


Get an AI summary of this page
 Deploy on cPanel
Getting Started Fixit API Deployment
1. Open fixit-laravel directory that you downloaded from CodeCanyon.

2. Building Assets and SCSS:
Note: Please make sure you've installed NodeJs. If you haven't installed, you can easily do by following this link: Link to Laravel Prerequisites.
- To set up and compile your assets and SCSS files, follow these steps:
- First, you need to install the necessary Node modules.
npm i- Compile assets and scss by running below command.
npm run build3. Create a .zip file
- Zip all files and folders in the fixit-laravel folder and upload it to your cPanel server.
- Delete the node_modules folder from the project or exclude it when creating the zip file.

4. Create Subdomain
- Login to your cPanel server and click on domains in the domains section.
- Create separate subdomains for Fixit Laravel.
your-domain.com -> fixit-laravel.
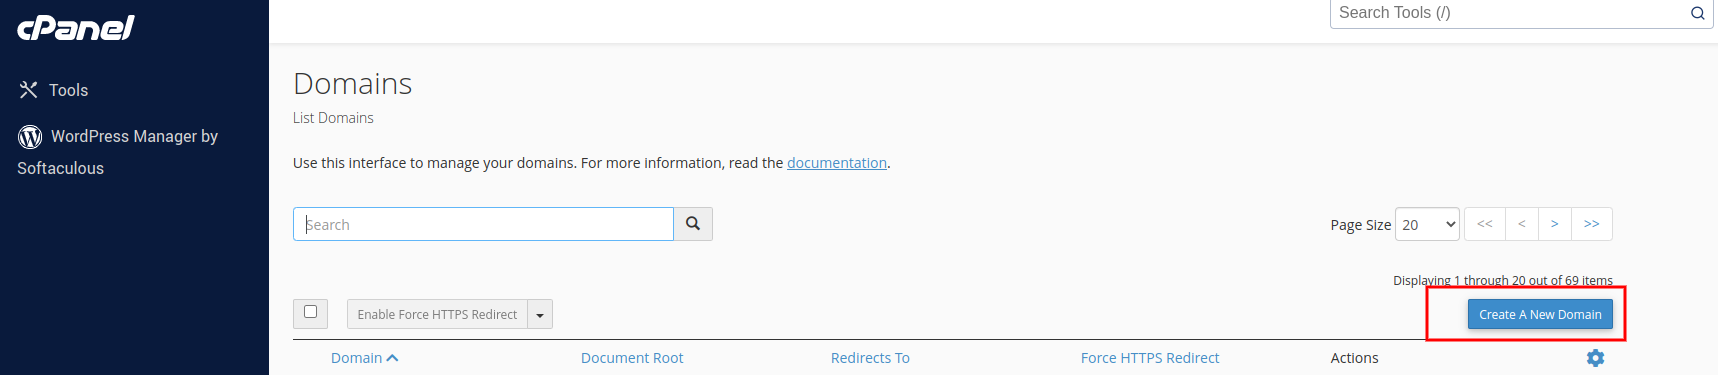


5. Upload Zip file on cPanel:
- Upload the fixit-laravel zip file in the laravel's subdomain (api.your-domain.com).
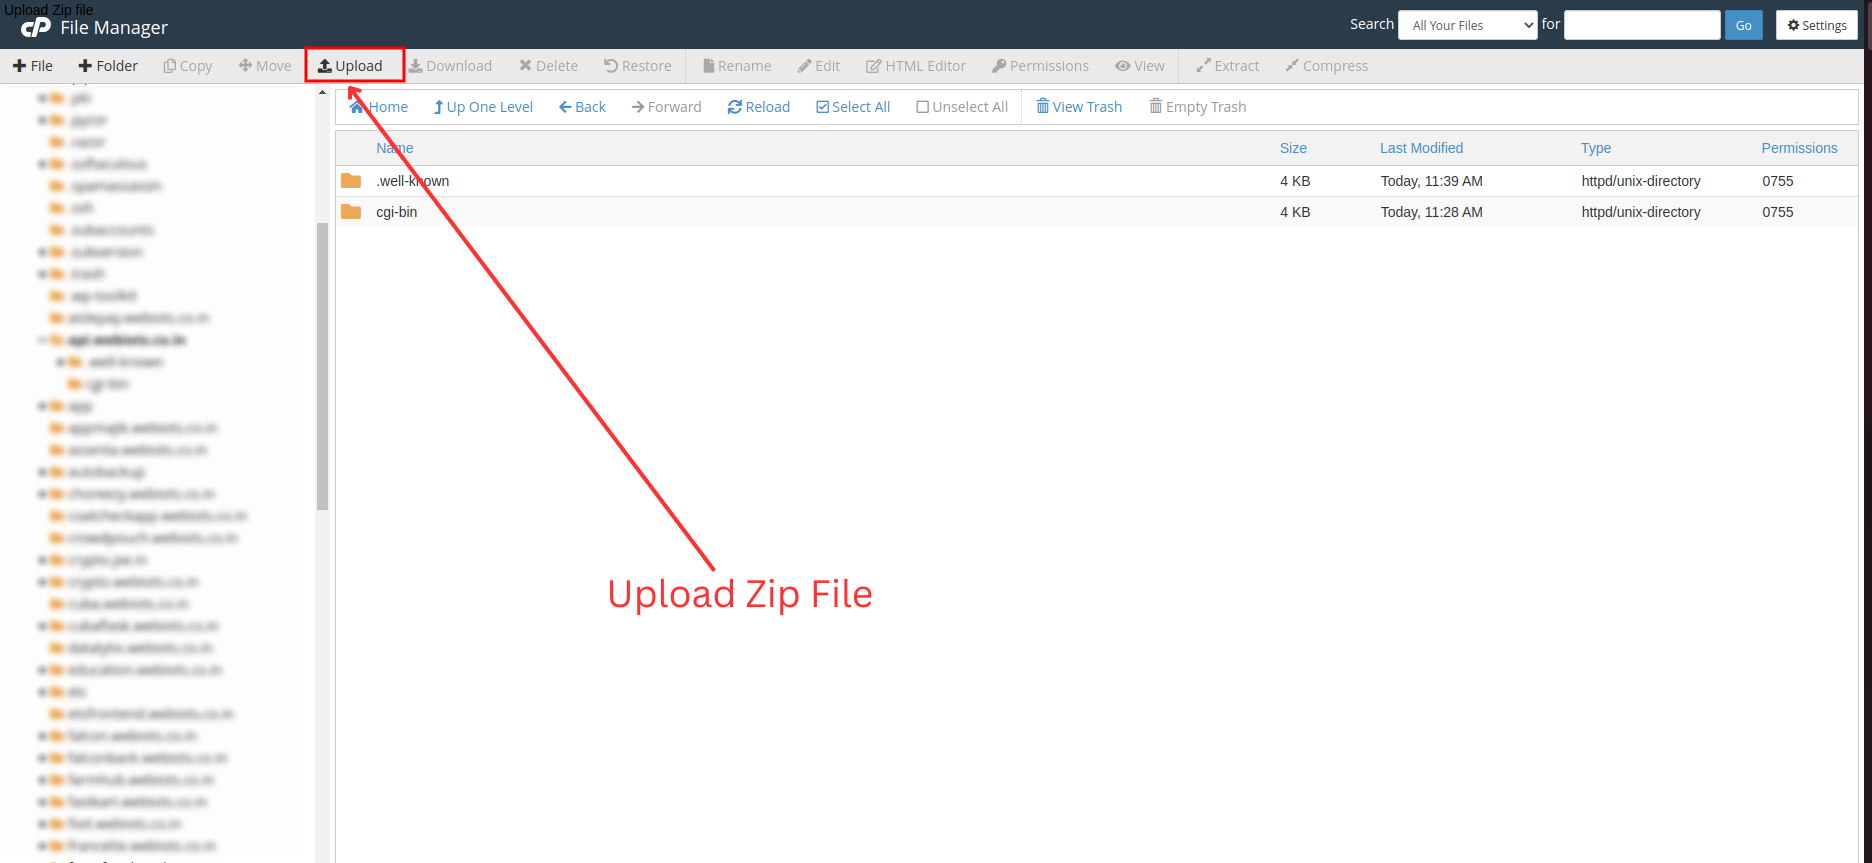

- Click on the Go Back link after the file is 100% uploaded.
6. Extract Laravel Zip File

7. Create MySQL Database:
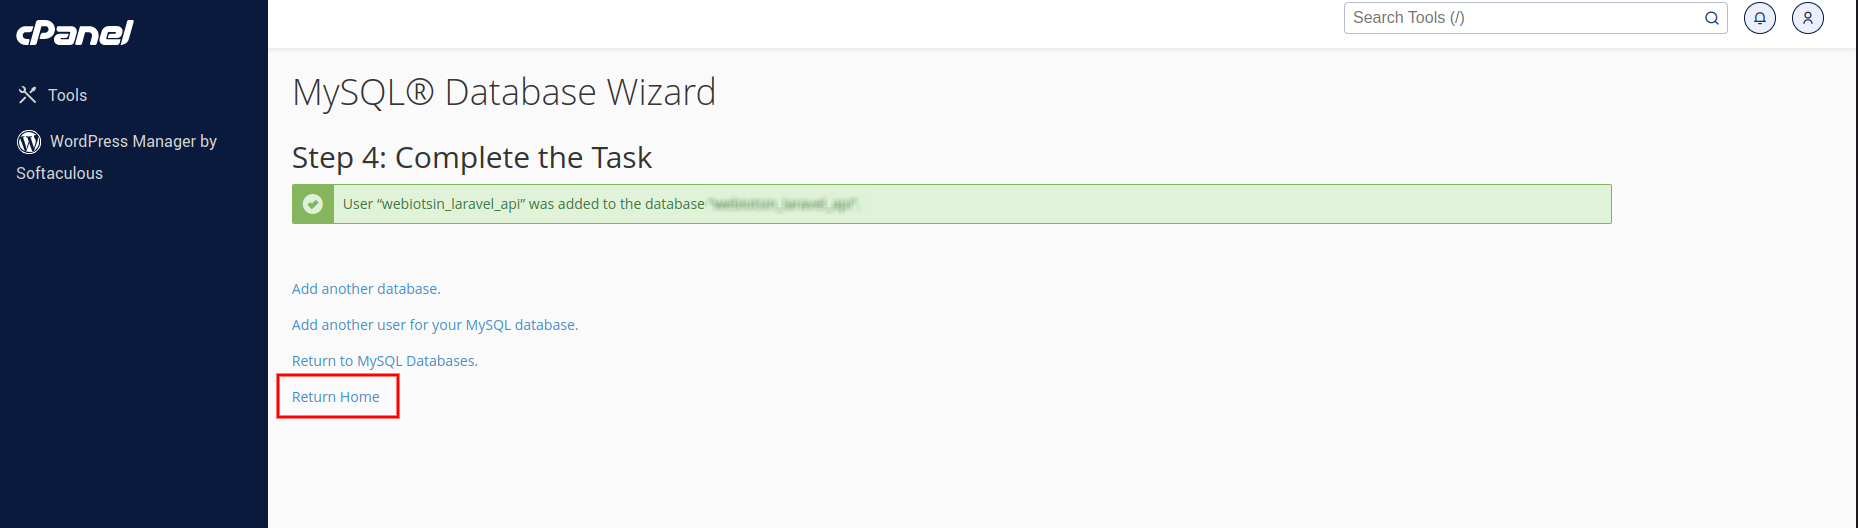
- Now move to cpanel manager and go to > MySQL Database Wizard
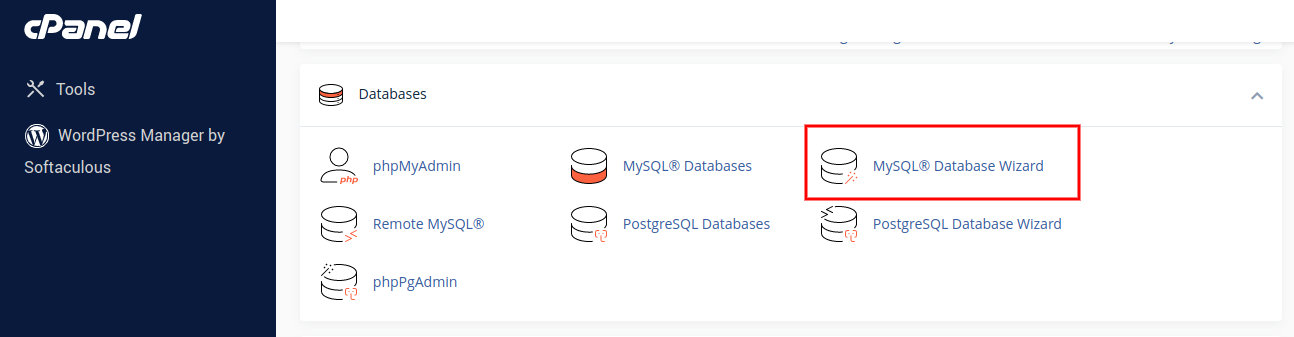
- Create database in MySQL Database Wizard

- Create database users and remember their passwords for the installation process.
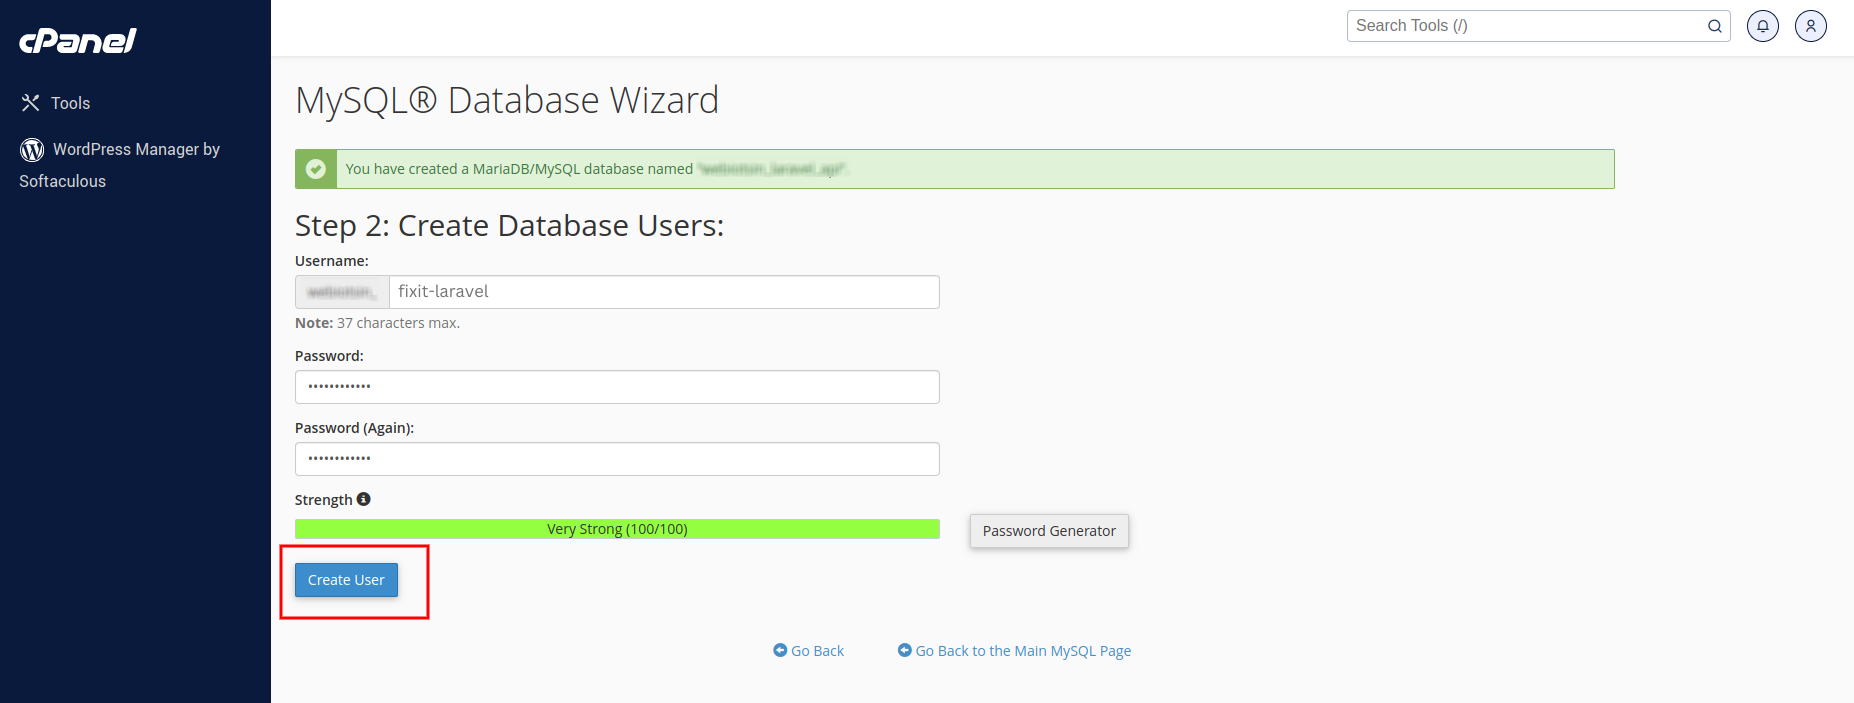
- Add a user to the database, give them all the necessary permissions, and then click 'Make Changes.' After that, click 'Next Step.

- Make a note of the database user, database name, and database password after creating the database.
8. Update Environment File
- After creating the MySQL database, go to fixit-laravel folder from your cPanel file manager and edit .env file.

- Add Laravel base url in APP_URL key.
- Also, change local to production in APP_ENV.
- Add MySQL database credentials.
Add you fixi-laravel primary domain url like a APP_URL=http://your-domain.com.
APP_URL=https://your-domain.com
APP_ENV=production
DB_DATABASE=your_db_name
DB_USERNAME=your_db_username
DB_PASSWORD=your_db_password
9. Open cPanel Terminal
- Enter terminal in cPanel search bar and select terminal.

- If you can't find the terminal, please log in to your local computer terminal or use Putty for Windows via SSH.
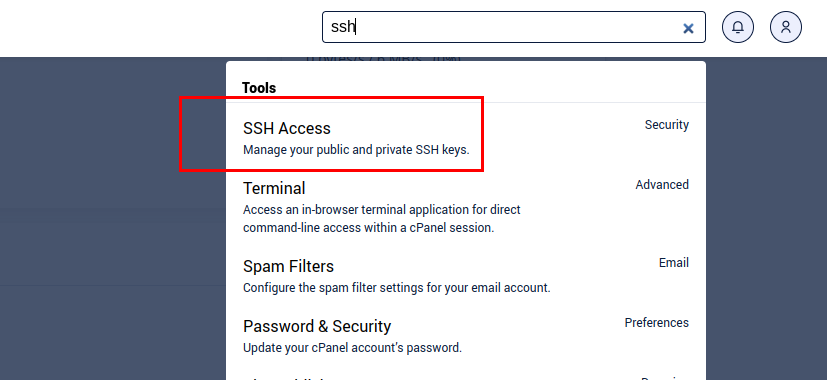
- Once you've opened the terminal, navigate to the root folder of laravel project.


10. Install Required Dependencies:
- In the laravel subdomain folder (api.your-domain.com), run this command to install the required dependencies.
composer install 
11. Run Fixit Installation Wizard:
- Once you open api.your-domain.com in your web browser, the Fixit installation wizard will appear.

- Step 1: Before you proceed to the next step, make sure that the specified PHP extensions are installed on your system.

- Step 2: Once all the required PHP extensions are installed, proceed to the next step to check permissions for specific folders to ensure they are allowed.
- If permissions are not allowed for the mentioned folders, please allowed folder permissions and proceed to the license verification step.

- Step 3: Before using the Fixit API, it's important to verify your Envato purchase license code.
- Enter in your Envato username and the Fixit purchase code and click next button.
- If you don't know where to find your purchase code, click here: Where Is My Purchase Code?
Note: Once a license is verified, it can't be used for another project. An Envato Purchase License can only be verified on one domain at time.

- Step 4: Once the license has been verified, proceed to the database configuration step.
- Enter the essential MySQL database credentials to connect the Laravel API to the MySQL database such as a database host, username, password, and database name.

- To import sample data, select "Import Dummy Data". After selecting this option, the administration details will be hidden. Click the "Next" button to the sample data will be imported.
- If you prefer not to import sample data, you can deselect "Import Dummy Data" After that, enter the administration details. Once done, click the "Next" button to proceed.
Note: After entering the required information and clicking "Next," the database setup will start. It might take few minutes, so please wait patiently.

- Step 5: Once all steps are finished, Congratulations! Fixit has been successfully installed and configured on your system! 🎉
12. Test Your Live Application:
- Visit your website in a web browser to ensure everything is working correctly.
References for deploying a Laravel project in cPanel
- Here are some references that can guide you through deploying a Laravel project on a cPanel server:
-
Laravel Official Documentation: It includes sections on deploying Laravel applications and provides insights into best practices.
-
cPanel's Documentation: Check for information related to hosting, databases, and other cPanel features.
-
Host-Specific Guides: Your hosting provider might have specific guides or documentation related to Laravel deployment.
Setup Cron Job
Below is a step-by-step guide on how to set up a cron job in cPanel for running a Laravel command.
1. Access cPanel
- Log in to your cPanel account using your credentials provided by your hosting provider.
2. Navigate to the Cron Jobs Section
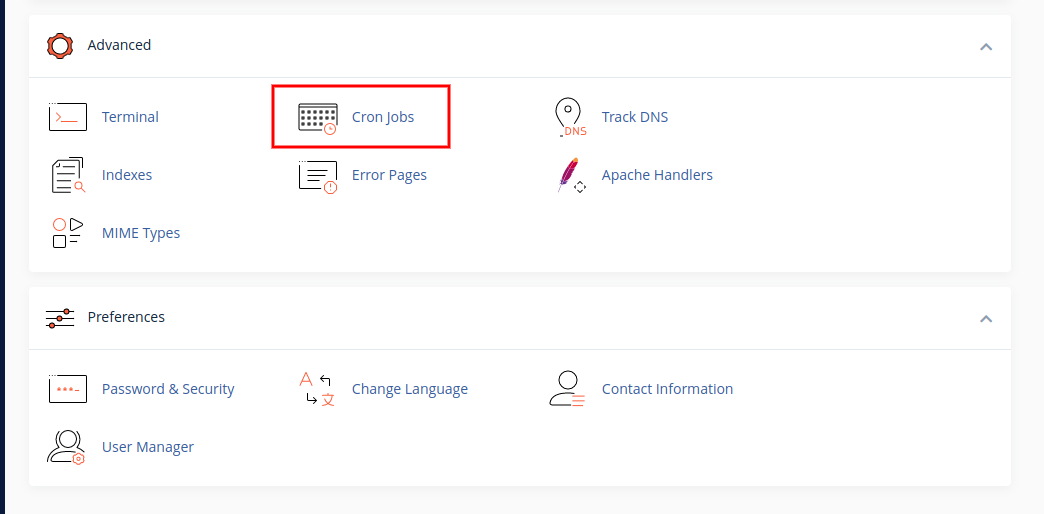
- In the cPanel dashboard, scroll down to the "Advanced" section.
- Click on "Cron Jobs."
3. Configure the Cron Job
To configure the cron job to run your Laravel command, follow these steps:
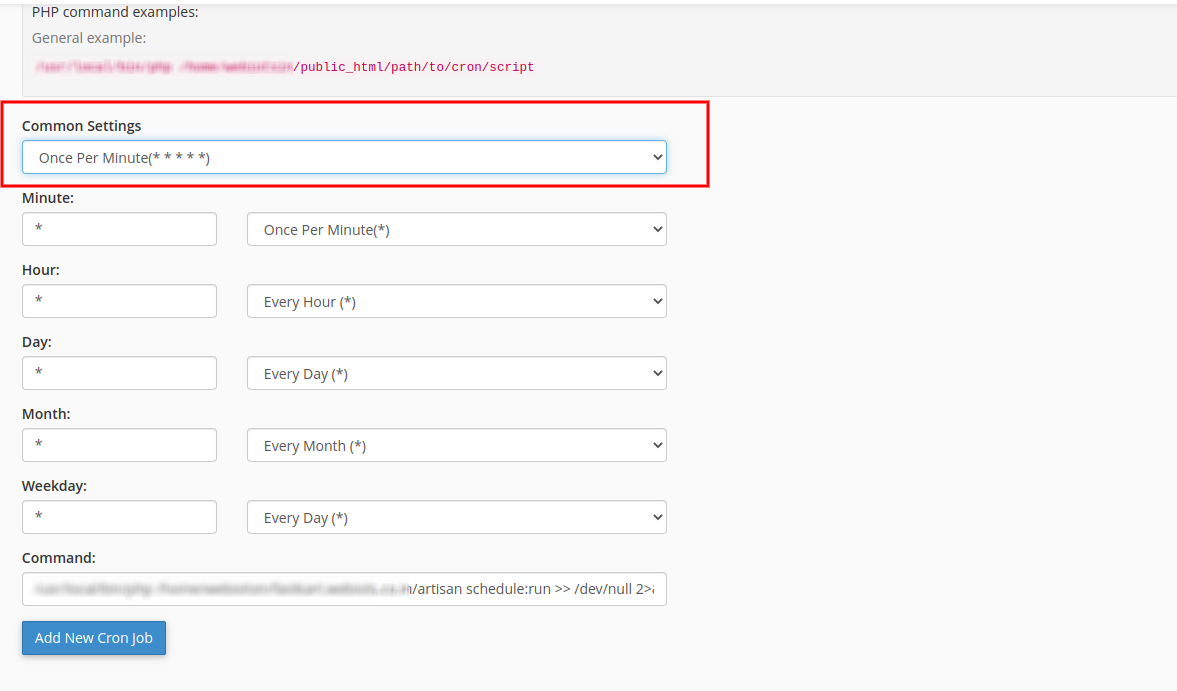
- Select common settings which you want to run Laravel schedule command (e.g., every 5 minutes).
- In the "Command" field, enter the Laravel API's artisan path from the api subdomain's root folder (api.your-domain.com) and also include the schedule:run command.
- Click to Add New Cron Job Button, then add new cron job in cPanel.
Default Credentials
Admin Credential:
- Url: http://localhost:8000/backend/login
- Email: admin@example.com
- Password: 123456789
Provider Credential:
- Url: http://localhost:8000/backend/login
- Email: provider@example.com
- Password: 123456789
Serviceman Credential:
- Url: http://localhost:8000/backend/login
- Email: serviceman@example.com
- Password: 123456789
User Credential:
- Email: user@example.com
- Password: 123456789