 Deploy on cPanel
Getting Started Fastkart API Deployment
1. Open fastkart-api directory that you downloaded from CodeCanyon.

2. Create a .zip file
- Zip all files and folders in the fastkart-api folder and upload it to your cPanel server.

3. Create Subdomain
- Login to your cPanel server and click on domains in the domains section.
- Create separate subdomains for fastkart-laravel.zip, fastkart-frontend-build.zip, and fastkart-backend-build.zip.
store.your-domain.com -> fastkart-frontend-build.zip.
api.your-domain.com -> fastkart-laravel.zip.
admin.your-domain.com -> fastkart-backend-build.zip.


4. Upload Zip file on cPanel:
- Upload the fastkart-laravel.zip file in the laravel's subdomain (api.your-domain.com).


- Click on the Go Back link after the file is 100% uploaded.
5. Extract fastkart-laravel.zip File

6. Create MySQL Database:
- Now move to cpanel manager and go to > MySQL Database Wizard

- Create database in MySQL Database Wizard

- Create database users and remember their passwords for the installation process.

- Add a user to the database, give them all the necessary permissions, and then click 'Make Changes.' After that, click 'Next Step.

- Make a note of the database user, database name, and database password after creating the database.

7. Update Environment File
- After creating the MySQL database, go to fastkart-laravel folder from your cPanel file manager and edit .env file.

- Add Laravel base url in APP_URL key.
- Also, change local to production in APP_ENV.
- Add MySQL database credentials.
Add you laravel API primary domain url like a APP_URL=http://api.your-domain.com.
APP_URL=https://api.your-domain.com (LARAVEL BASE URL)
APP_ENV=production (local OR production)
DB_DATABASE=your_db_name (MYSQL_DATABASE_NAME)
DB_USERNAME=your_db_username (MYSQL_DATABASE_USERNAME)
DB_PASSWORD=your_db_password (MYSQL_DATABASE_PASSWORD)
8. Open cPanel Terminal
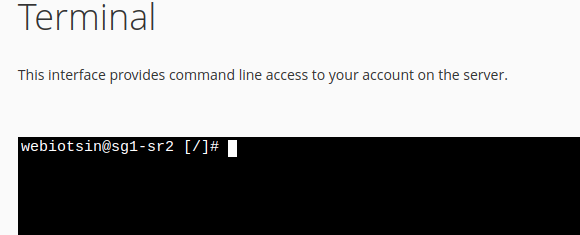
- Enter terminal in cPanel search bar and select terminal.

- If you can't find the terminal, please log in to your local computer terminal or use Putty for Windows via SSH.

- Once you've opened the terminal, navigate to the root folder of laravel project.

9. Install Required Dependencies:
- In the laravel subdomain folder (api.your-domain.com), run this command to install the required dependencies.
composer install 
10. Run Fastkart Installation Wizard:
- Once all dependencies have been downloaded, open the your current running API server URL (e.g., http://api.your-domain.com) in your web browser.
- The Fastkart installation wizard will automatically appear.

- Step 1 (Requirements): Before you proceed to the next step, make sure that the specified PHP extensions are installed on your system.

- Step 2 (Directories): Once all the required PHP extensions are installed, proceed to the next step to check permissions for specific folders to ensure they are allowed.
- If permissions are not allowed for the mentioned folders, please allowed folder permissions and proceed to the license verification step.

- Step 3 (License): After Before using the FastKart API, it's important to verify your Envato purchase license code.
- Enter in your Envato username and the FastKart purchase code and click next button.
- If you don't know where to find your purchase code, click here: where is my purchase code
Note: Once a license is verified, it can't be used for another project. An Envato Purchase License can only be verified on one domain at time.

- Step 4 (Configuration) Once the license has been verified, proceed to the database configuration step.
- Enter the essential MySQL database credentials to connect the Laravel API to the MySQL database such as a database host, username, password, and database name.

- To import sample data, select "Import Dummy Data". After selecting this option, the administration details will be hidden. Click the "Next" button to the sample data will be imported.
- If you prefer not to import sample data, you can deselect "Import Dummy Data" After that, enter the administration details. Once done, click the "Next" button to proceed.
Note: After entering the required information and clicking "Next," the database setup will start. It might take around 5 to 10 minutes, so please wait patiently.

- Step 5 (Complete): Once all steps are finished, Congratulations! Fastkart has been successfully installed and configured on your system! 🎉
11. Test Your Live Application:
- Visit your website in a web browser to ensure everything is working correctly.
References for deploying a Laravel project in cPanel
- Here are some references that can guide you through deploying a Laravel project on a cPanel server:
-
Laravel Official Documentation: It includes sections on deploying Laravel applications and provides insights into best practices.
-
cPanel's Documentation: Check for information related to hosting, databases, and other cPanel features.
-
Host-Specific Guides: Your hosting provider might have specific guides or documentation related to Laravel deployment.
Once you've finished installing the Fastkart API, the next step is to set up the FastKart Angular frontend. You can easily do this by following the instructions provided in the following link: Link to FastKart Angular Frontend Installation Guide.
Setup Cron Job
Below is a step-by-step guide on how to set up a cron job in cPanel for running a Laravel command.
1. Access cPanel
- Log in to your cPanel account using your credentials provided by your hosting provider.
2. Navigate to the Cron Jobs Section

- In the cPanel dashboard, scroll down to the "Advanced" section.
- Click on "Cron Jobs."
3. Configure the Cron Job
To configure the cron job to run your Laravel command, follow these steps:
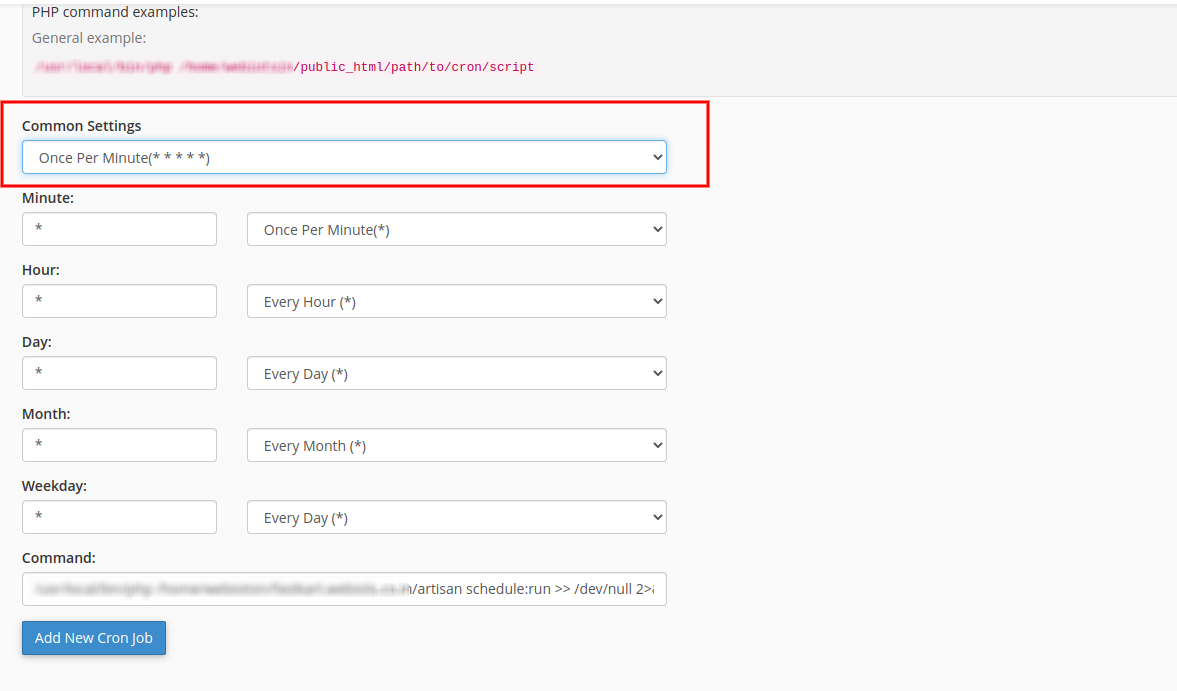
- Select common settings which you want to run Laravel schedule command (e.g., every 5 minutes).
- In the "Command" field, enter the Laravel API's artisan path from the api subdomain's root folder (api.your-domain.com) and also include the schedule:run command.
- Click to Add New Cron Job Button, then add new cron job in cPanel.
Angular Frontend And Backend Deployment
For Frontend Store:
- Open fastkart-frontend folder that you downloaded from CodeCanyon.
Open the environment.prod.ts file in your code editor by going to src > environments > environment.prod.ts and adjust the URL based on the reference image.

- baseURl: This represents the base URL for running our FastKart frontend project.
- URL: This represents the Laravel API server URL
- storageURL: Enter the laravel primary domain.
For Admin:
- Open fastkart-admin folder:
Open the environment.prod.ts file in your code editor by going to src > environments > environment.prod.ts and adjust the URL based on the reference image.

-
For building your Angular application, utilize the following commands separately for both the frontend and admin
ng build
-
This will create a "dist" directory in your project with optimized files.


Note: Now, the below steps will be the same for frontend and admin project.
Upload zip file to respective domains on cPanel:
- Take the contents of the "dist" folder and upload them to your website's respective domain folder.
- Zip the Frontend project and upload it to the domain "store.your-domain.com."
- Zip the Admin project and upload it to the domain "admin.your-domain.com."

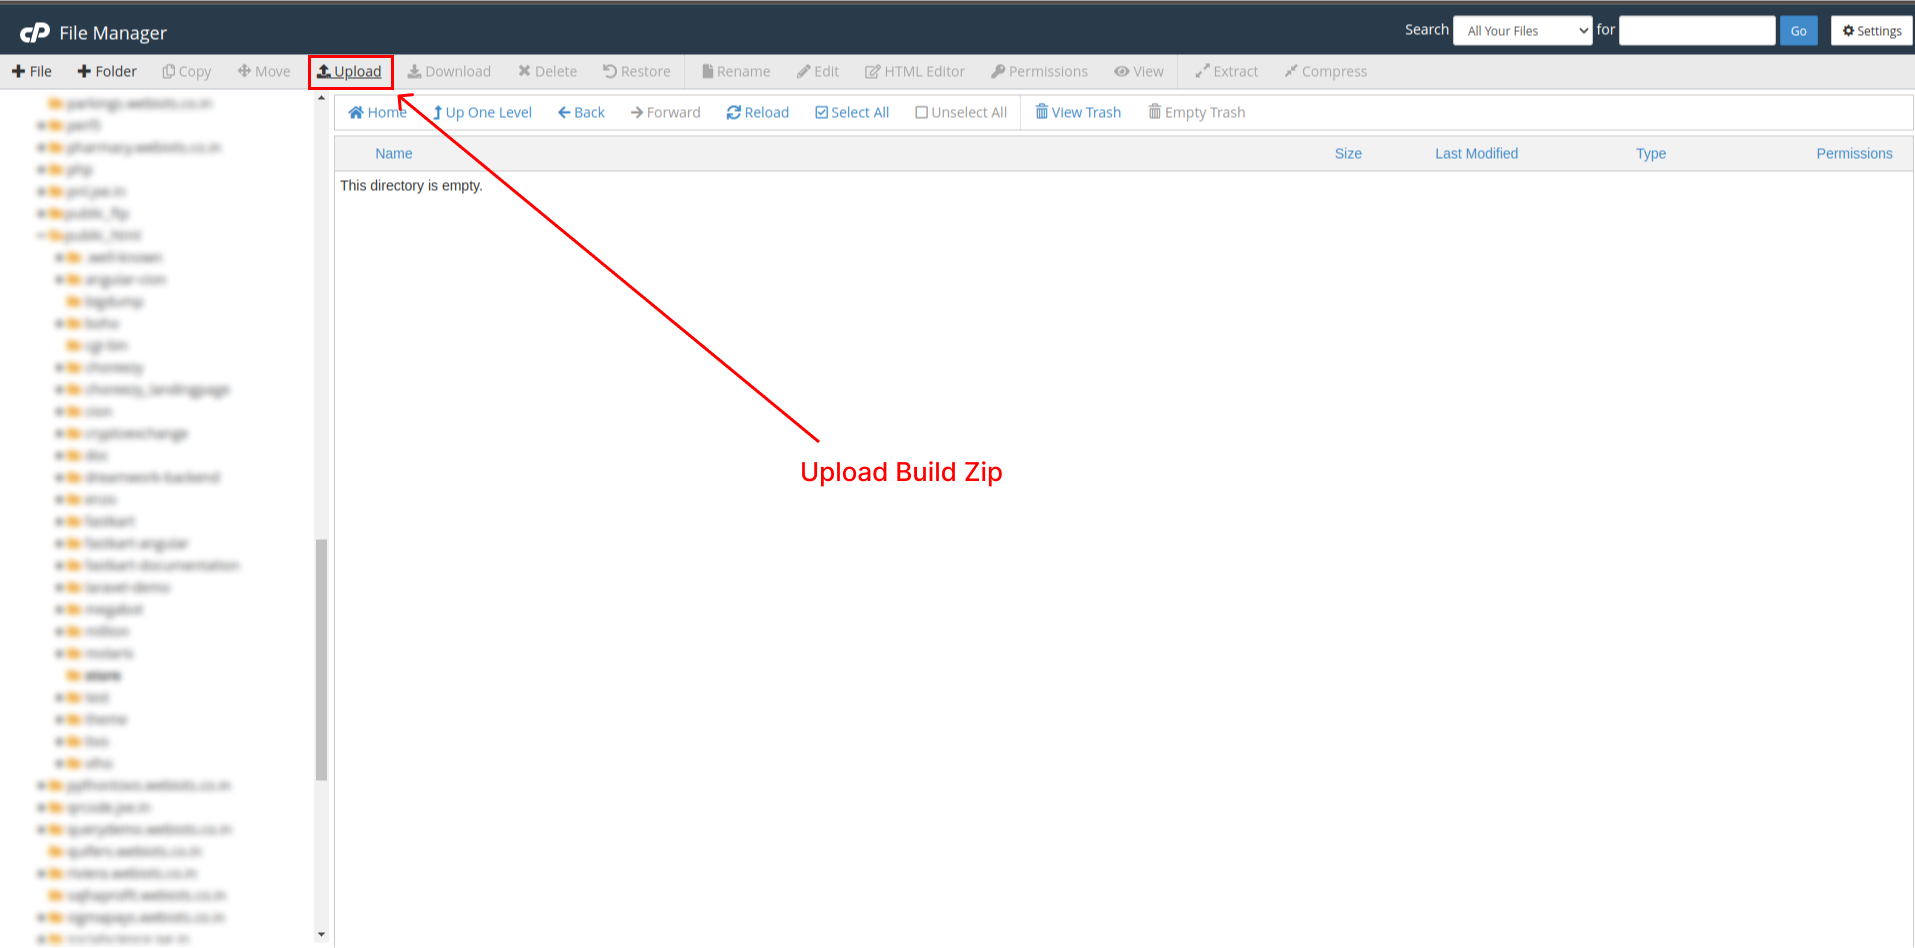
- Click on the Go Back link after the file is 100% uploaded.

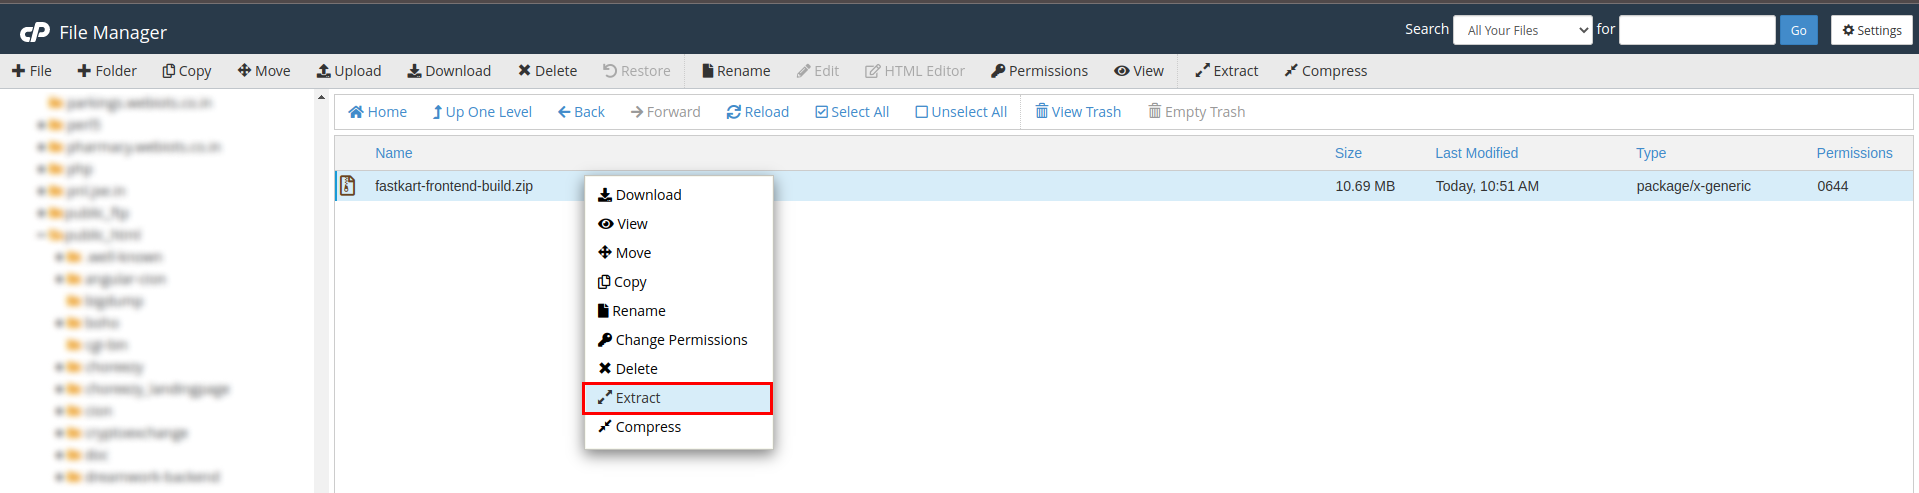
- Extract the uploaded zip folder.
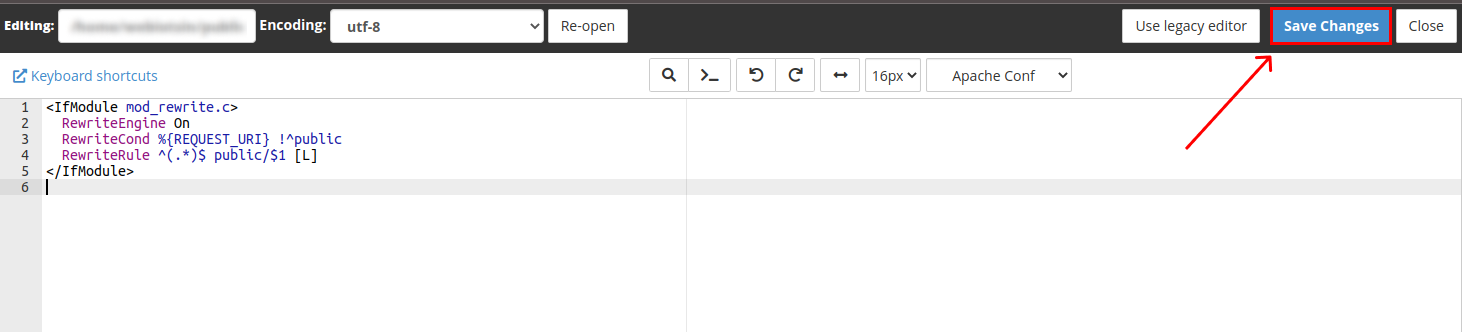
- Create a .htaccess file for both domain.

- Add the below code and click the click the Save Changes.
Congratulations on the successful installation of FastKart! After configuring the theme, you can proceed by using the default credentials.
Default Credentials
Admin Credential:
- Url: https://admin.your-domain.com/auth/login
- Email: admin@example.com
- Password: 123456789
Vendor Credential:
- Url: https://admin.your-domain.com/auth/login
- Email: john.store@example.com
- Password: 123456789
Customer Credential:
- Url: https://store.your-domain.com/auth/login
- Email: john.customer@example.com
- Password: 123456789