 NextJs Frontend Installation
Getting Started With NextJs Fastkart Frontend
- Please make sure you've installed NodeJs & NextJs. If you haven't installed, you can easily do by following this link: Link to Node.js & NextJs Installation Guide.
- Before you start, please make sure you've successfully configured and run the Fastkart API, then you can proceed to set up the NextJs FastKart frontend.
1. Open NextJs-fastkart-frontend directory that you downloaded from CodeCanyon.

2 next.congif.js Setting:
- Open the next.config.js file in your code editor and adjust the URL based on the reference image.
- Also add https://api.your-domain.com/api to URL
- Add api.your-domain.com to hostname for image access
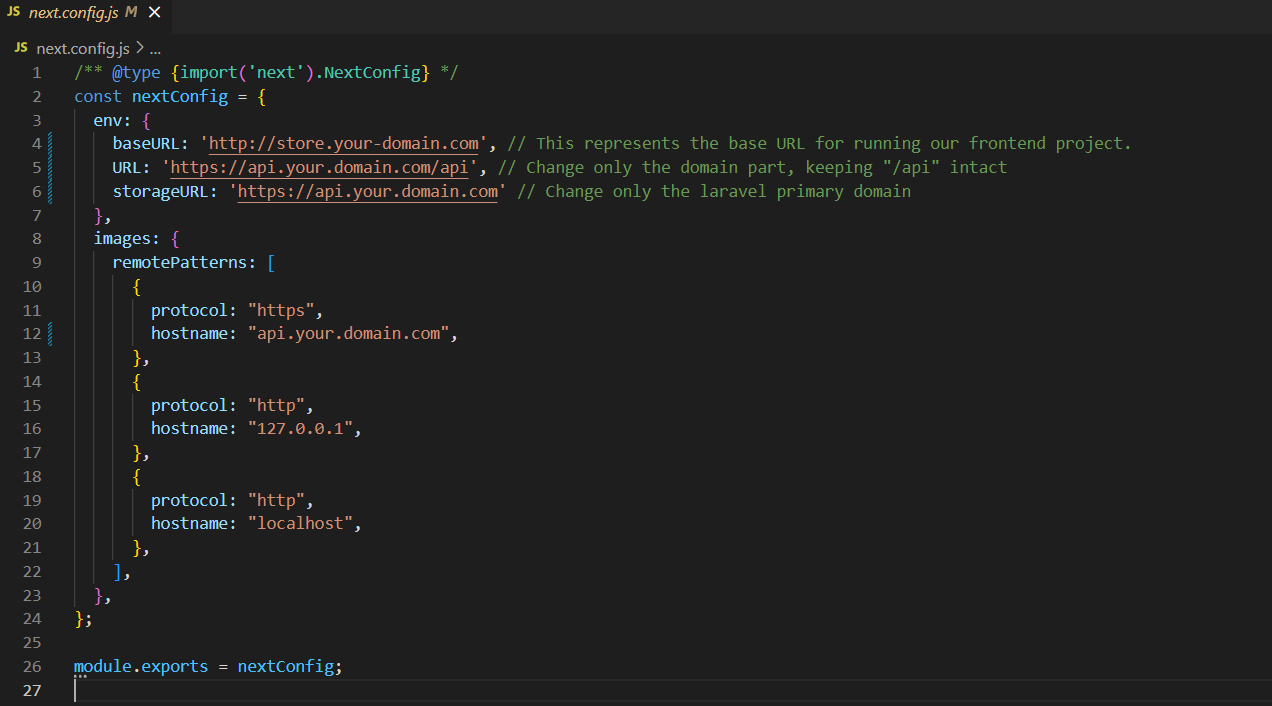
- baseURl: This represents the base URL for running our FastKart frontend project.
- URL: This represents the Laravel API server URL
- storageURL: Enter the laravel primary domain.
3. Install Node Module:
- In the nextjs-fastkart-frontend folder, run following command in the terminal to install the required dependencies.
npm install
4. Run the Project:
- Once the necessary dependencies are successfully installed, initiate your project by executing below command in the Terminal.
npm run dev
When you start your application, it usually uses the default port, so you can access it by opening http://localhost:3000/
Once you've finished installing the NextJs Fastkart Frontend, the next step is to set up the NextJs FastKart Admin. You can easily do this by following the instructions provided in the following link: Link to NextJs FastKart Admin Installation Guide.