Firebase Collections
NOTE :
- Before running the app make sure you have import Collection json in Firestore database which we have provided.
- Before import json in firestore database remember to give rule permission or
create Firestore Data.
See the Firebase Rules for create
Firestore
Database and how to give
permission
in firebase.
Also you can check below video for how to import json in firebase:
VIDEO URL :
https://youtu.be/Jd0sW8Wrc5Y?si=AxC6BmWBFwZfZU4a
As you have know there are multiple collection has been used in firebase. Let's see what is the use of the collection and how it added
Note: If any error occur in app check in firebase if missing any below
                                            Required config is
                                            missing if not then check there field and datatype and key word same to same
                                            as given in document
There are 11 collections created in the firebase
- admin
- adsConfiguration
- checkOutItems
- config
- exitPopupConfiguration
- headerConfig
- headerRightIconConfig
- onBoardScreenConfiguration - [Auto generate]
- splashConfiguration
- themeColor
- users
Let see detail about all the collections.
NOTE :
In above collection list [Auto generate] means this collections are
generate in firebase whenever any first user enter any data
. For other collections need to add manually in firebase. See the below 2
options for add collection data in firebase.
There are 2 ways to import Data in Firebase
- By Import Json which we have provided
- Collection Data add manually
By Import Json which we have provided :- OPTION 1
NOTE :
Before import json in firestore database remember to Configure or
create.
See the Firebase Rules for create
Firestore
Database and how to give
permission
in firebase.
Also you can check below video for how to import json in firebase:
VIDEO URL :
https://youtu.be/Jd0sW8Wrc5Y?si=AxC6BmWBFwZfZU4a
- Firstly download our goApp.json and keep it in one folder or desktop
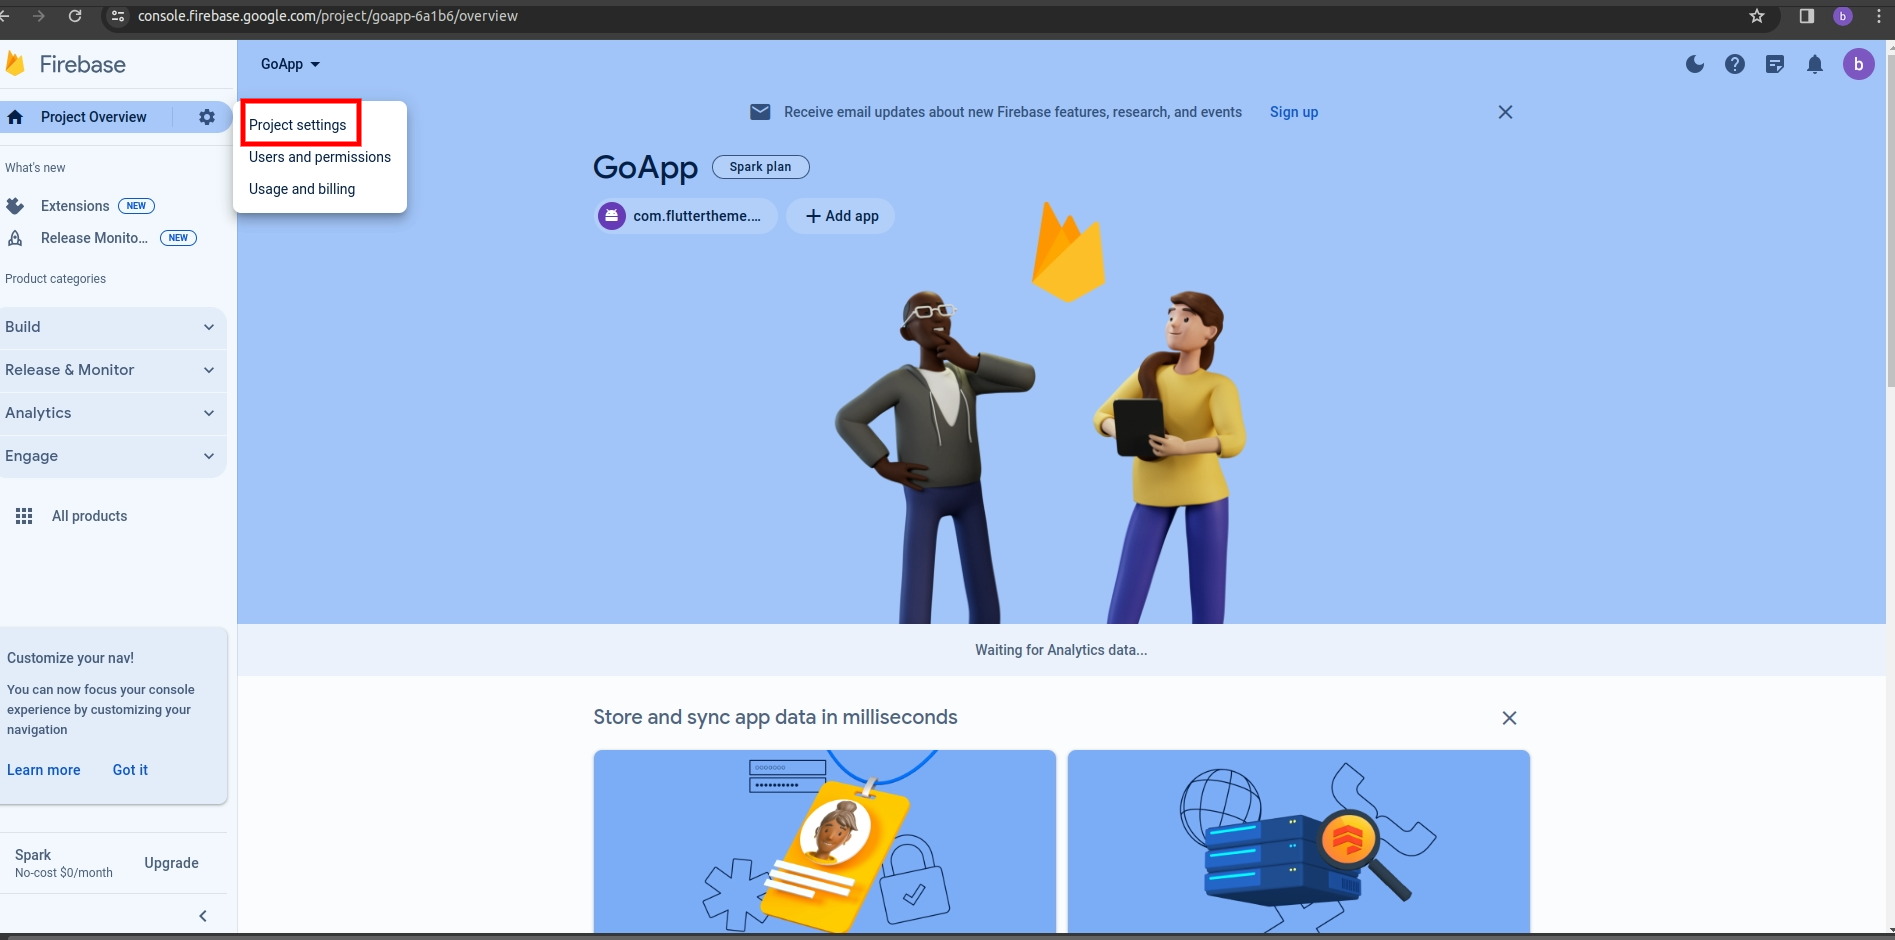
- Now go to your Firebase project, On left hand side panel click on
setting
icon. On click Setting button pop open open. In that click on
Project
Settings
- Now go to Service accounts

-
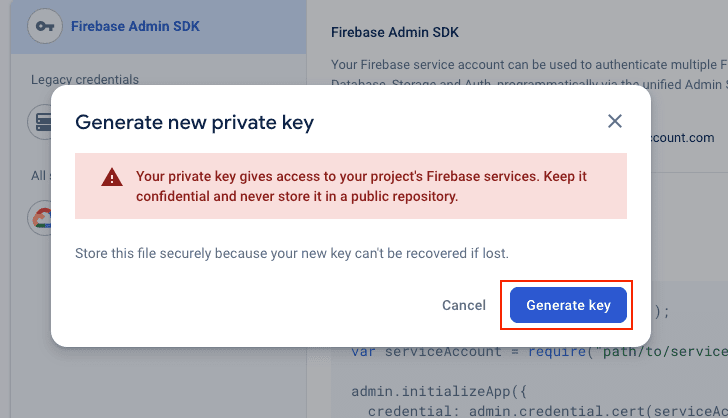
Now click on button Generate new private key
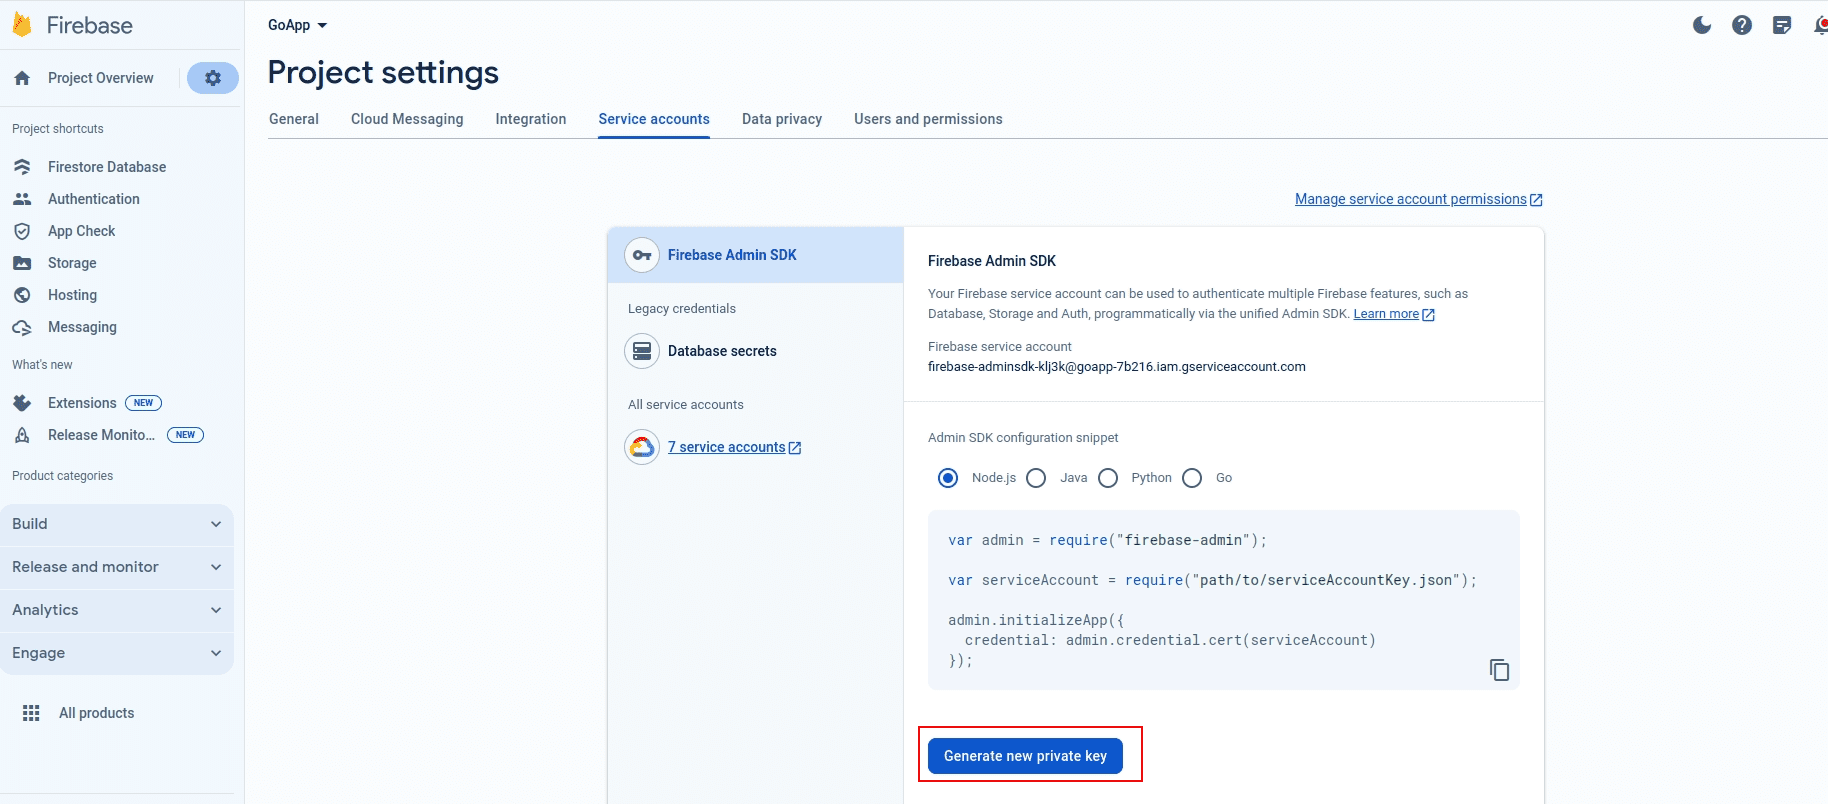
-
After click on button on pop-up appear int that click on Generate
key
-
After click on Generate
key your json will be download copy that json and paste in
the
folder where you have kept goApp.json
If you kept goApp.json in desktop and keep downloaded json in desktop and rename that json file - Now open terminal or command prompt go to the path you have kept both json For example : c:\desktop\
-
Now Copy below command in that remeber to change your rename json
name
Example :npx -p node-firestore-import-export firestore-import -a [your rename file name].json -b goApp.json
npx -p node-firestore-import-export firestore-import -a webdemo.json -b goApp.json - After enter above command confirmation for import will be ask just type "y" and enter it
Collection Data add manually :- OPTION 2
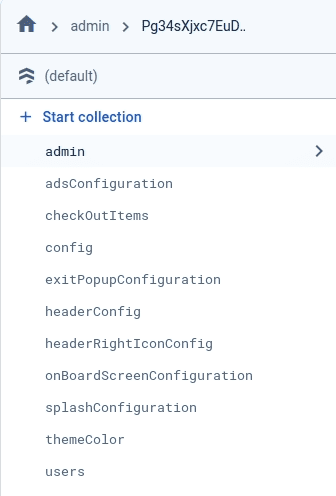
1. admin:
- For Admin access you need to add credentials for login in firebase we have create 2 login credentials. You can create as per you requirement.
- In Project (admin@gmail.com, Admin1234) credentials are for all the users with this credentials they can't access in live you can remove this condition from project which is admin project -> lib -> controllers -> auth_controllers -> phone_controller.dart
- There are 2 field in admin config, copy and paste one by one in
firebase
and create
collection
in your project
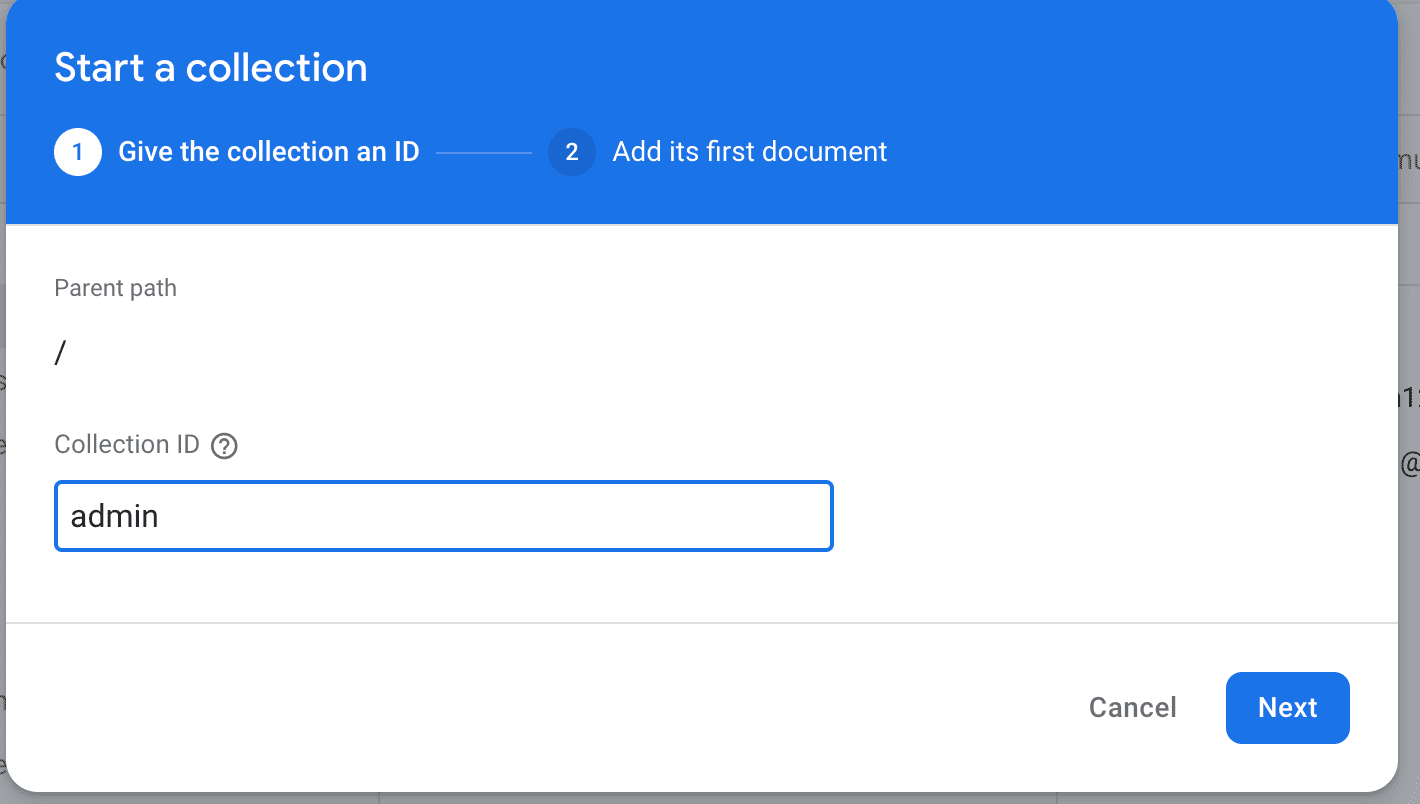
No. Fields -> datatype 1. userName -> string -> Your email for admin login 2. password -> string -> Your password for admin login - Now click on Start Collection one pop-up will appear give
collection
name
admin
- After that click on Auto-ID

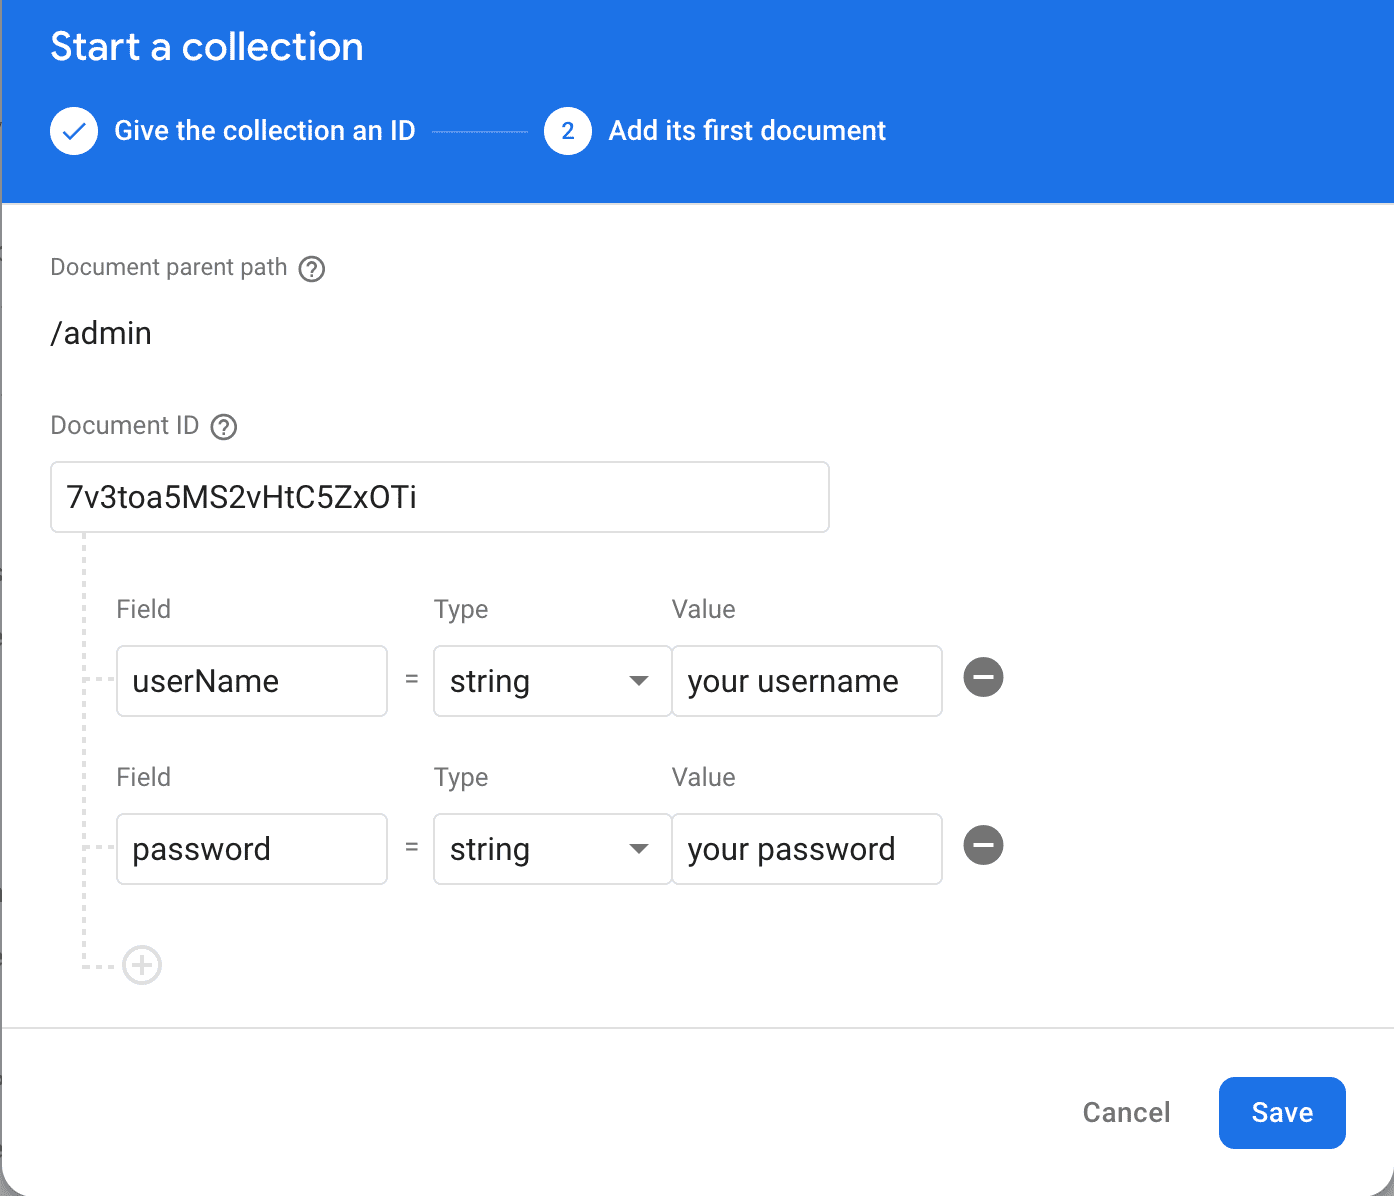
- Your admin config look like this :

2. adsConfiguration:
- In the project advertisement, they cannot access live. You can remove these ads from the admin project -> lib -> controllers -> app_pages_controller -> ads_controller.dart
- There are 10 field in adsConfiguration, copy and paste one
by one in
firebase
and create
collection
in your project
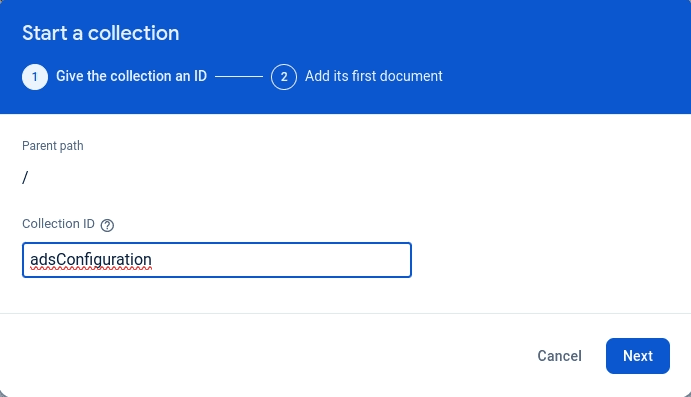
No. Fields -> datatype 1. adMobBannerAndroid -> string -> your adMobBannerAndroid for adsConfiguration 2. adMobBanneriOS -> string -> your adMobBanneriOS for adsConfiguration 3. admobInterstitialAndroid -> string -> your admobInterstitialAndroid for adsConfiguration 4. admobInterstitialiOS -> string -> your admobInterstitialiOS for adsConfiguration 5. facebookAdBannerAndroid -> string -> Your facebookAdBannerAndroid for adsConfiguration 6. facebookAdBanneriOS -> string -> your facebookAdBanneriOS for adsConfiguration 7. facebookAdInterstitialAndroid -> string -> your facebookAdInterstitialAndroid for adsConfiguration 8. facebookAdInterstitialiOS -> string -> your facebookAdInterstitialiOS for adsConfiguration 9. facebookAdsVisible -> bool -> whether you want to display facebook ad or not 10.googleAdsVisible -> bool -> whether you want to display google ad or not 11. isAdVisible -> bool -> whether you want to display add or not - Now click on Start Collection one pop-up will appear give
collection
name
adsConfiguration
- After that click on Auto-ID
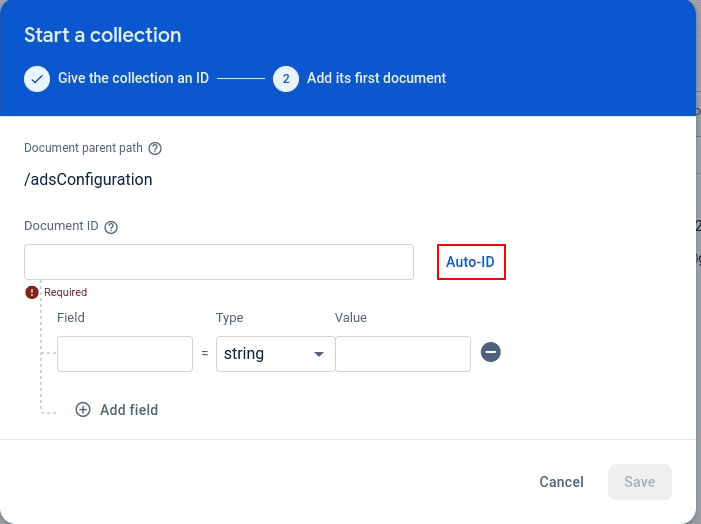
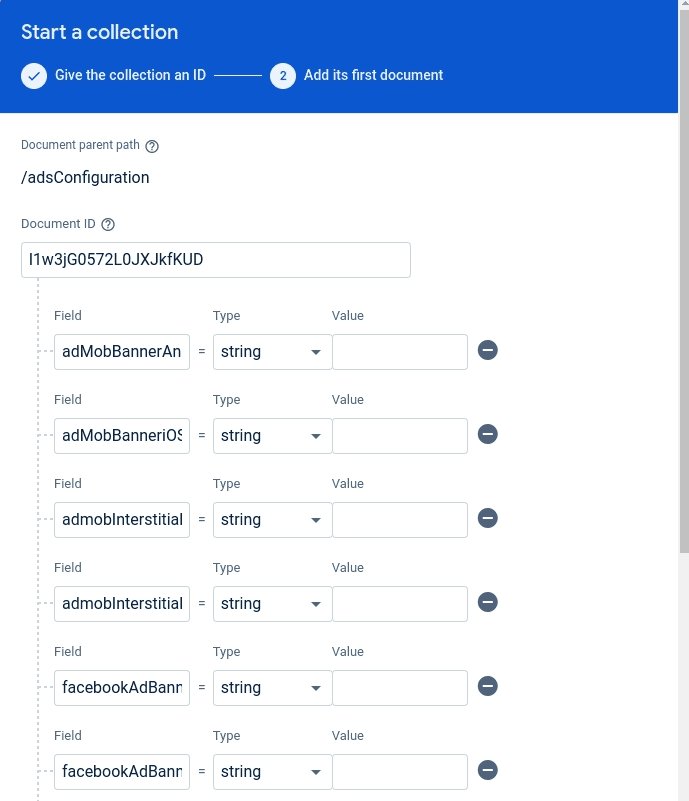

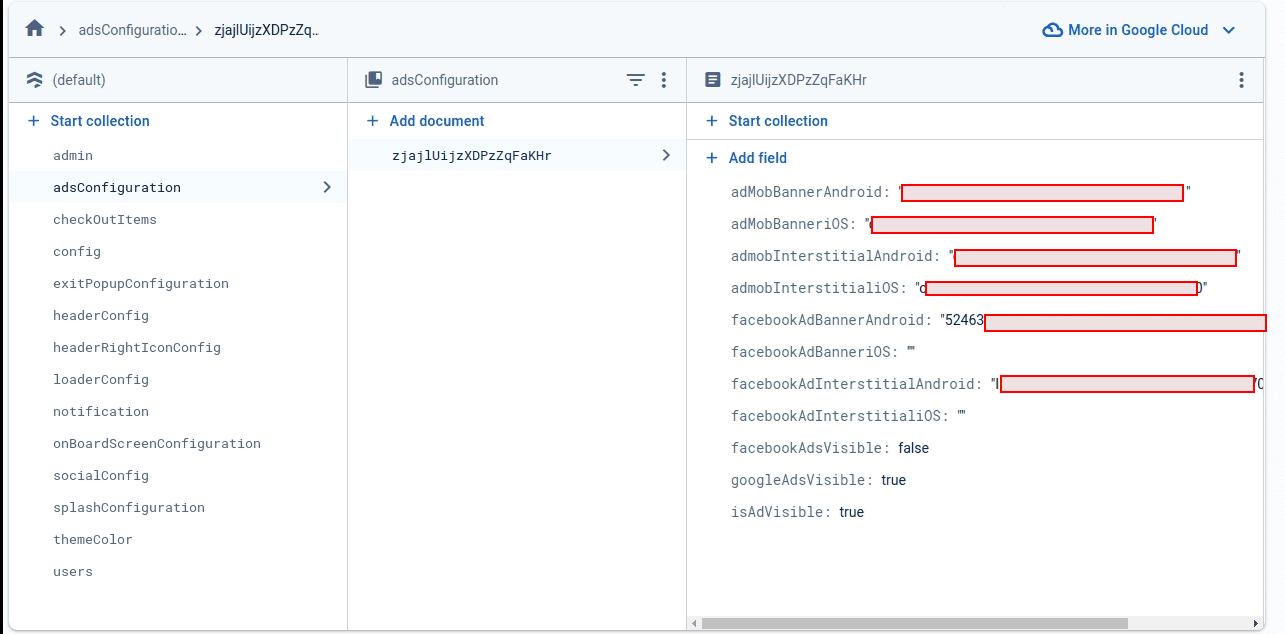
- Your adsConfiguration look like this :
3. checkOutItems:
- There are 5 field in checkOutItems, copy and paste one
by one in
firebase
and create
collection
in your project
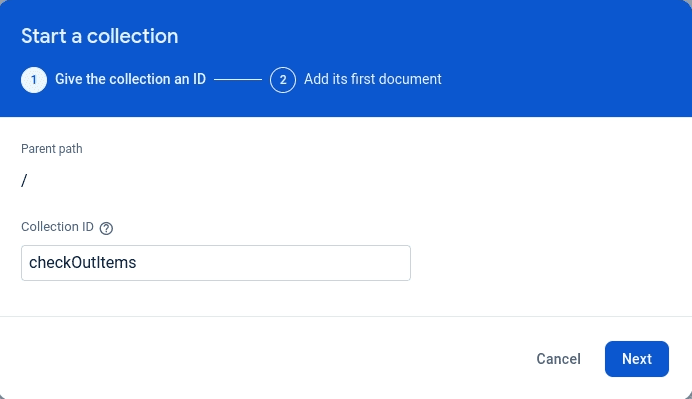
No. Fields -> datatype 1. Image -> string -> Checkout image set 2. Title -> string -> checkout title 3. URL -> string -> set checkout url 4. isActive -> bool -> If you want to diplay or not 5. subTitle -> string -> set sub title - Now click on Start Collection one pop-up will appear give
collection
name
checkOutItems
- After that click on Auto-ID
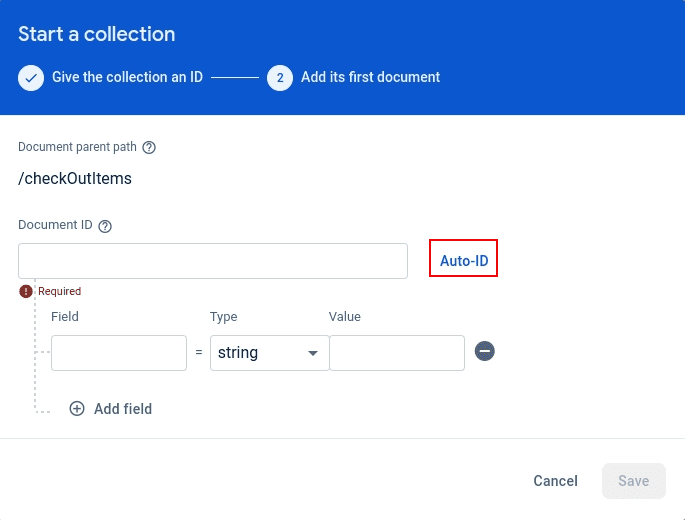
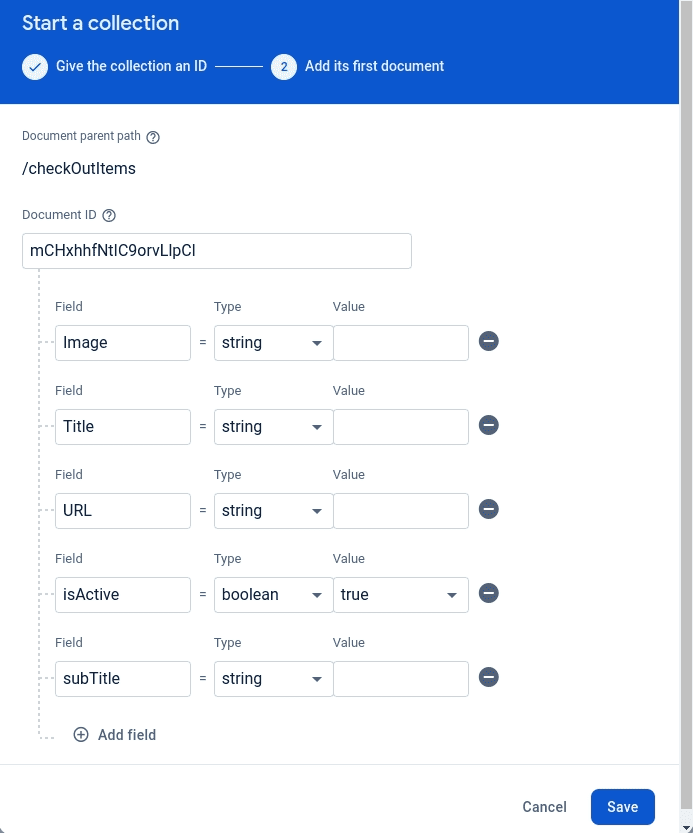
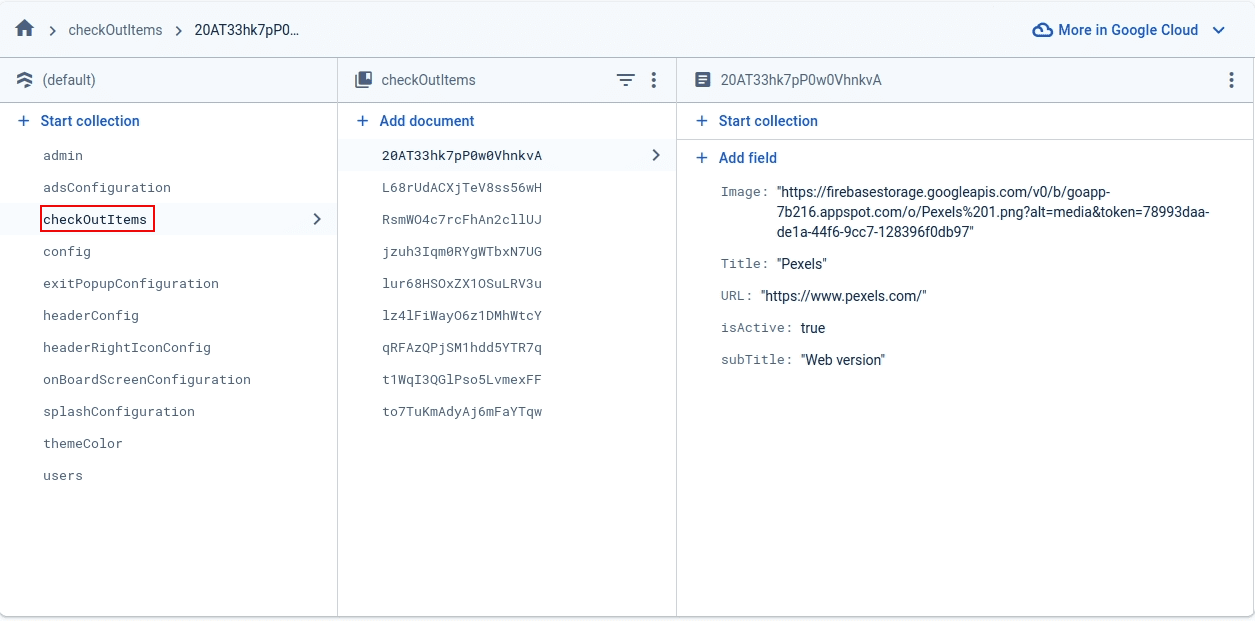
- Your checkOutItems look like this :
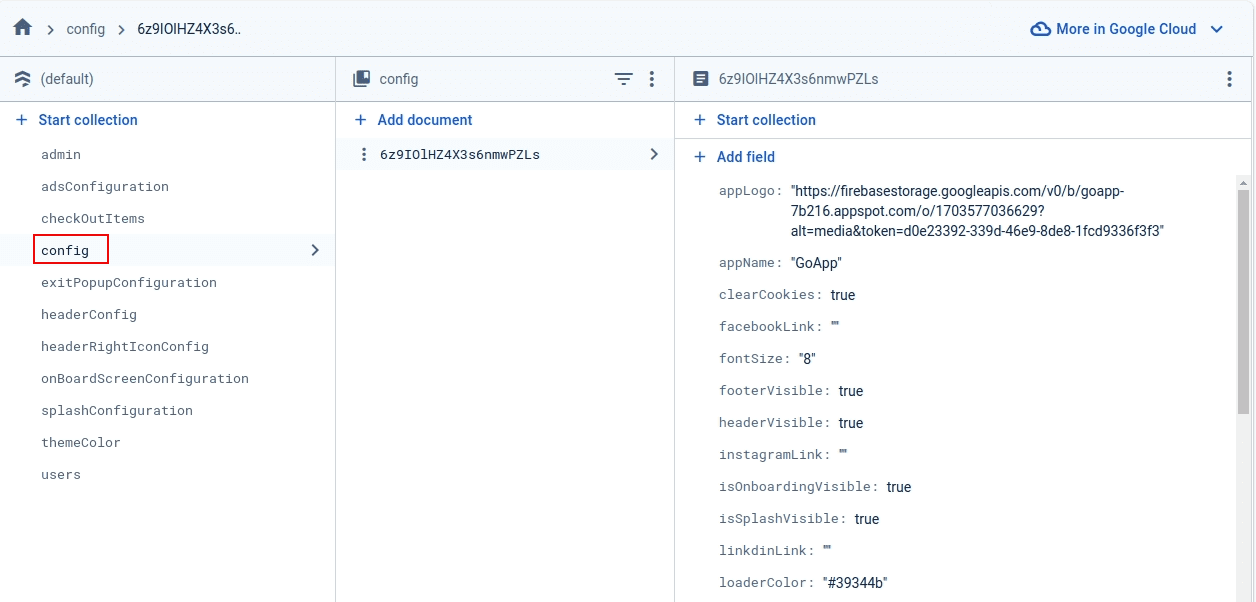
4. config:
- In the project config, they cannot access live. You can remove these config from the admin project -> lib -> controllers -> app_pages_controller -> app_configuration_controller.dart
- There are 24 field in config, copy and paste one
by one in
firebase
and create
collection
in your project
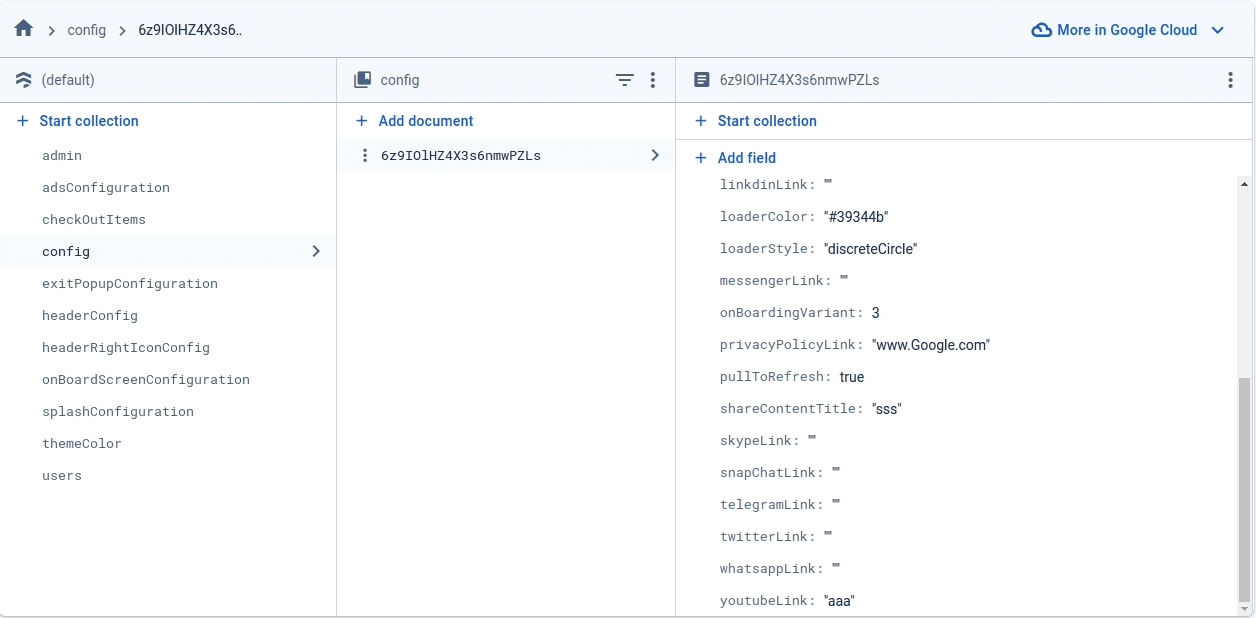
No. Fields -> datatype 1. appLogo -> string -> your app logo 2. appName -> string -> your app name 3. clearCookies -> bool -> if you want to clear cookies in the app 4. facebookLink -> string -> your facebookLink 5. fontSize -> string -> if you want to set fontsize 6. footerVisible -> bool -> if you want to display footer in the app 7. headerVisible -> bool -> if you want to header in the app 8. instagramLink -> string -> your instagramLink 9. isOnboardingVisible -> bool -> if you want to display onboard in the app 10.isSplashVisible -> bool -> if you want to display splash in the app 11.linkdinLink -> string -> your linkdinLink 12.loaderColor -> string -> your loaderColor 13.loaderStyle -> string -> your loaderStyle 14.messengerLink -> string -> your messengerLink 15.onBoardingVariant -> number -> Your onBoardingVariant selected value 16.privacyPolicyLink -> string -> your privacyPolicyLink 17.pullToRefresh -> bool -> if you want to display pull to refresh in the app 18.shareContentTitle -> string -> your shareContentTitle 19.skypeLink -> string -> your skypeLink 20.snapChatLink -> string -> your snapChatLink 21.telegramLink -> string -> your telegramLink 22.twitterLink -> string -> your twitterLink 23.whatsappLink -> string -> your whatsappLink 24.youtubeLink -> string -> your youtubeLink 25.androidPackage -> string -> your android package name - Now click on Start Collection one pop-up will appear give
collection
name
config
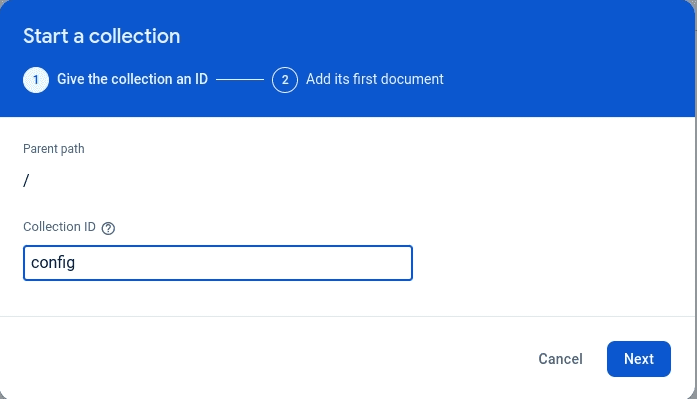
- After that click on Auto-ID
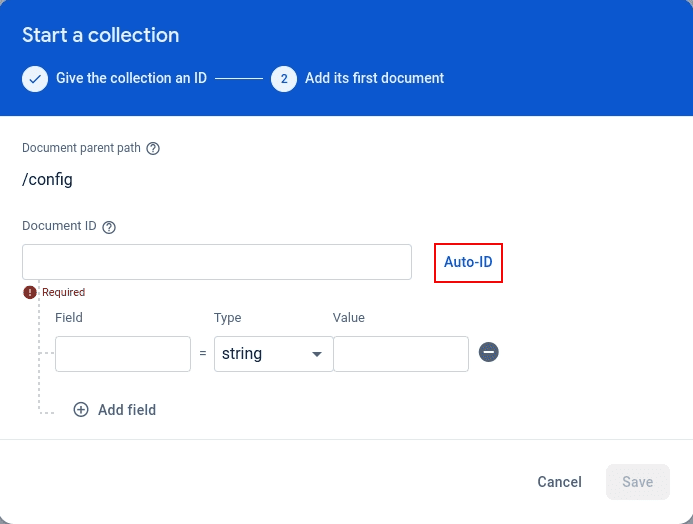
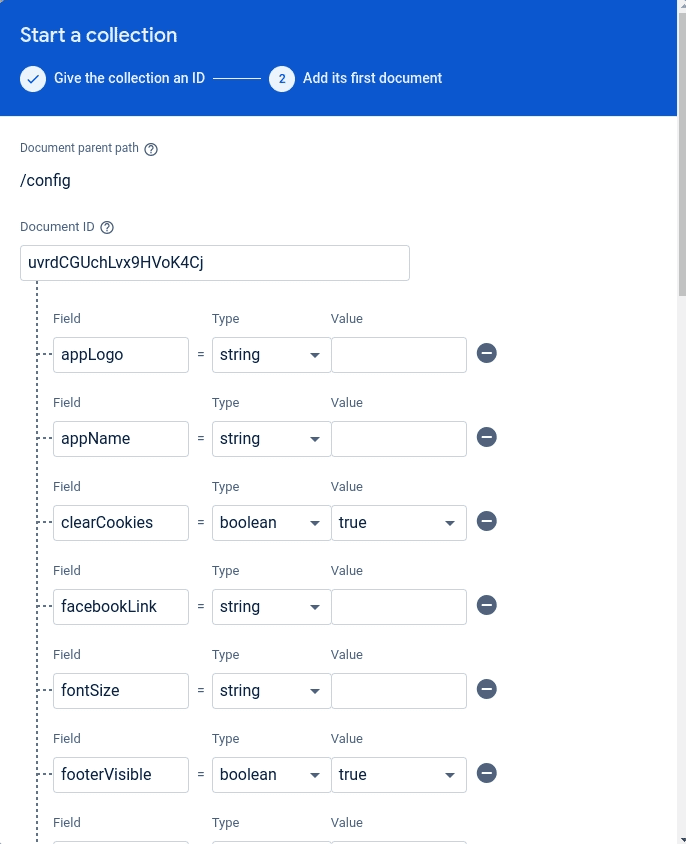
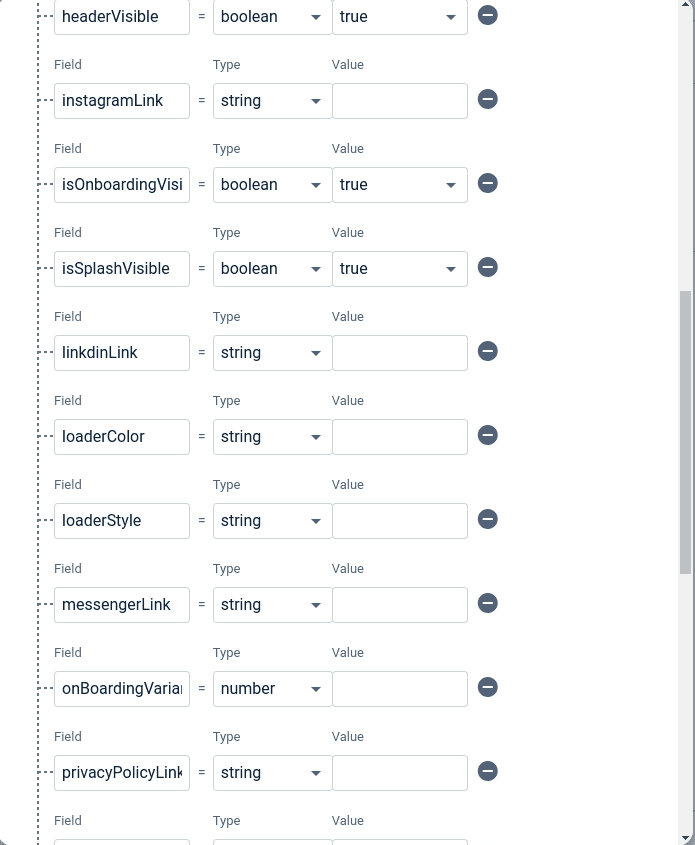
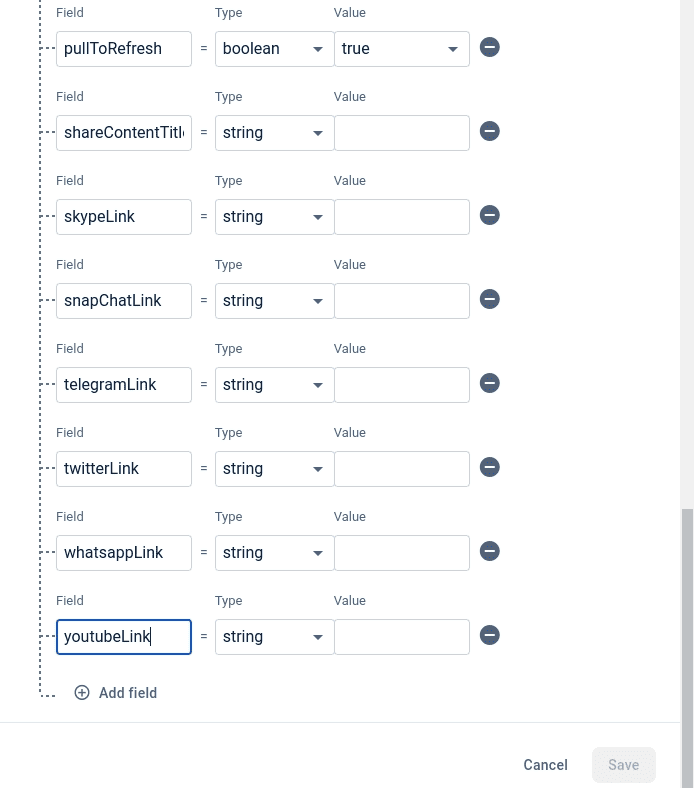
- Your config look like this :
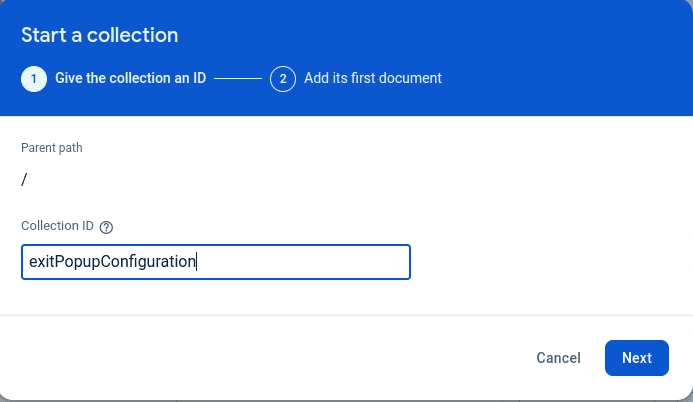
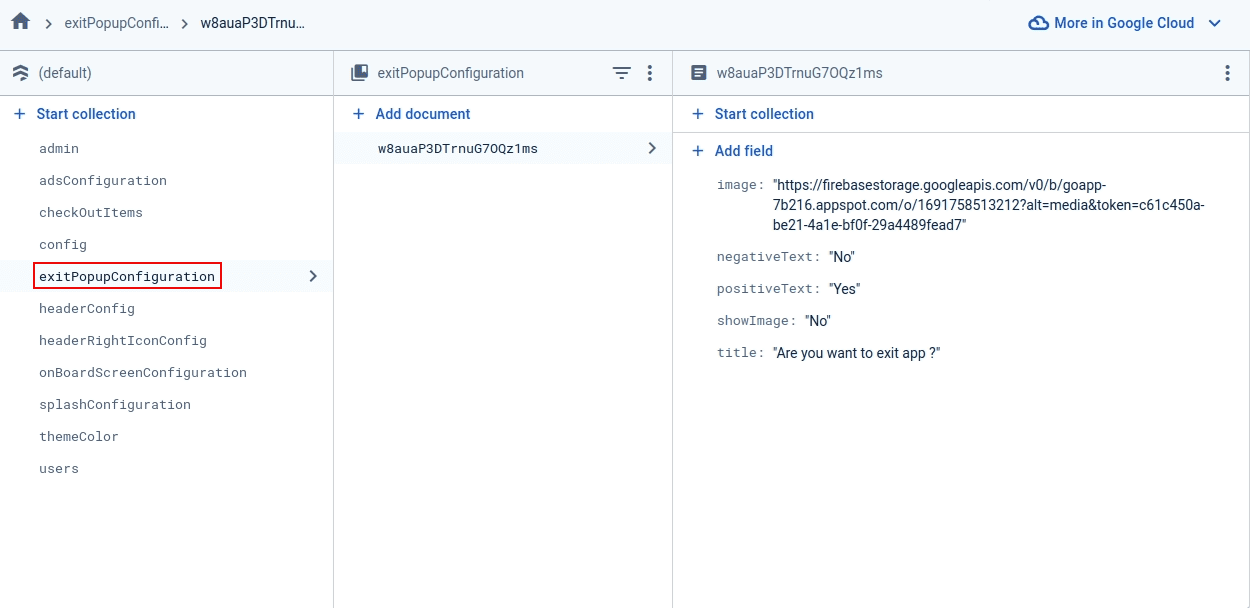
5. exitPopupConfiguration:
- In the project exitPopupConfiguration, they cannot access live. You can remove these exitPopupConfiguration from the admin project -> lib -> controllers -> app_pages_controller -> exitPopup_controller.dart
- There are 5 field in exitPopupConfiguration, copy and paste one
by one in
firebase
and create
collection
in your project
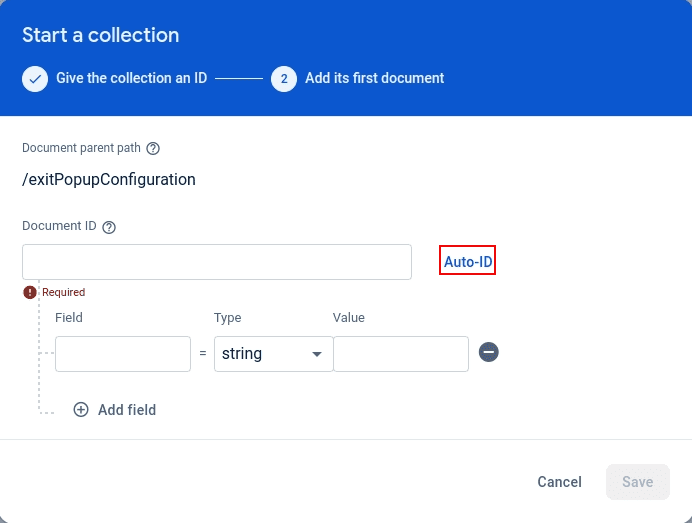
No. Fields -> datatype 1. image -> string -> If you want to display any image in exit pop-up you can add in this field 2. negativeText -> string -> exit pop-up first button 3. positiveText -> string -> exit pop-up second button name 4. showImage -> string -> If you want to display any image in exit pop-up or not 5. title -> string -> Your title for exitPopupConfiguration - Now click on Start Collection one pop-up will appear give
collection
name
exitPopupConfiguration
- After that click on Auto-ID
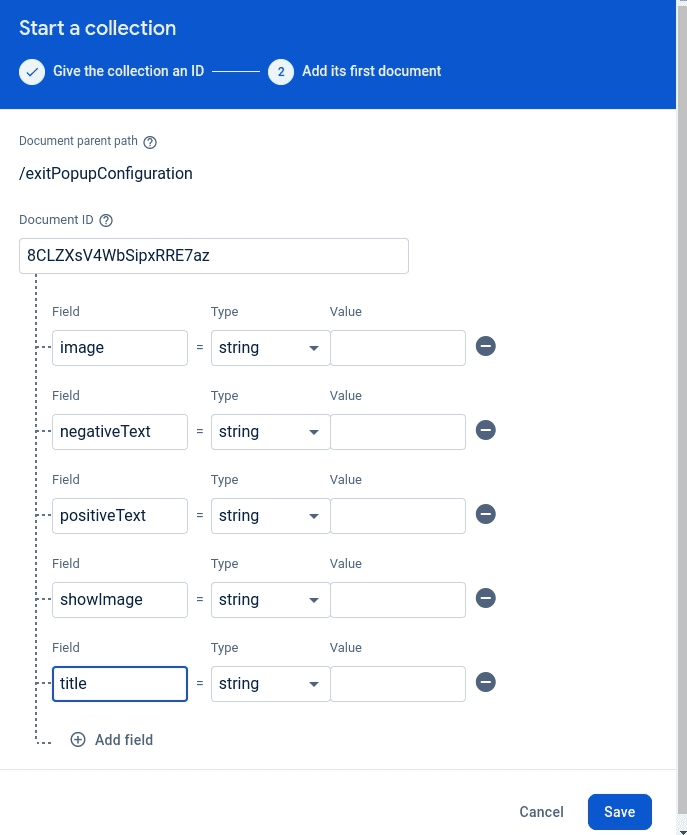
- Your exitPopupConfiguration look like this :
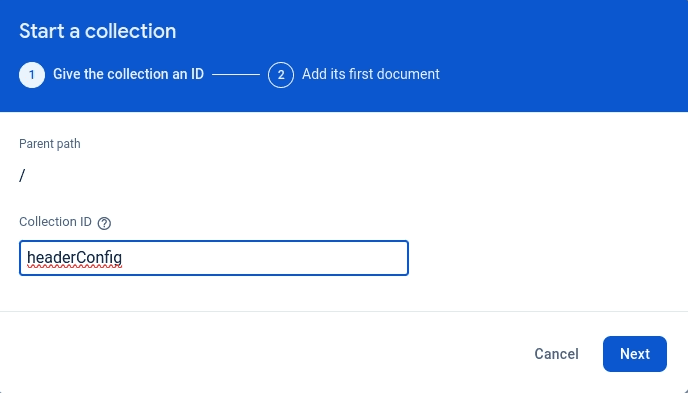
5. headerConfig:
- In the project headerConfig, they cannot access live. You can remove these headerConfig from the admin project -> lib -> controllers -> app_pages_controller -> header_config_controller.dart
- There are 5 field in headerConfig, copy and paste one
by one in
firebase
and create
collection
in your project
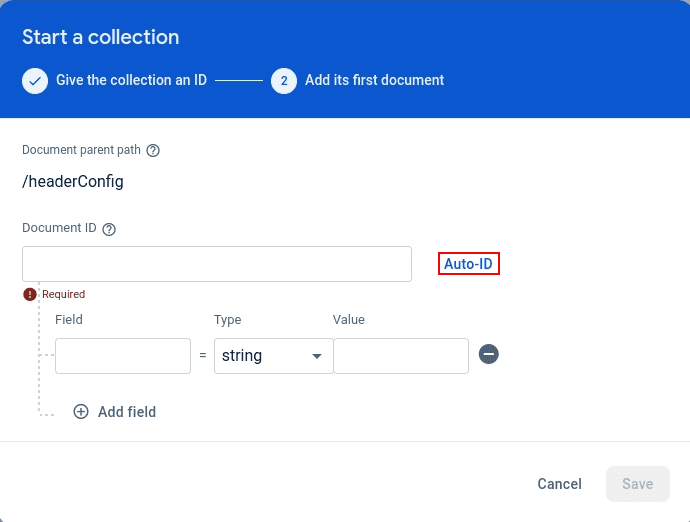
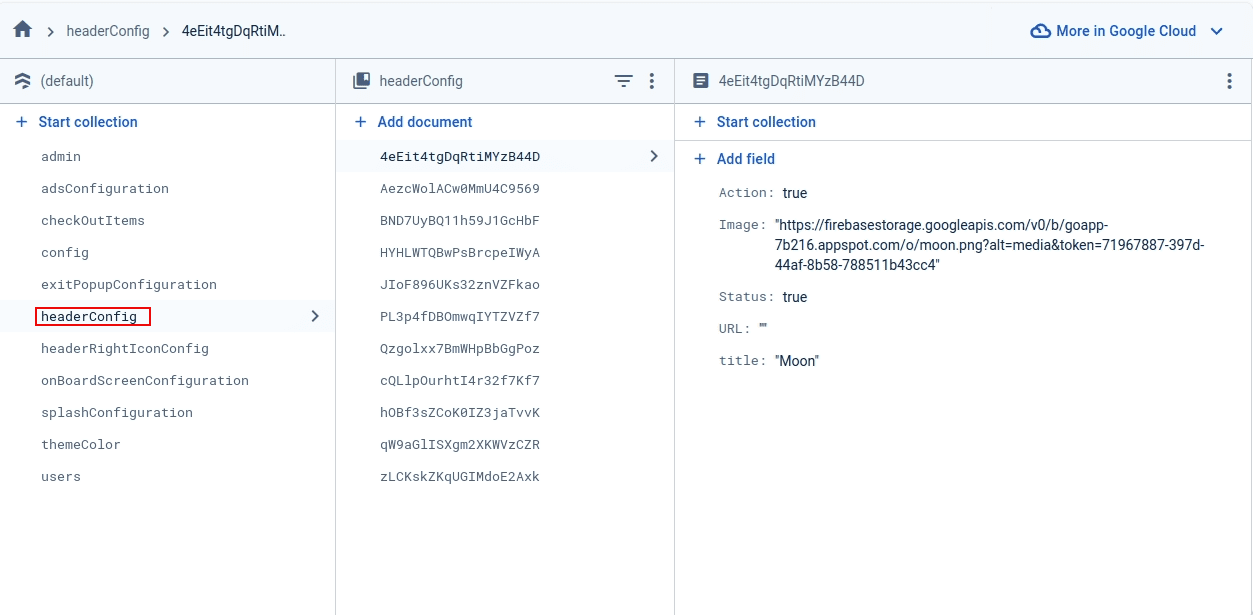
No. Fields -> datatype 1. Action -> bool -> If you want to manage any action on header left icon 2. Image -> string -> header action image 3. Status -> bool -> whether it is active or not 4. URL -> string -> if you want to manage url on click event 5. title -> string -> icon name - Now click on Start Collection one pop-up will appear give
collection
name
headerConfig
- After that click on Auto-ID
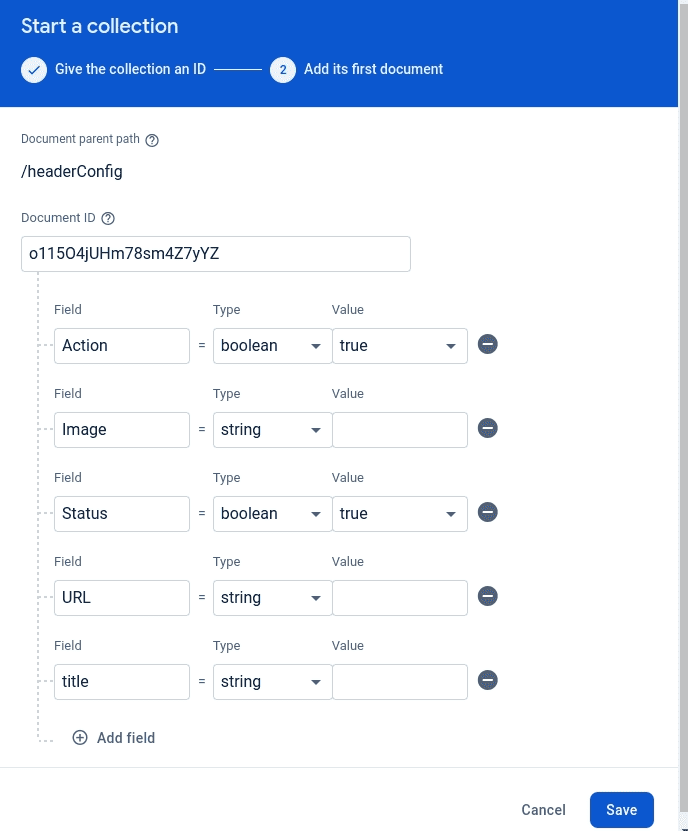
- Your headerConfig look like this :
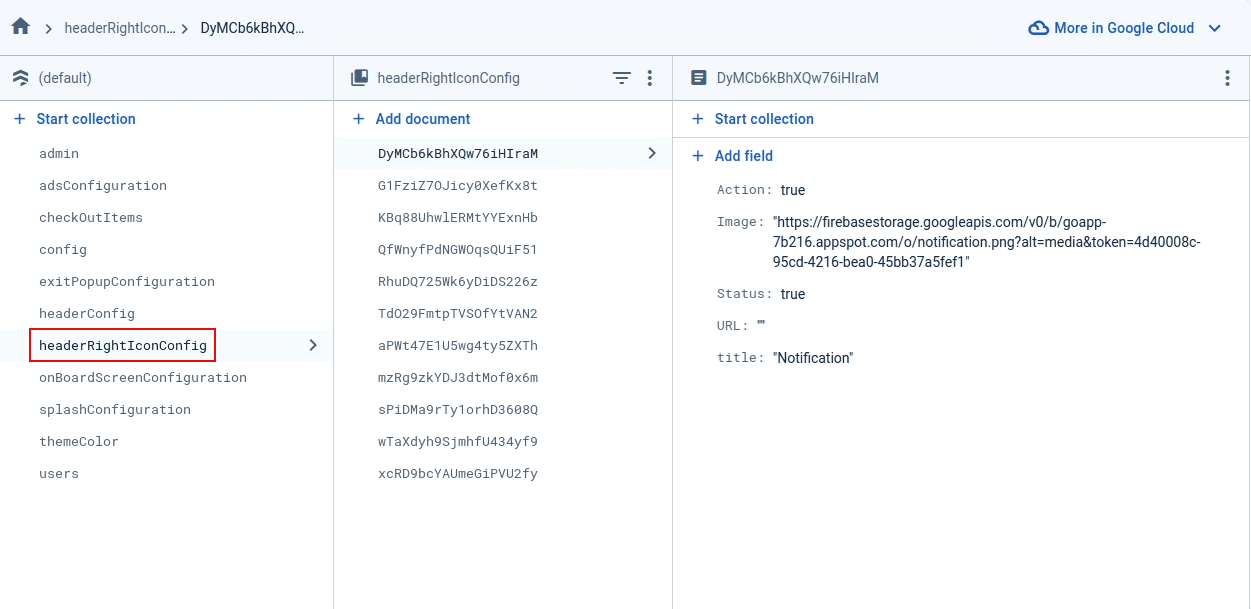
6. headerRightIconConfig:
- In the project headerRightIconConfig, they cannot access live. You can remove these headerRightIconConfig from the admin project -> lib -> controllers -> app_pages_controller -> header_config_controller.dart
- There are 5 field in headerRightIconConfig, copy and paste one
by one in
firebase
and create
collection
in your project
No. Fields -> datatype 1. Action -> bool -> If you want to manage any action on header right icon 2. Image -> string -> right icon image 3. Status -> bool -> whether it is active or not 4. URL -> string -> if you want to manage url on click event 5. title -> string -> icon name - Now click on Start Collection one pop-up will appear give
collection
name
headerRightIconConfig

- After that click on Auto-ID
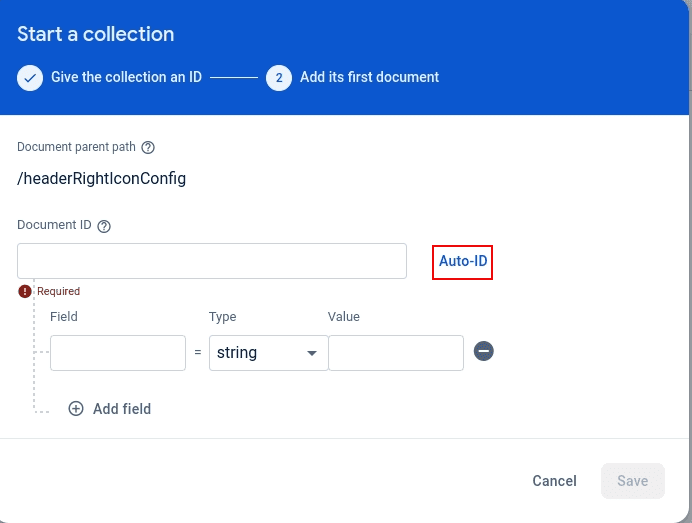
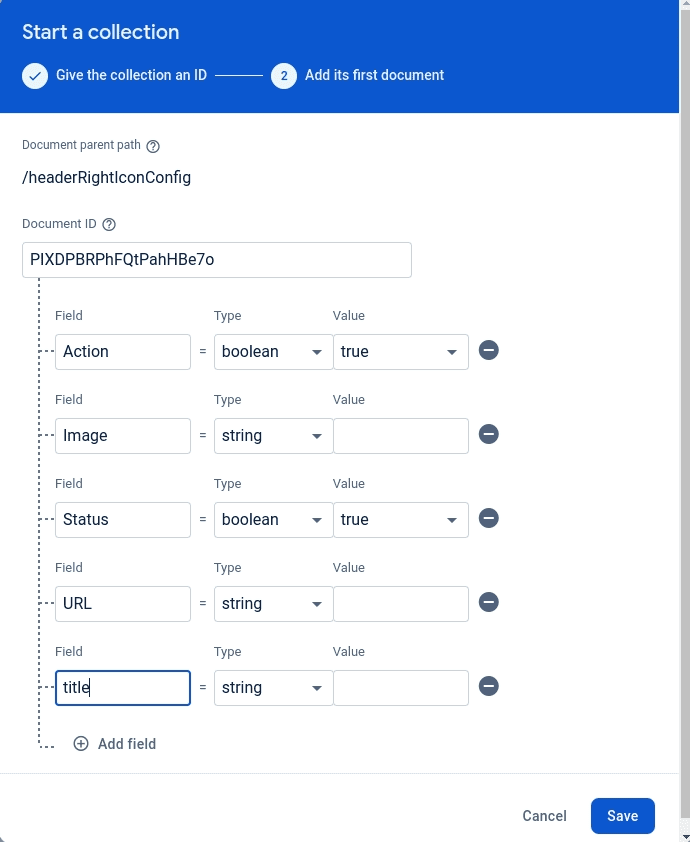
- Your headerRightIconConfig look like this :
7. splashConfiguration:
- There are 8 field in splashConfiguration, copy and paste one
by one in
firebase
and create
collection
in your project
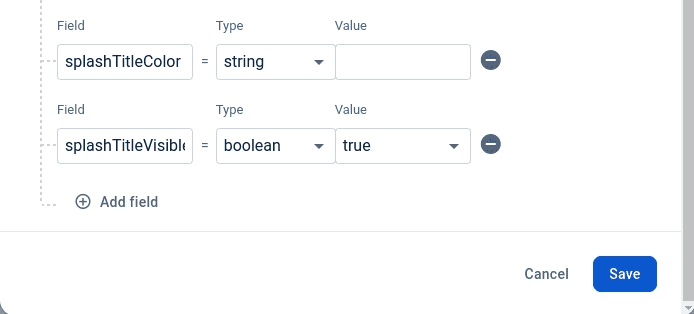
No. Fields -> datatype 1. firstColor -> string -> your firstColor 2. secondColor -> string -> your secondColor 3. splashLogo -> string -> your splashLogo 4. splashLogoHeight -> string -> your splashLogoHeight 5. splashLogoWeight -> string -> Your splashLogoWeight 6. splashTitle -> string -> your splashTitle 7. splashTitleColor -> string -> your splashTitleColor 8. splashTitleVisible -> bool -> If you want to visibile title in splash - Now click on Start Collection one pop-up will appear give
collection
name
splashConfiguration

- After that click on Auto-ID

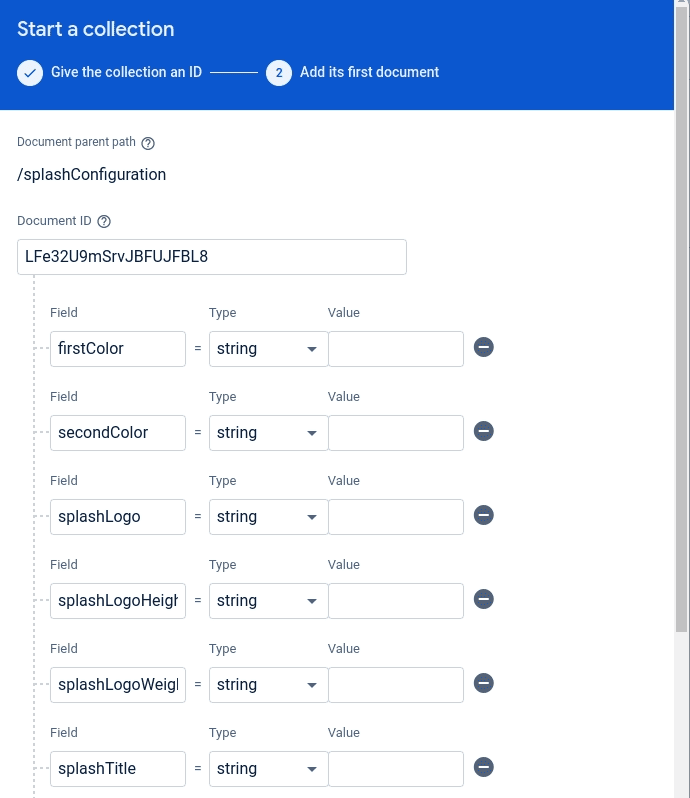
- Your splashConfiguration look like this :

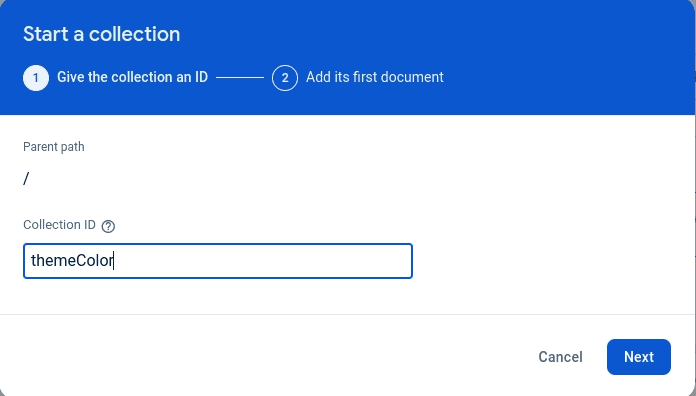
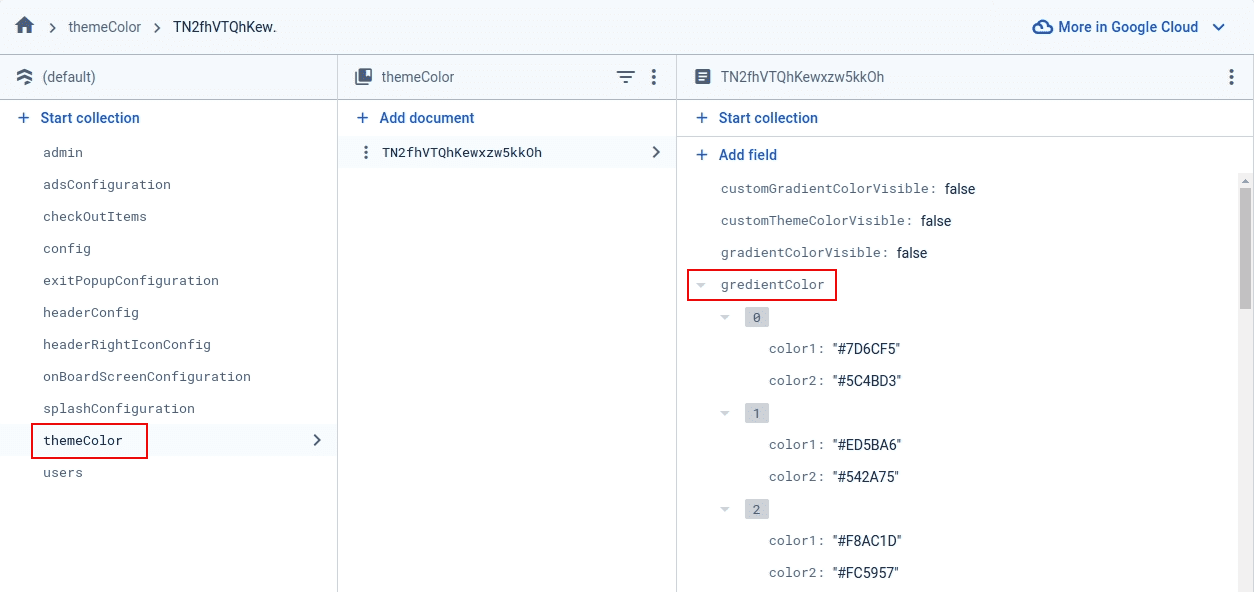
8. themeColor:
- There are 8 field in themeColor, copy and paste one
by one in
firebase
and create
collection
in your project
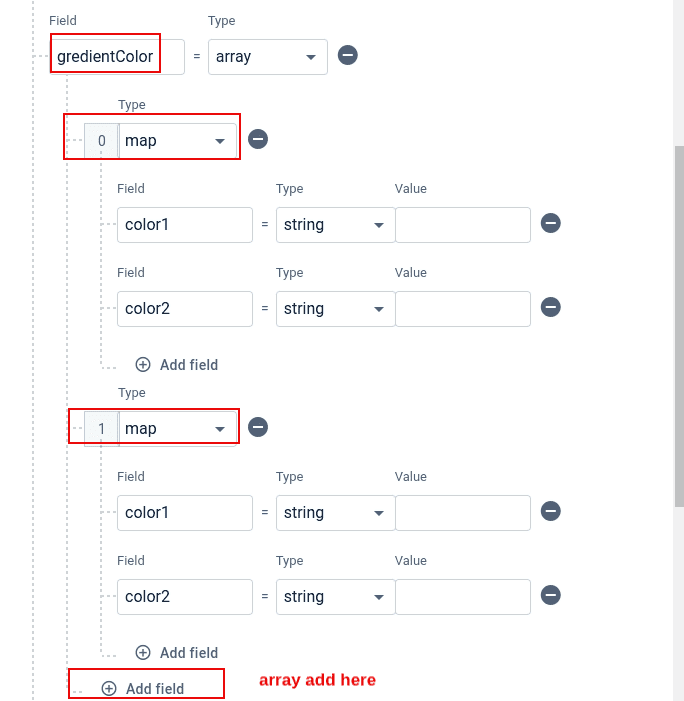
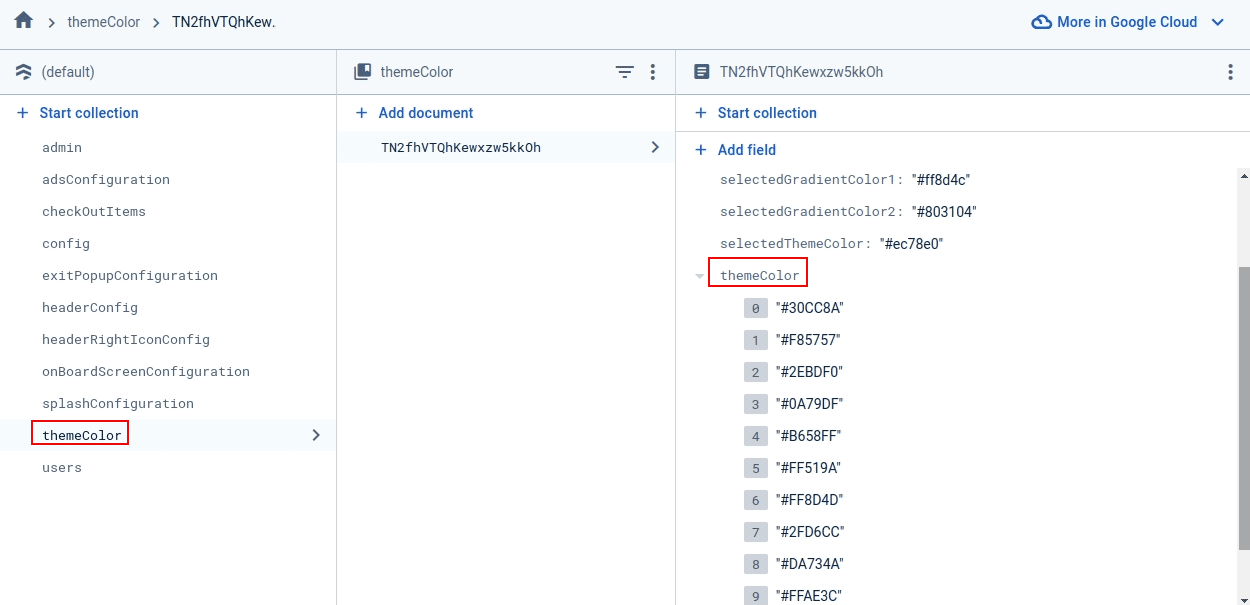
No. Fields -> datatype 1. customGradientColorVisible -> bool -> If you want to visibile customGradientColor in themeColor 2. customThemeColorVisible -> bool -> If you want to visibile customThemeColor in themeColor 3. gradientColorVisible -> bool -> If you want to visibile gradientColor in themeColor 4. gredientColor -> array(map) -> your gredientColor array 1. color1 ->> string -> your color1 2. color2 ->> string -> your color2 5. selectedGradientColor1 -> string -> Your selectedGradientColor1 6. selectedGradientColor2 -> string -> your selectedGradientColor2 7. selectedThemeColor -> string -> your selectedThemeColor 8. themeColor -> array -> yout themeColor array - Now click on Start Collection one pop-up will appear give
collection
name
themeColor
- After that click on Auto-ID
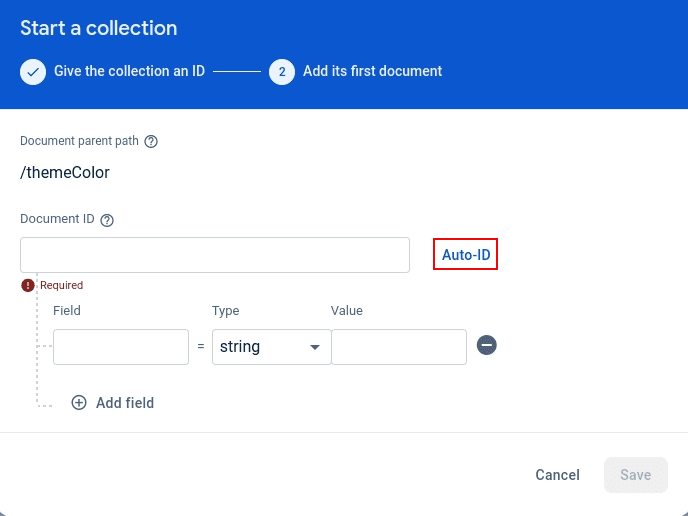
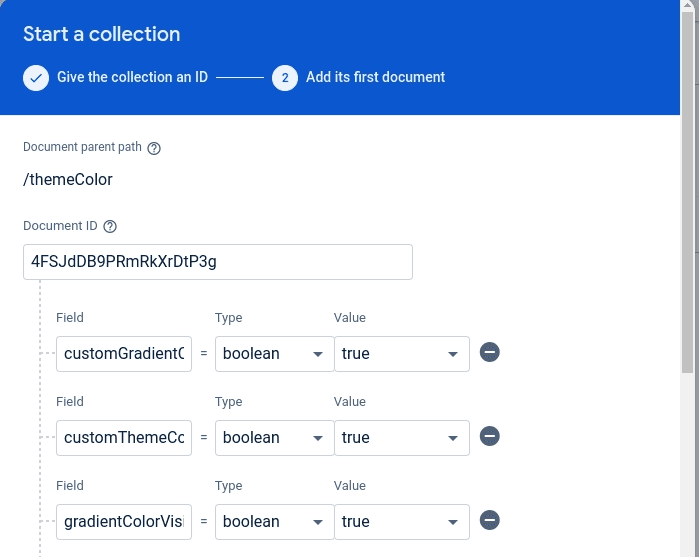
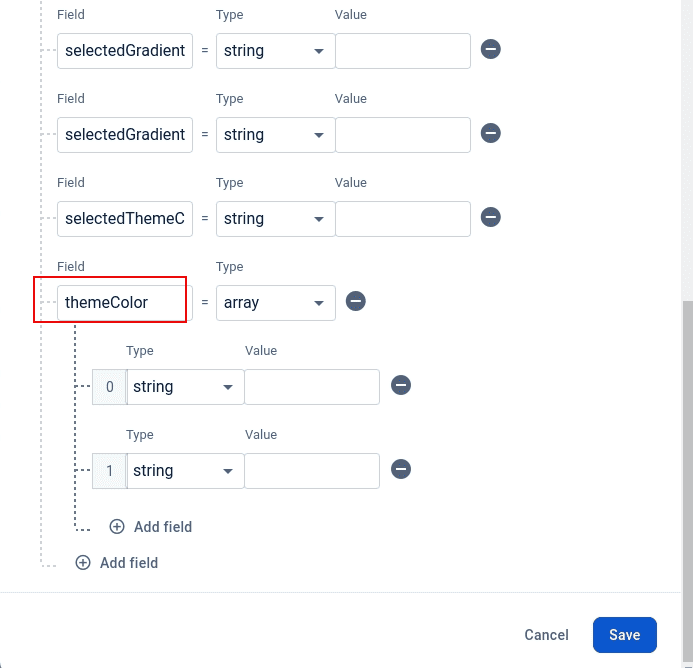
- Your themeColor look like this :
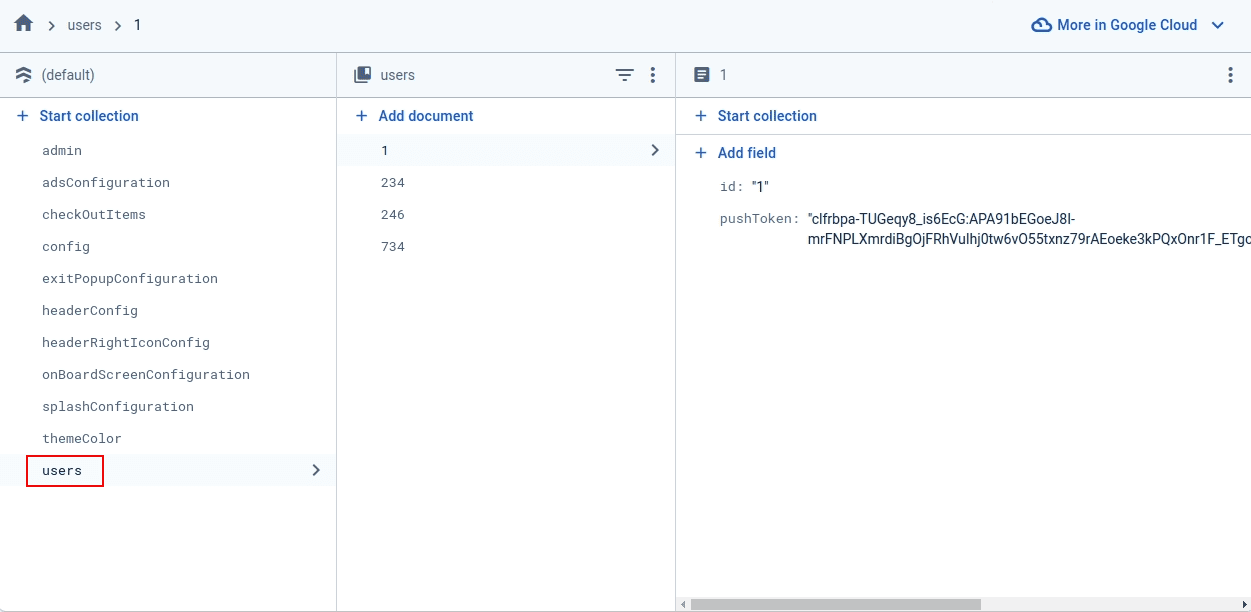
9. users:
- There are 2 field in users, copy and paste one
by one in
firebase
and create
collection
in your project
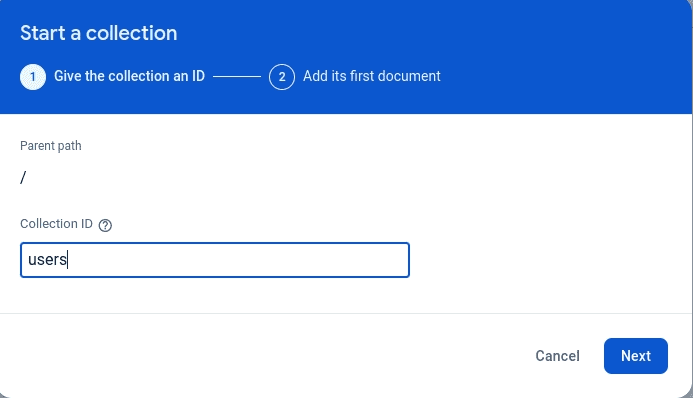
No. Fields -> datatype 1. id -> string -> your id 2. pushToken -> string -> your pushToken - Now click on Start Collection one pop-up will appear give
collection
name
users
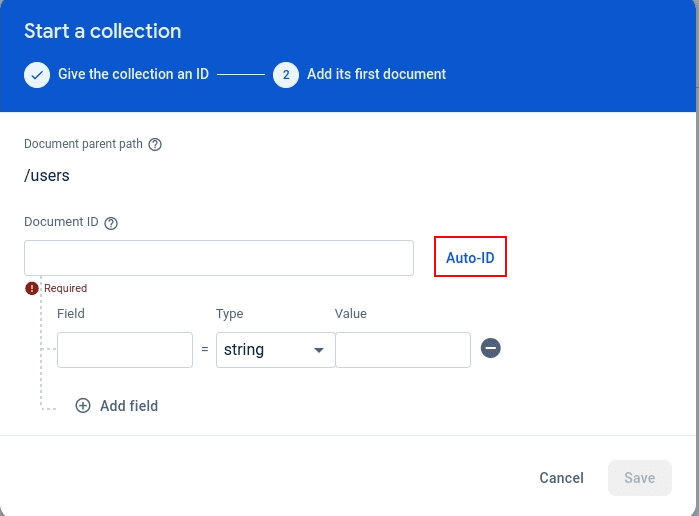
- After that click on Auto-ID

- Your users look like this :