 WhatsApp Integration (Twilio) –
Pixel-AI
WhatsApp Integration (Twilio) –
Pixel-AI
Overview
The WhatsApp Integration allows you to connect your Pixel-AI chatbot to WhatsApp using Twilio. Once connected, users can message your AI bot directly from WhatsApp.
If Human Support is enabled, conversations can also be handled by a human agent from the Pixel-AI dashboard.
Step 1: Enable WhatsApp Channel
- Go to the Chatbots section in your Pixel-AI dashboard.
- Open the chatbot you want to connect.
- Navigate to the Channels section.
- Select WhatsApp as the communication channel.
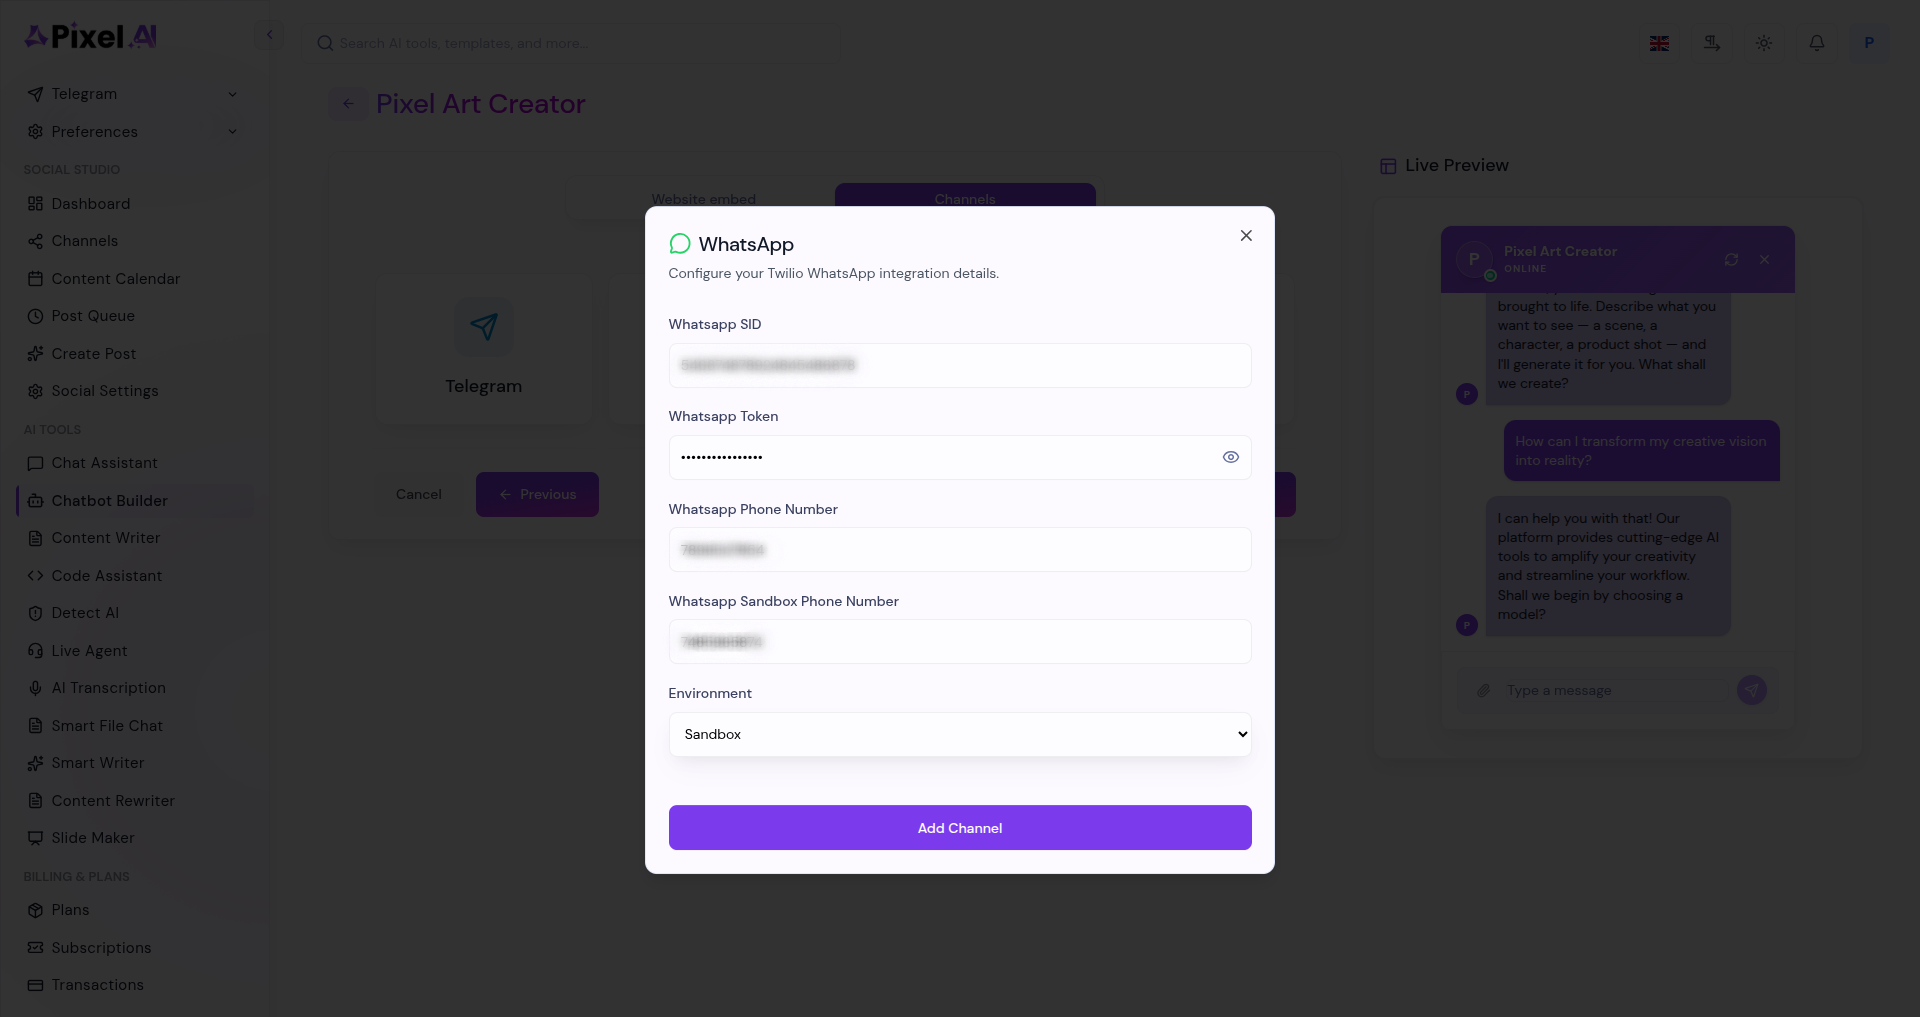
This activates WhatsApp configuration for the selected bot.
Step 2: Enter Twilio Configuration Details
In the WhatsApp settings panel, you will see fields for Twilio credentials.
Here, you’ll need to enter:
- Account SID
- Auth Token
- Twilio WhatsApp Number
- Sandbox Number (if using sandbox mode)
These details connect Pixel-AI with your Twilio account.
Step 3: Get Twilio Credentials
- Log in to your Twilio Console.
- From your dashboard:
- Copy your Account SID
- Copy your Auth Token
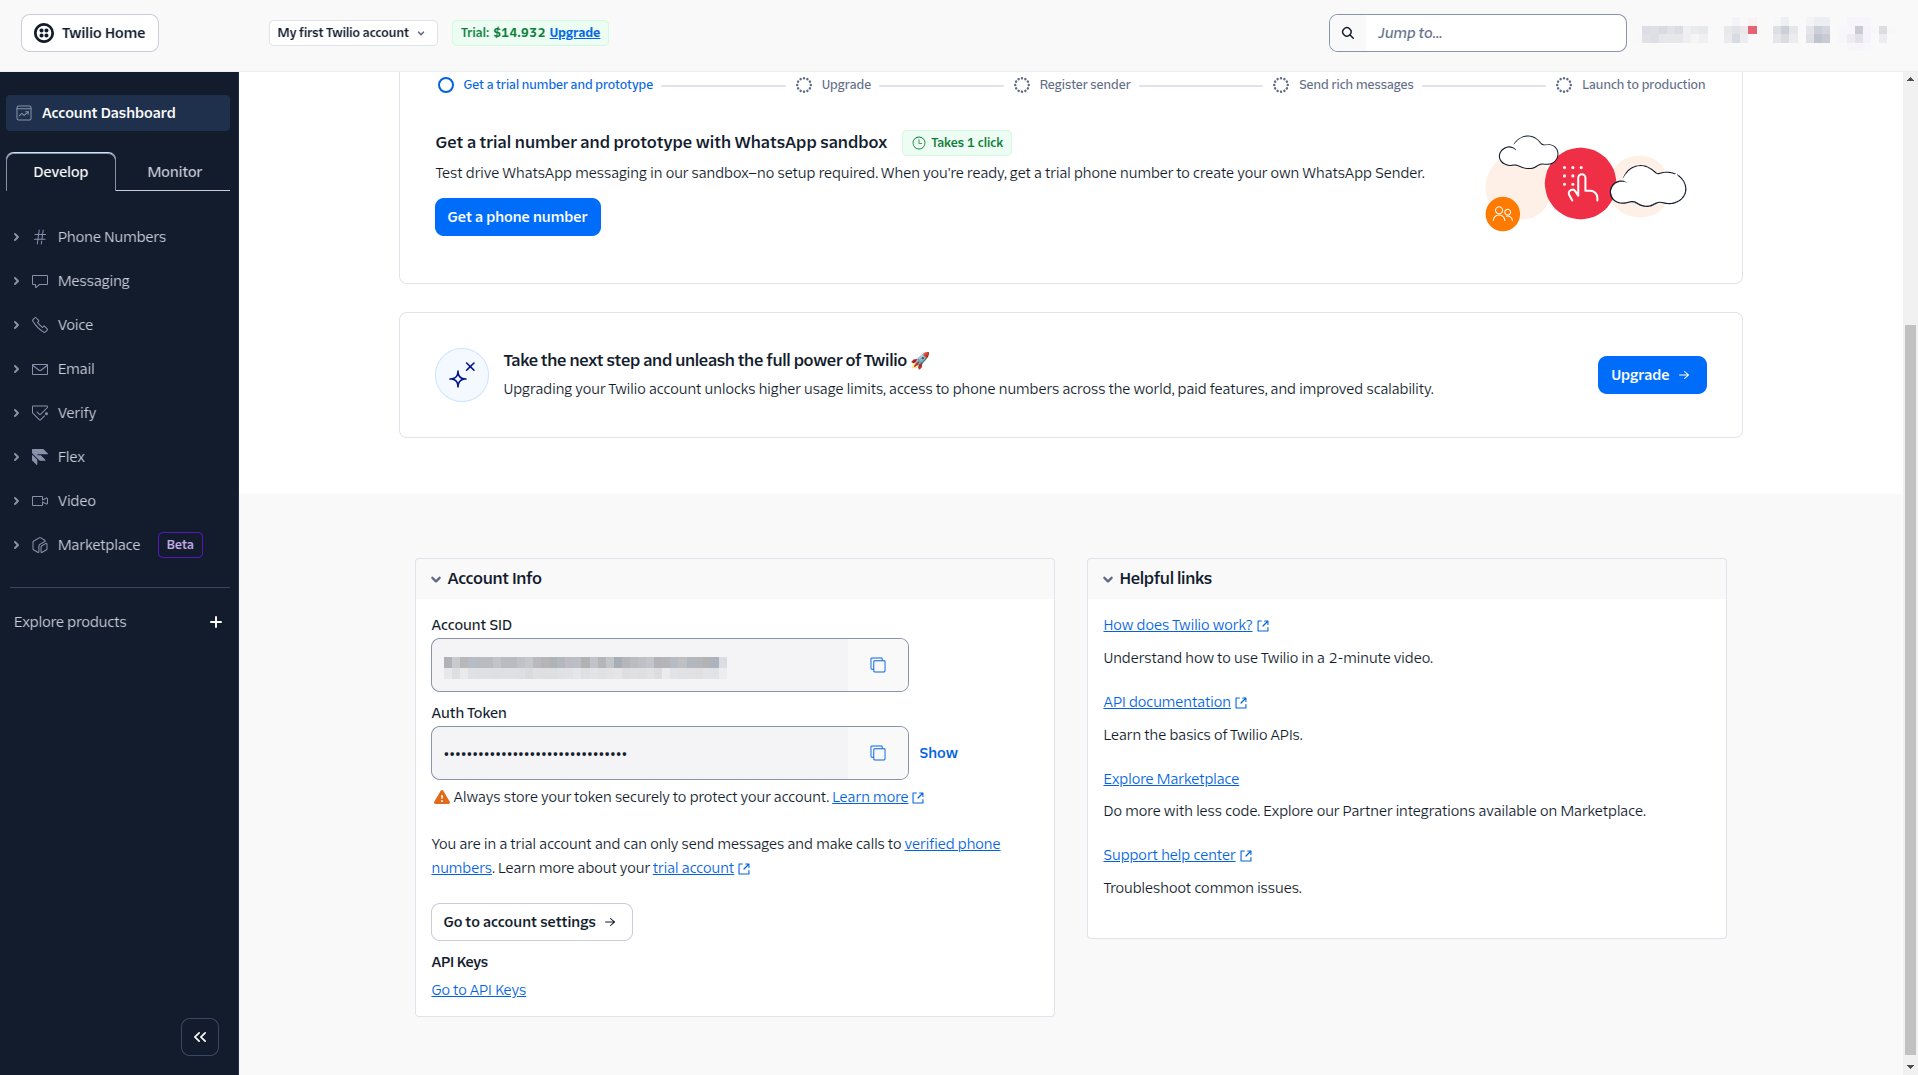
These credentials allow secure communication between Twilio and Pixel-AI.
Paste them into the corresponding fields inside Pixel-AI.
Step 4: Add Phone Numbers
Enter your:
- Twilio WhatsApp-enabled phone number
- Twilio Sandbox number (if testing in sandbox mode)
Make sure the number is properly configured inside your Twilio account for WhatsApp messaging.
Step 5: Configure Webhook in Twilio
After saving your settings in Pixel-AI:
- Go back to your Twilio Console.
- Open your WhatsApp number configuration.
- In the Webhook URL for incoming messages, enter your Pixel-AI webhook endpoint.
- Save the changes.
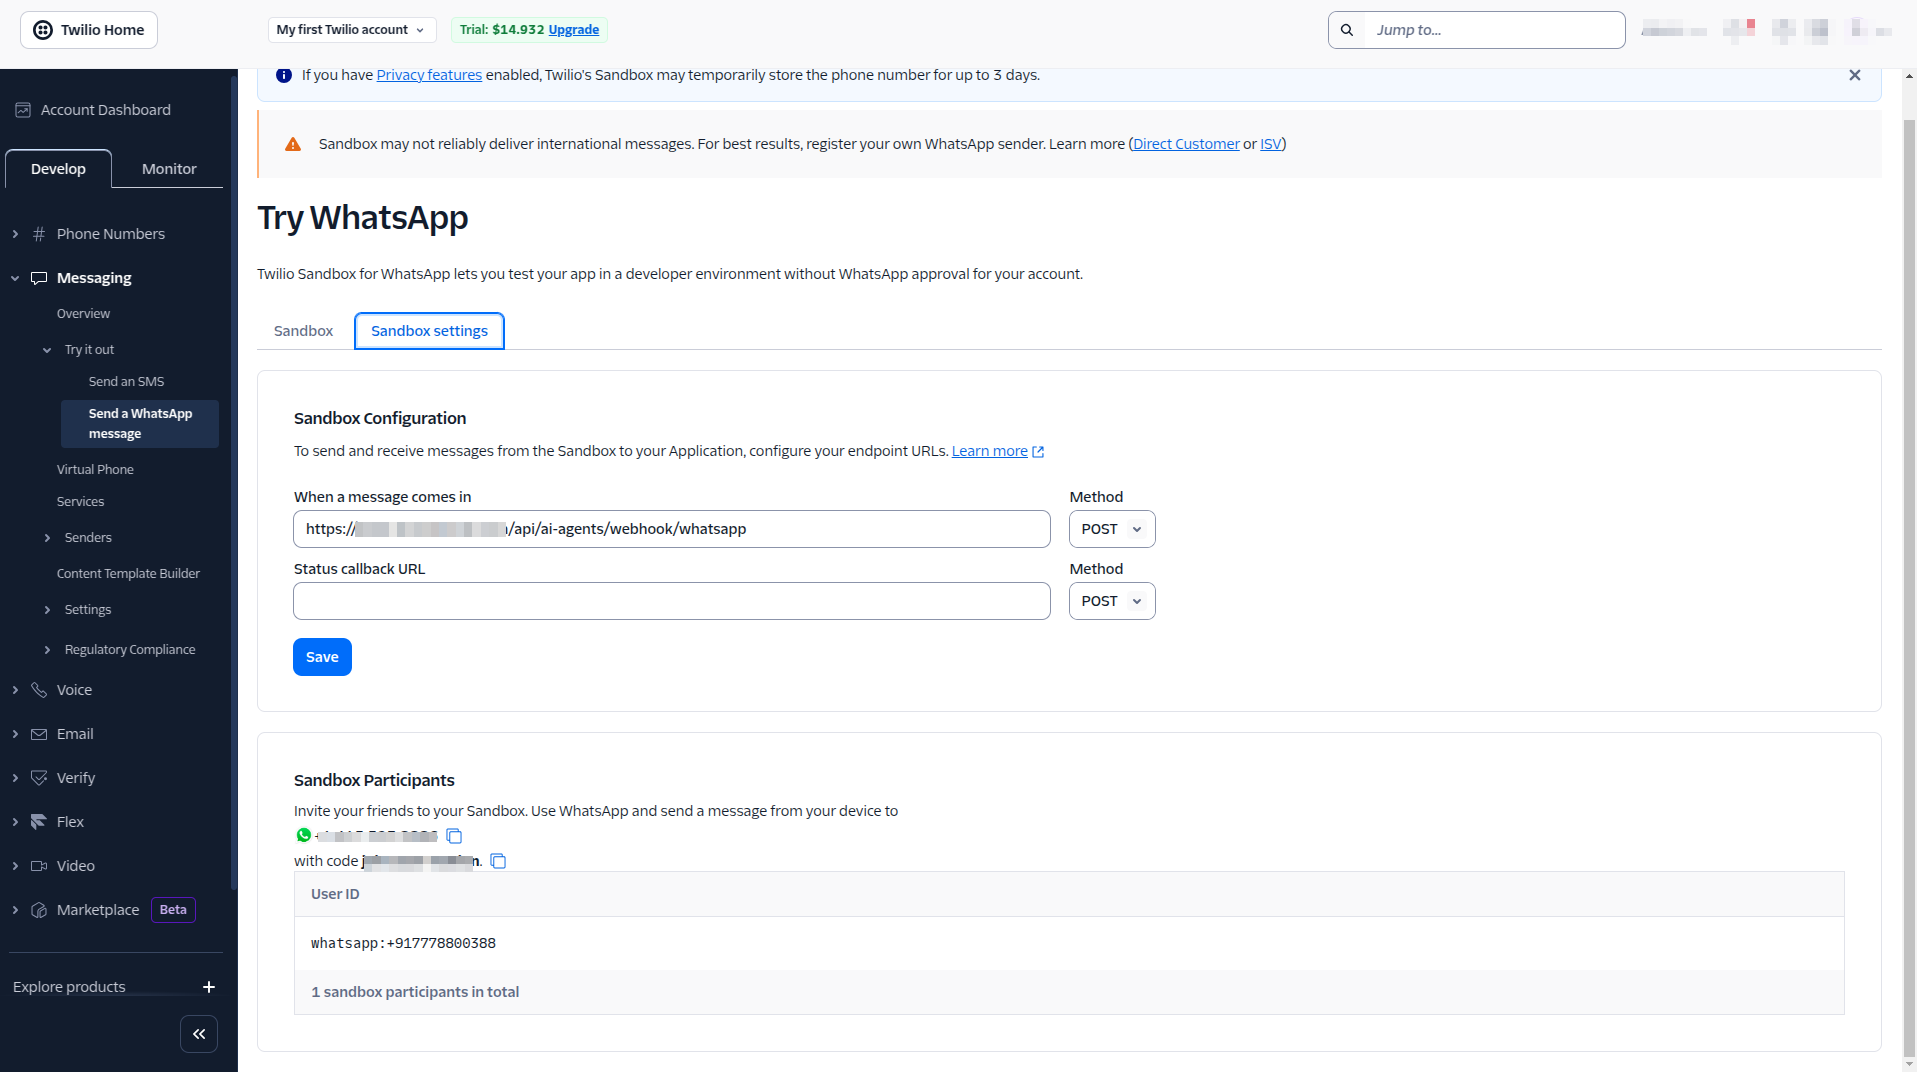
This ensures incoming WhatsApp messages are forwarded to your chatbot.
Live Activation
Your WhatsApp chatbot is now active.
Users can:
- Send messages directly from WhatsApp
- Receive AI-powered responses
- Request human assistance (if enabled)
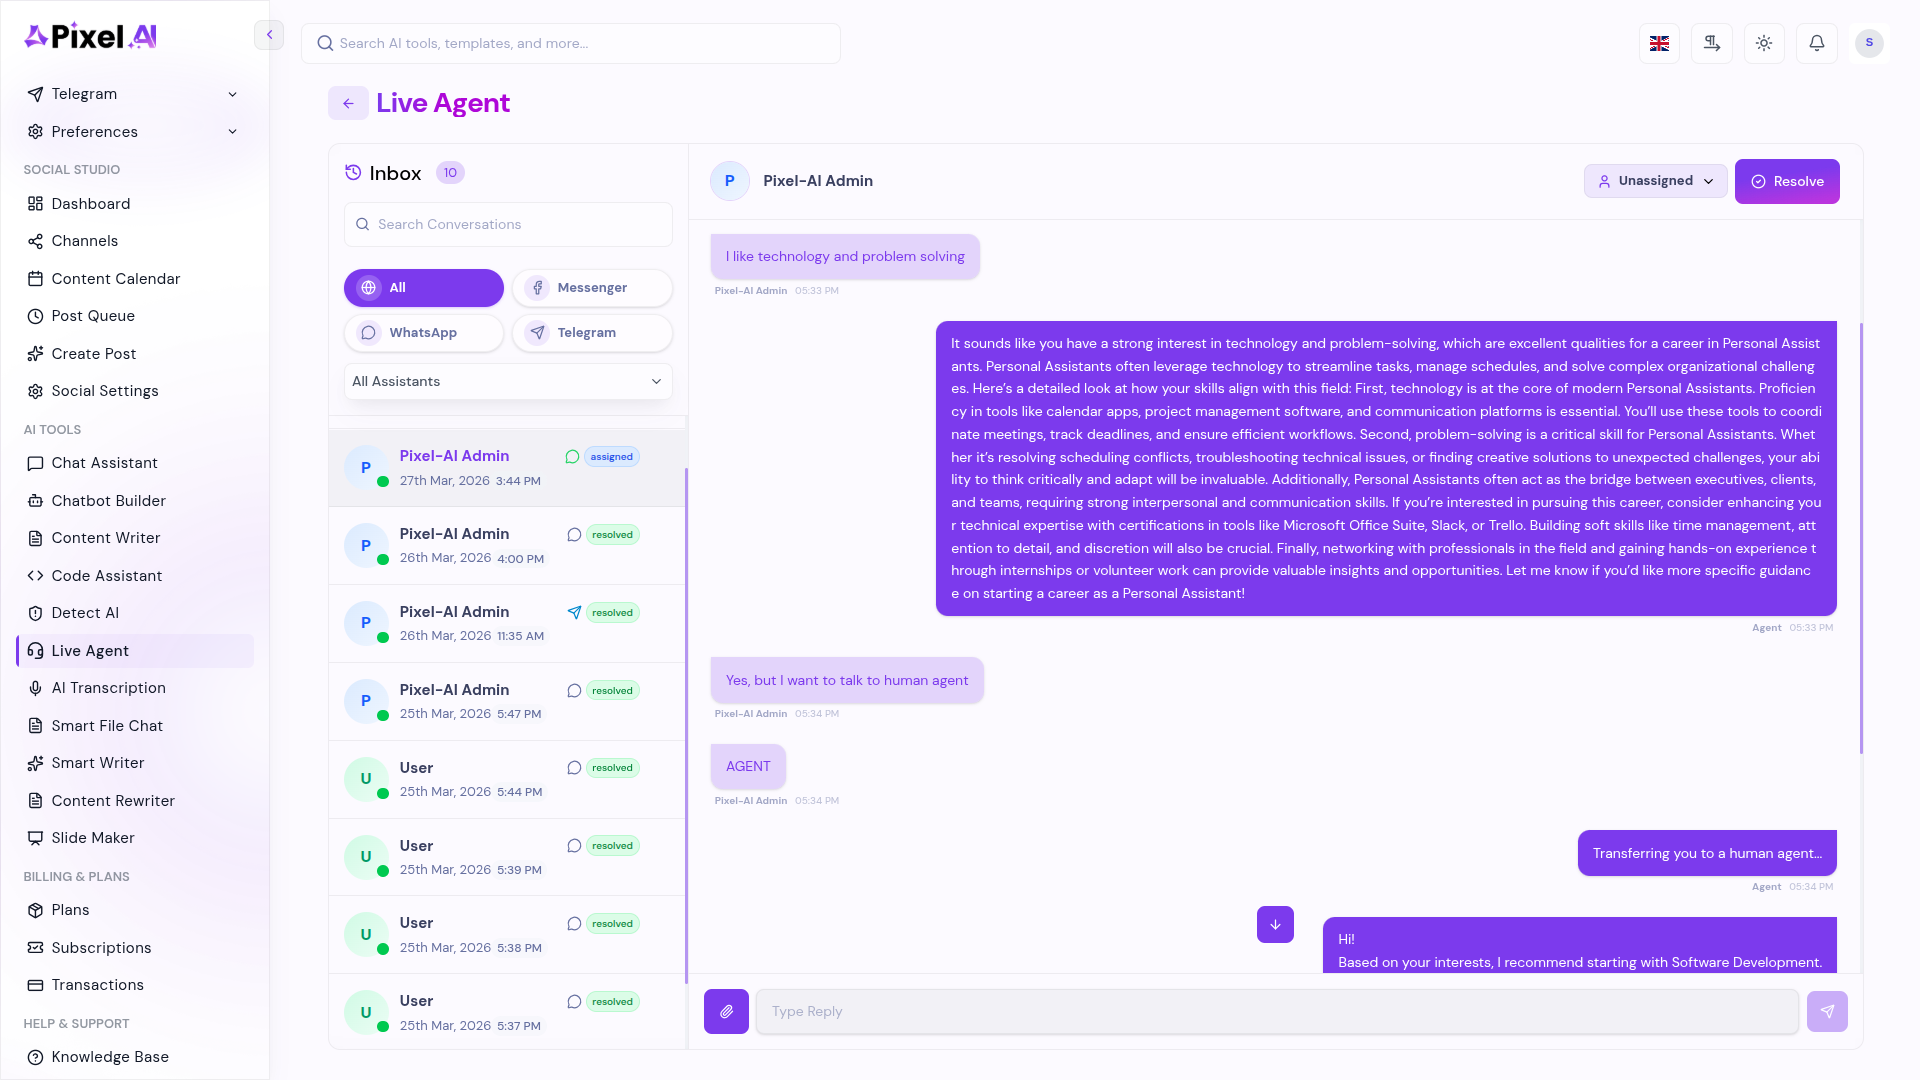
All conversations are managed centrally inside your Pixel-AI dashboard.
What's Next?
Let's get started — your journey with Pixel AI begins here!

