 Welcome to WAPI!
Overview
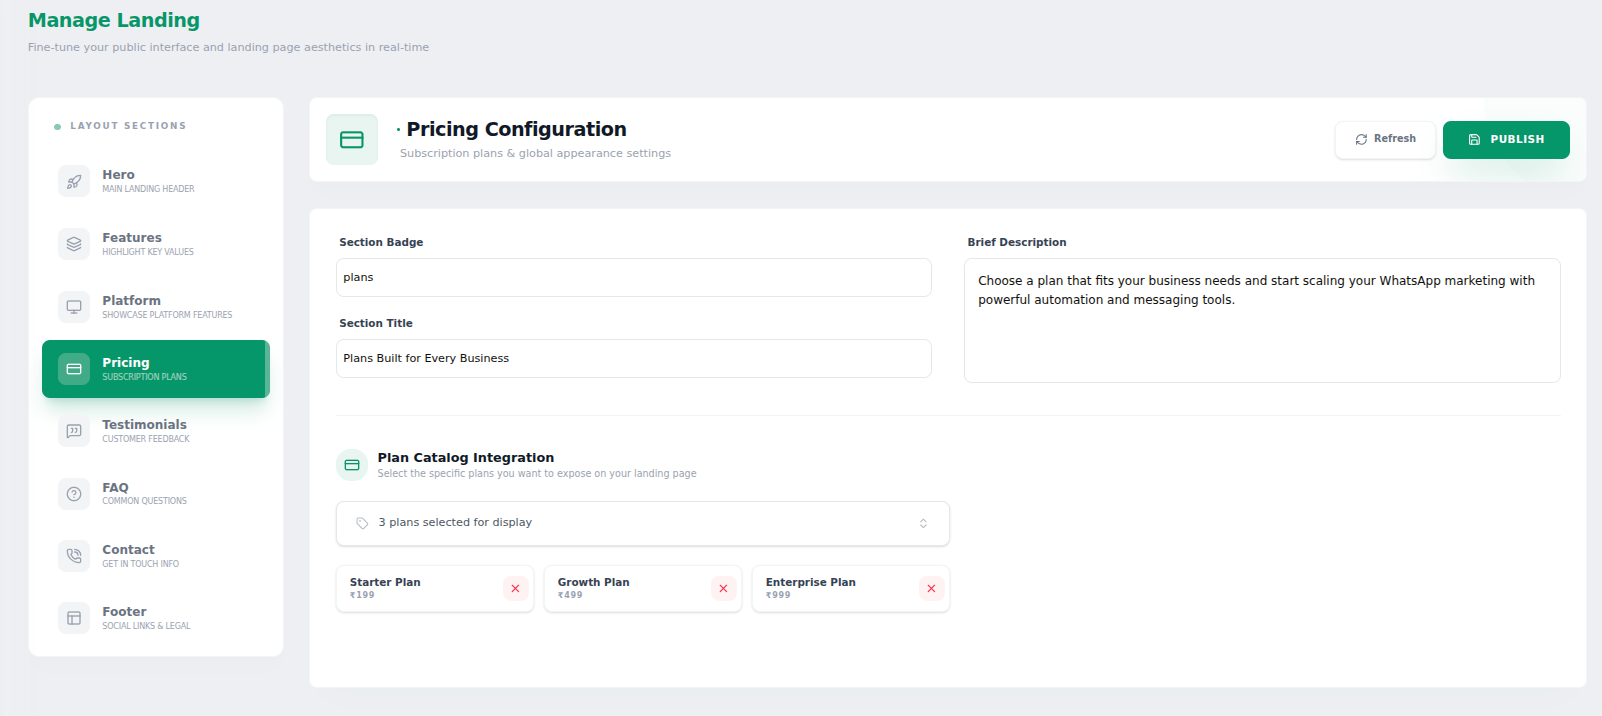
The **Manage Landing** module is your localized command center for real-time website customization. It provides a non-technical interface for administrators to fine-tune the public-facing aesthetics, messaging, and conversion zones of the WAPI landing page without touching a single line of code.
Designed for marketing agility, this feature enables instant updates to hero sections, feature showcases, pricing tables, and social proof, ensuring your brand remains consistent and responsive to evolving business needs.
Key Features
- Section-Based Editing: Discretely manage Hero, Features, Pricing, and Footer sections through a streamlined sidebar.
- No-Code UI Design: Update text, badges, and high-resolution media through simple form fields.
- Real-time Synchronization: Preview changes internally with "Refresh" and go live instantly with "Publish."
- Conversion Optimization: Fine-tune Call-to-Action (CTA) buttons and target links for maximum user engagement.
- Brand Consistency: Centrally manage social links, copyright info, and legal documentation paths.
Navigation Flow
Layout Sections Panel
The Sidebar Panel organizes your landing page into manageable blocks:
| Section | Strategic Purpose | Typical Editable Fields |
|---|---|---|
| Hero | First impression & main value proposition. | Badge, Title, Description, CTA, Image. |
| Features | Highlighting core platform benefits. | Benefit blocks, Descriptions, images. |
| Platform | Showcasing specific product capabilities. | Feature modules, Product screenshots. |
| Pricing | Subscription plan visibility. | Plan names, Feature lists, CTA links. |
| Testimonials | Building social proof and trust. | Customer feedback, Name, Rating. |
| FAQ | Addressing common onboarding hurdles. | Questions, In-depth answers. |
| Contact | Lead generation & support routes. | Email, Phone, Address details. |
| Footer | Navigation & compliance anchors. | Social links, Copyright, Legal paths. |
Hero Configuration Protocol
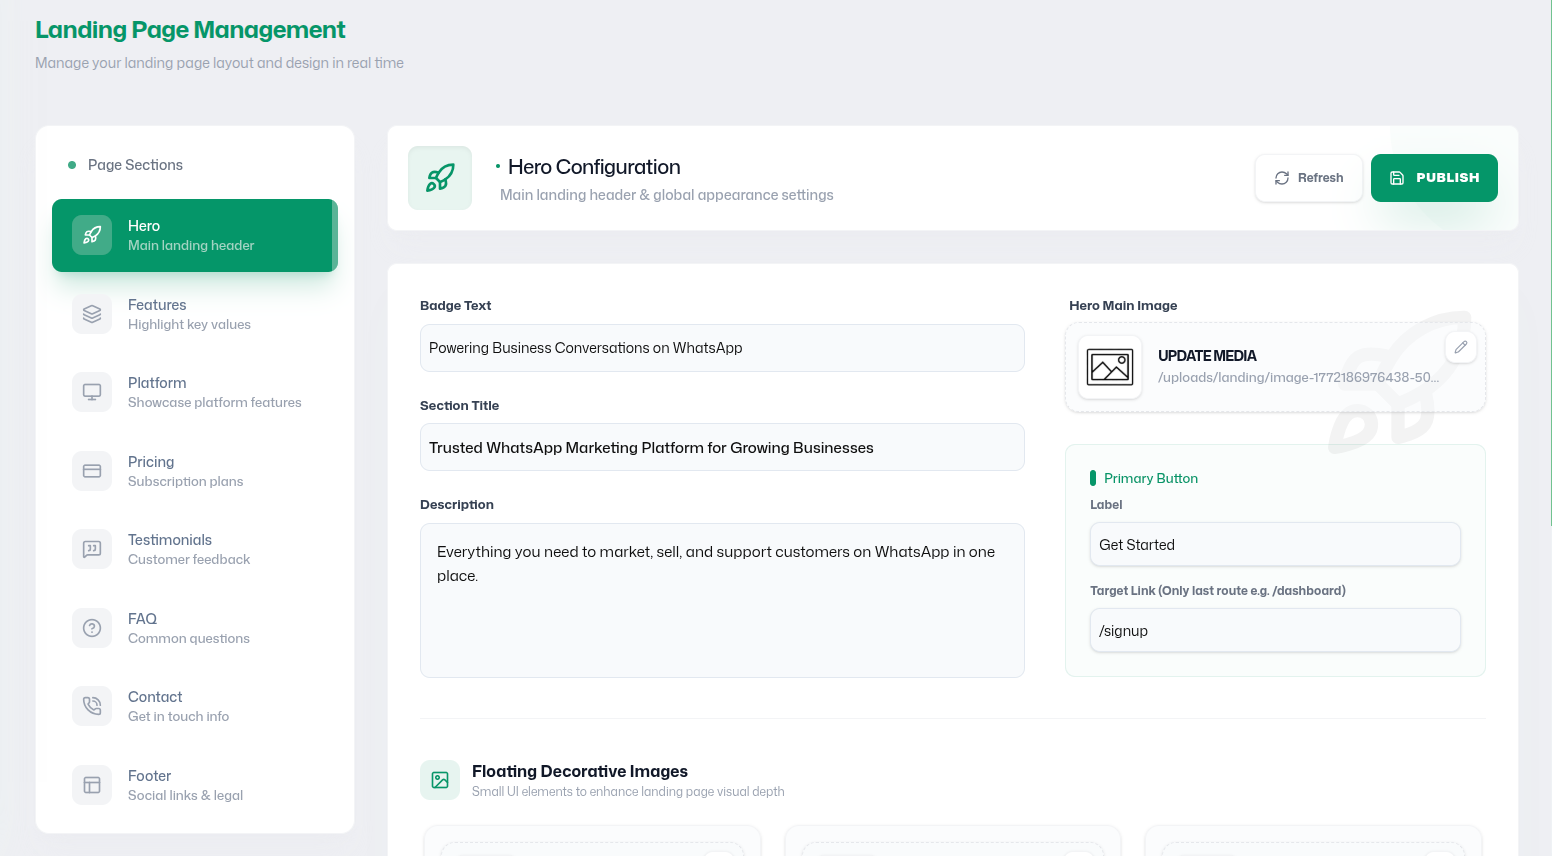
The Hero section is the most critical conversion zone of your website. Follow these steps to optimize it:
Editable Data Fields
- Badge Text: A short highlight tag (e.g., "New Feature Ready").
- Section Title: Your primary H1 headline.
- Description: Supporting body text defining the WAPI value.
- Primary Button Label: The CTA text (e.g., "Start Free Trial").
- Target Link: The internal path (e.g., `/signup`) for the button.
Media Management
Upload a high-resolution PNG/JPG that represents the platform UI.
Ensure transparent backgrounds for a modern premium feel.
Publishing & Deployment Workflow
Use this to reload the latest saved configuration without making it public. ideal for testing different copy ideas internally.
Commits all current form data to the live database and updates the public landing page in real-time.
Copywriting Best Practices
- Benefit Over Feature: Explain *why* the product helps, not just *what* it does.
- Concise CTA: Keep button labels under 3 words for maximum impact.
- Regular Refreshes: Update testimonials every quarter to show platform growth.
- Device Testing: Check the live site on mobile after every major Publish.