 Welcome to WAPI!
Overview
The **Manage Testimonials** module is a powerful lever for building trust and social proof across your marketing ecosystem. This module allows administrators to curate, organize, and display customer success stories, quotes, and logos on the WAPI landing page and other high-visibility conversion zones.
By showcasing authentic feedback from satisfied users, you can significantly improve conversion rates and provide the social validation necessary for prospective customers to commit to the platform.
Key Features
- Visual Identity Management: Upload customer avatars or company logos to add authenticity to every quote.
- Role-Based Credibility: Highlight customer designations and company affiliations for targeted social proof.
- Visibility Governance: Toggle testimonials between Published and Draft states to manage marketing cycles.
- Dynamic Search: Instantly filter through established entries by name, role, or content snippet.
- Strategic Sequencing: Reorder entries to ensure your strongest results-driven testimonials appear first.
Navigation Flow
Testimonials List Page
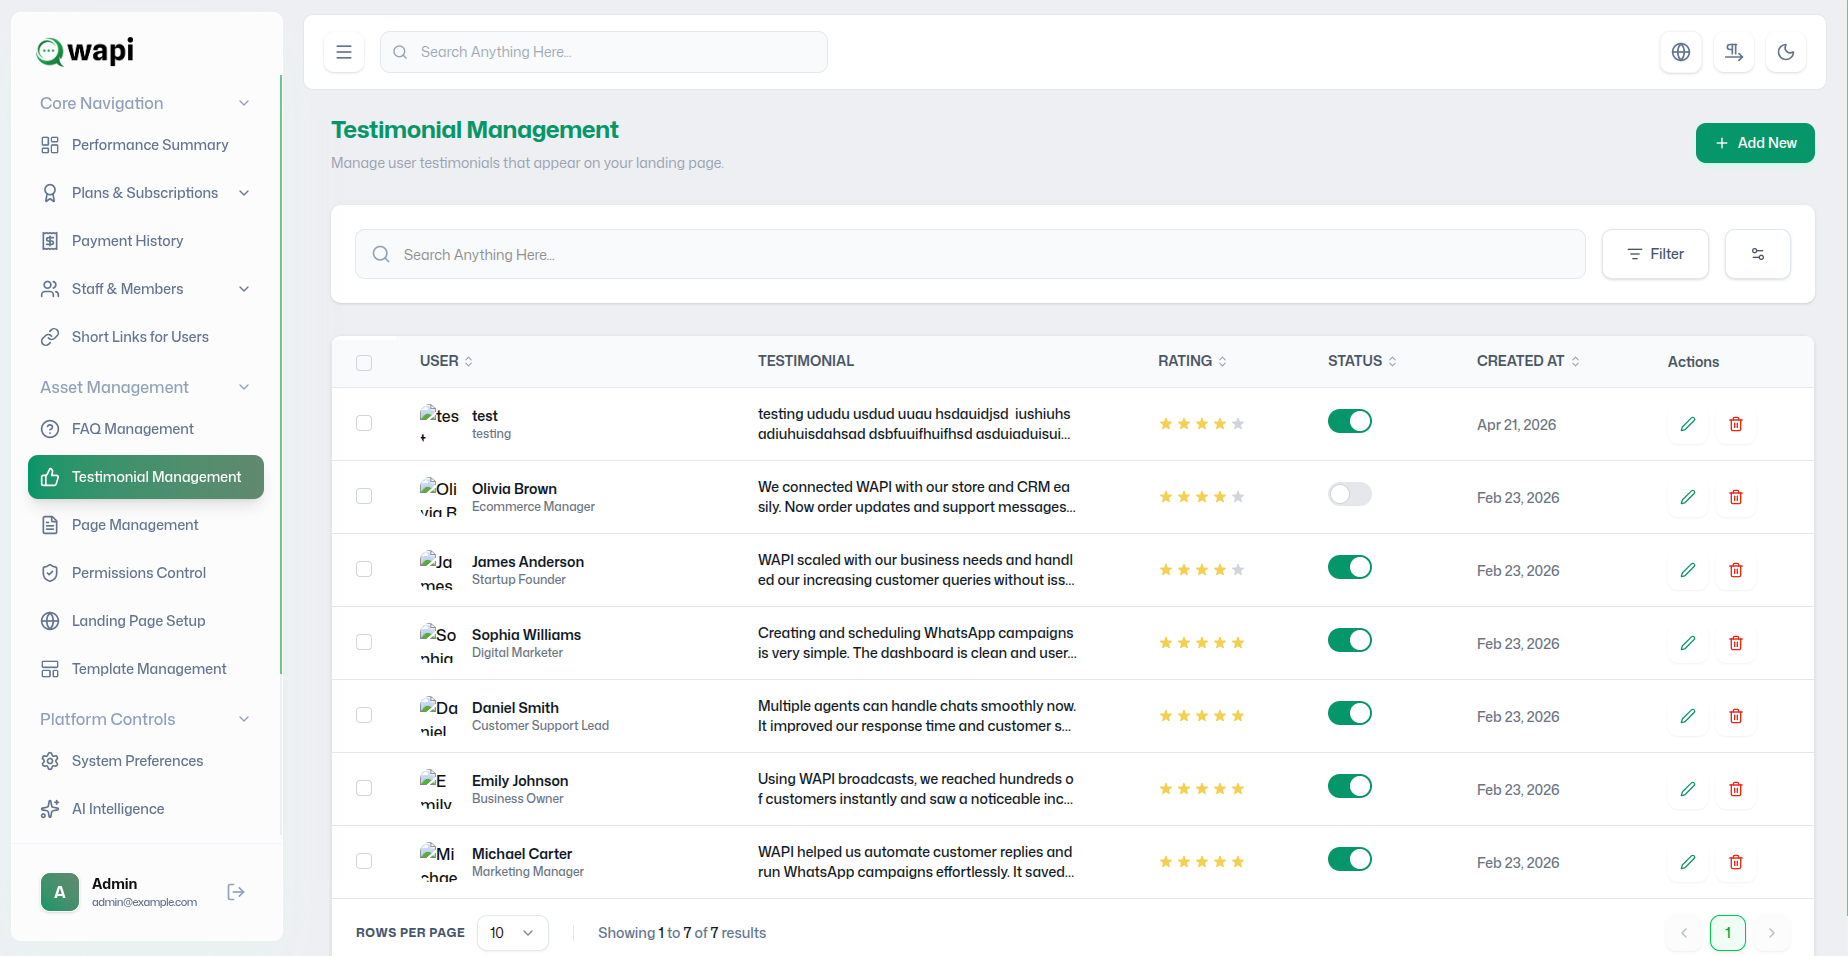
The Testimonials List provides a direct overview of your active social proof assets:
- User Identity: Displays the customer's name, role (e.g., CEO, Manager), and avatar snippet.
- Feedback Preview: A condensed view of the results-driven quote or success story.
- Rating: Visual star indicators reflecting the customer's platform satisfaction.
- Centralized Search: Locate entries quickly using the top-level keyword filter.
- Quick Actions: Direct entry points for the **Edit** and **Delete** protocols.
How to Create a New Testimonial
Step 1: Initiation
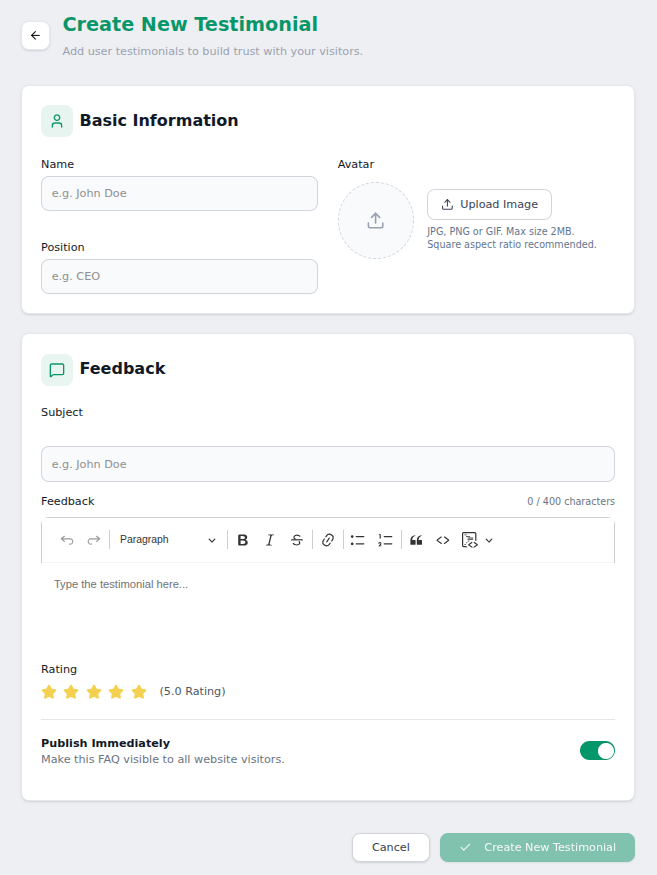
Step 2: Basic Information
| Field | Provisioning Instruction | Required |
|---|---|---|
| Name | Enter the customer's professional name for identification. | Yes |
| Avatar | Upload a square profile image (JPG/PNG, max 2MB) for authenticity. | Optional |
| Position | Define the user's role or designation (e.g., Marketing Director). | Yes |
Step 3: Feedback Details
| Field | Functional Impact | Required |
|---|---|---|
| Subject | A short, punchy heading summarizing the testimonial's essence. | Yes |
| Feedback | The core quote (max 400 characters recommended for optimal UI). | Yes |
Step 4: Satisfaction Metrics & Visibility
| Configuration | Description | Required |
|---|---|---|
| Rating | Assign a numerical satisfaction score (e.g., 5.0). | Optional |
| Publish Immediately | Toggle ON to sync the testimonial to the frontend instantly. | Optional |
Step 5: Finalization
Testimonial Curation Workflow
Optimization Tips
- Highlight Metrics: Use specific outcomes (e.g., "40% faster replies").
- Keep it Punchy: Focus on results rather than generic features.
- Visual Trust: Always include high-quality, square avatars where possible.
- Regular Refresh: Update social proof as you onboard higher-tier customers.
Provisioning Notes
Draft entries are effectively invisible to the frontend. Ensure you re-verify the **Visibility** toggle after finalized edits to ensure live synchronization.