 Embeddable
Widget
Embeddable
Widget
Overview
The Embeddable Widget module allows users to add an AI-powered voice and chat assistant directly to websites, landing pages, and digital platforms. The widget appears as a floating chat button and enables visitors to interact with AI agents in real time for support, lead capture, appointment booking, and automated conversations.
The widget is fully customizable with branding, AI agent integration, business hours control, and usage limits. Users can configure and deploy the widget easily using generated embed code.
Dashboard
Access the Embeddable Widget module from:
- Toolbox Hub > Configure > Embeddable Widget
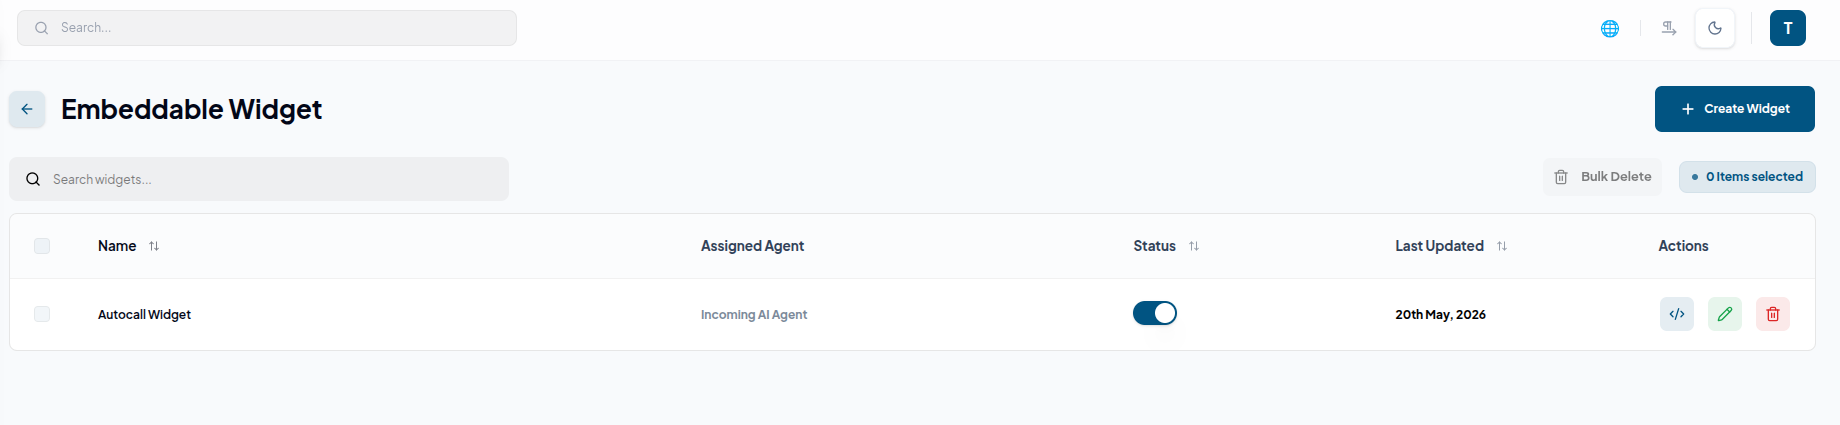
The dashboard displays all created widgets with details such as:
- Widget Name
- Assigned Agent
- Status
- Last Updated
- Actions
Users can:
- Create widgets
- Search widgets
- Edit configurations
- Copy embed code
- Delete widgets
- Perform bulk delete operations
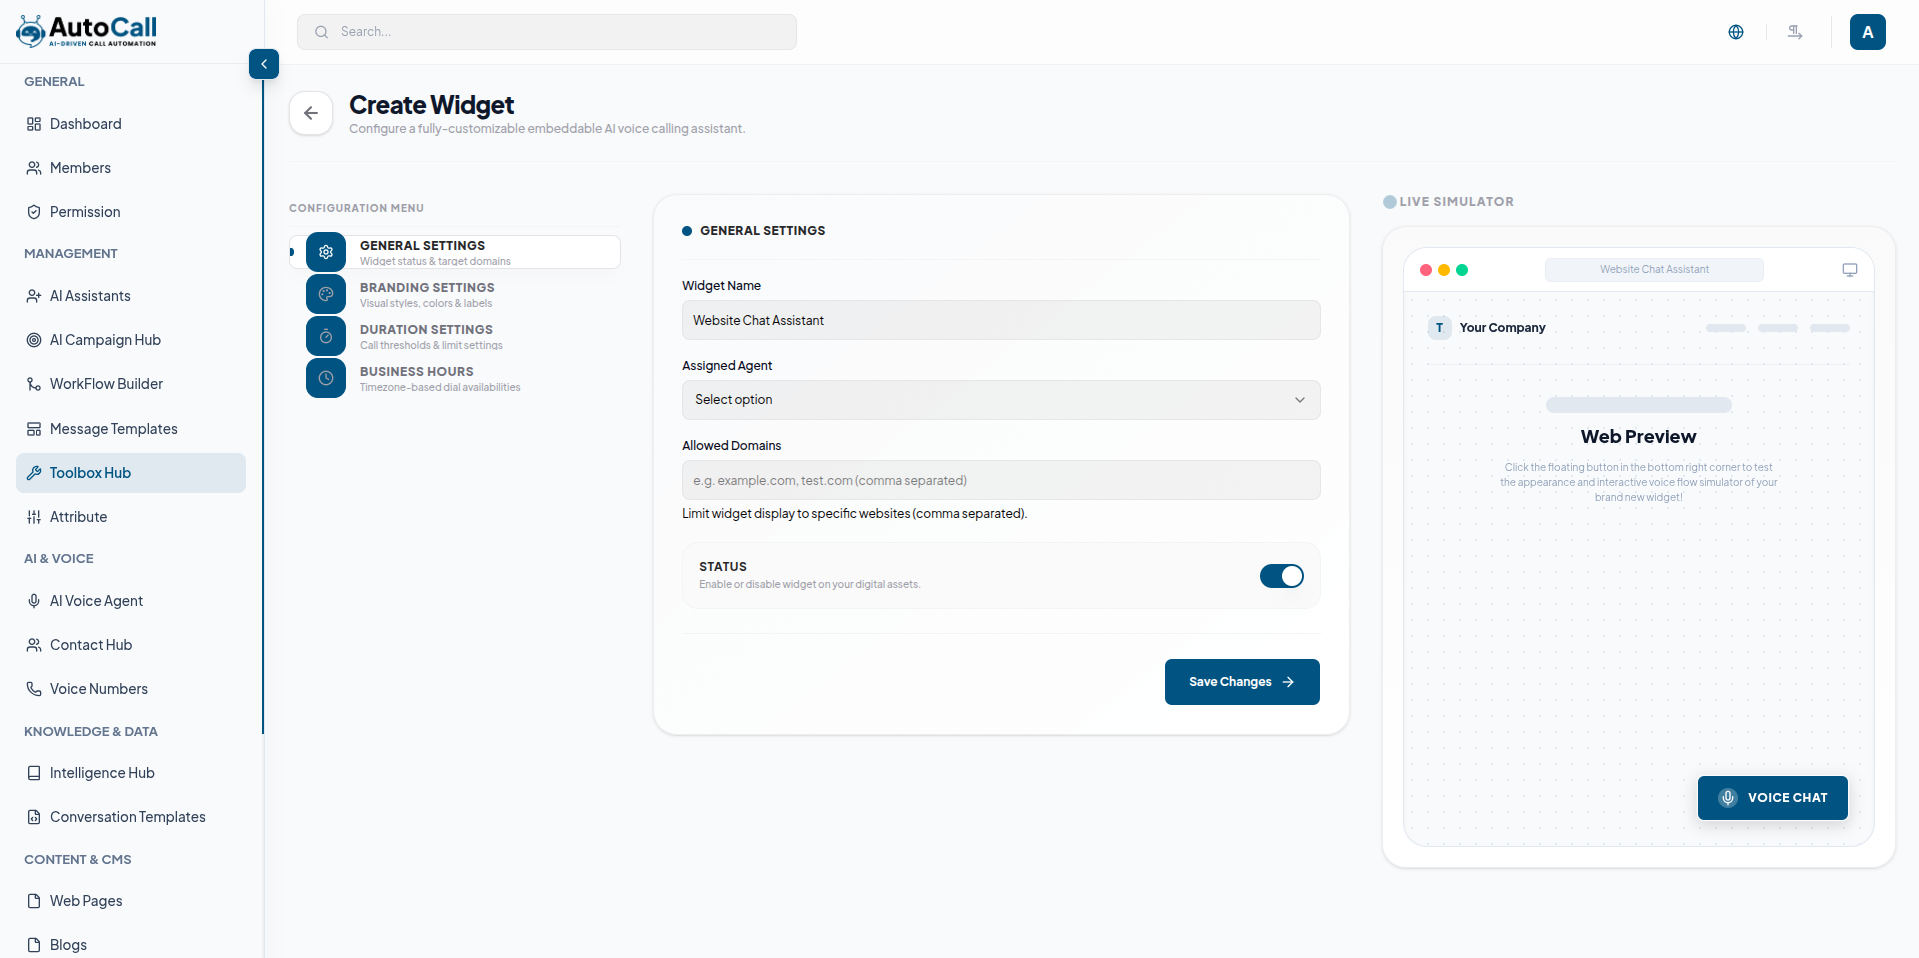
1. Create Embeddable Widget
Click the Add Widget button to configure a new AI widget.
The configuration screen contains:
- Configuration Settings Panel
- Live Simulator Preview
General Settings
Configure:
- Widget Name
- Assigned AI Agent
- Allowed Domains
- Widget Status
Branding Settings
Customize:
- Brand Name
- Button Label
- Logo Icon URL
- Primary Color
- Terms and Conditions Requirement
The Live Simulator updates instantly based on branding changes.
Duration Settings
Manage widget usage with:
- Maximum Call Duration
- Cooldown Time
- Maximum Sessions Per User
Business Hours
Configure widget availability using:
- Enable Business Hours Toggle
- Timezone Selection
- Start and End Time
- Available Working Days
After entering all required details, click the Create Widget button to save the configuration.
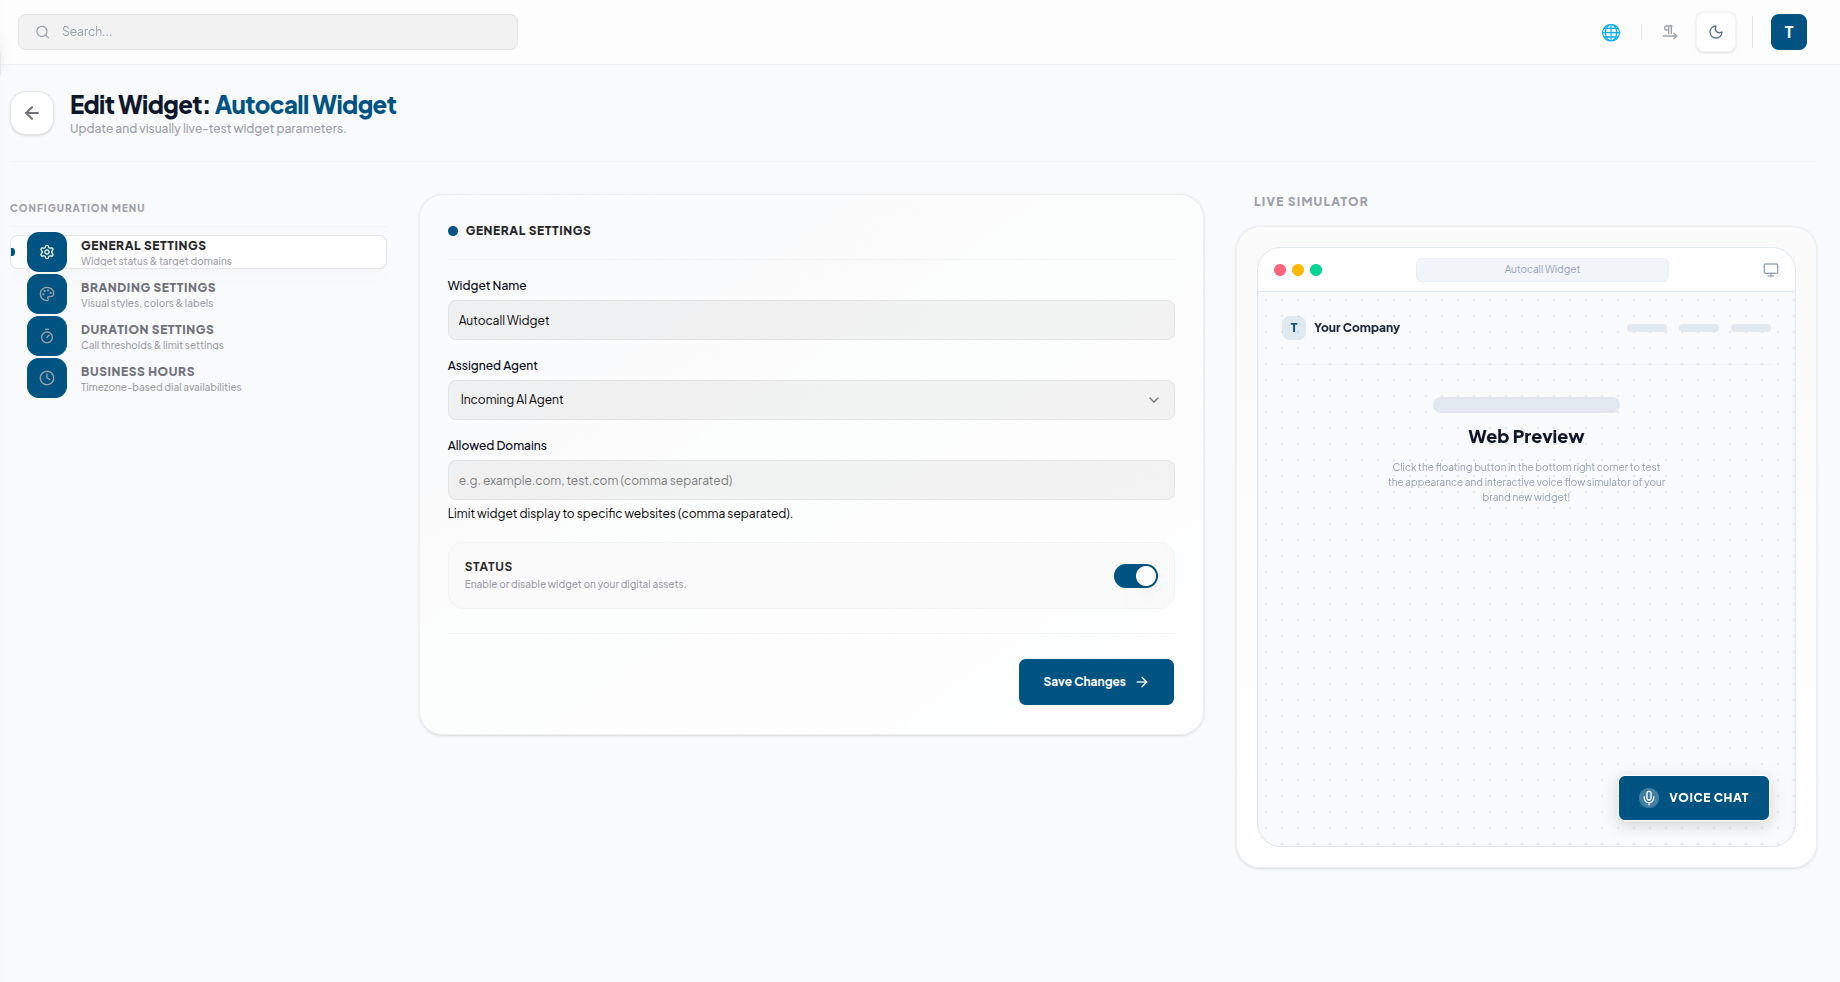
2. Edit Embeddable Widget
Click the Edit (pencil icon) of any widget to update its configuration. Users can modify branding settings, assigned AI agents, business hours, allowed domains and duration limits.
Once changes are completed, click Save Changes to apply updates.
3. Delete Embeddable Widget
Click the Delete (trash icon) to any widget to permanently remove it from the system. A confirmation prompt will appear before deletion to prevent accidental removal.
Once deleted, the widget and its embed configuration will no longer be available.

4. Deploy Widget
Click the Code (</>) icon from the Actions
column to generate the
widget embed code.
Copy the generated embed code and paste it into your website HTML before
the closing </body> tag. Once added, the AI voice and chat widget
will appear
on your website for visitor interaction.
Key Points
- Live Simulator provides instant widget preview during setup.
- AI Voice and Chat Widget enables real-time customer interaction.
- Embed Code Generation supports easy website integration.
- Business Hours Control manages widget availability.
What's Next?
Let's get started — your journey with AutoCall begins here!