 WhatsApp
Connection
WhatsApp
Connection
Overview
Connect your WhatsApp Business account with Meta to enable automated customer communication directly from the platform. This integration allows workflows to send WhatsApp messages using the connected business number.
For example, when users complete an appointment booking flow, the system can automatically send confirmation messages, appointment details, and updates through WhatsApp.
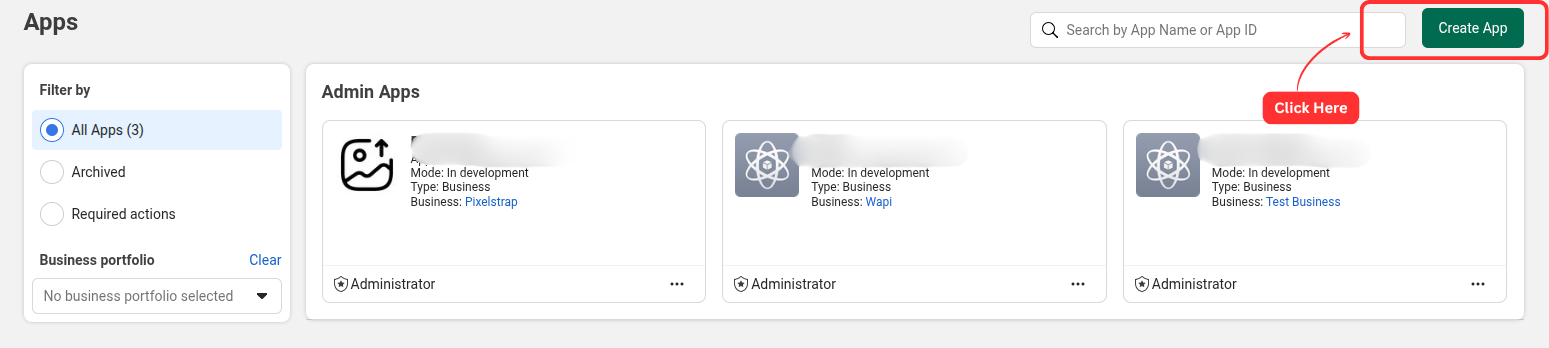
Step 1: Create Meta App
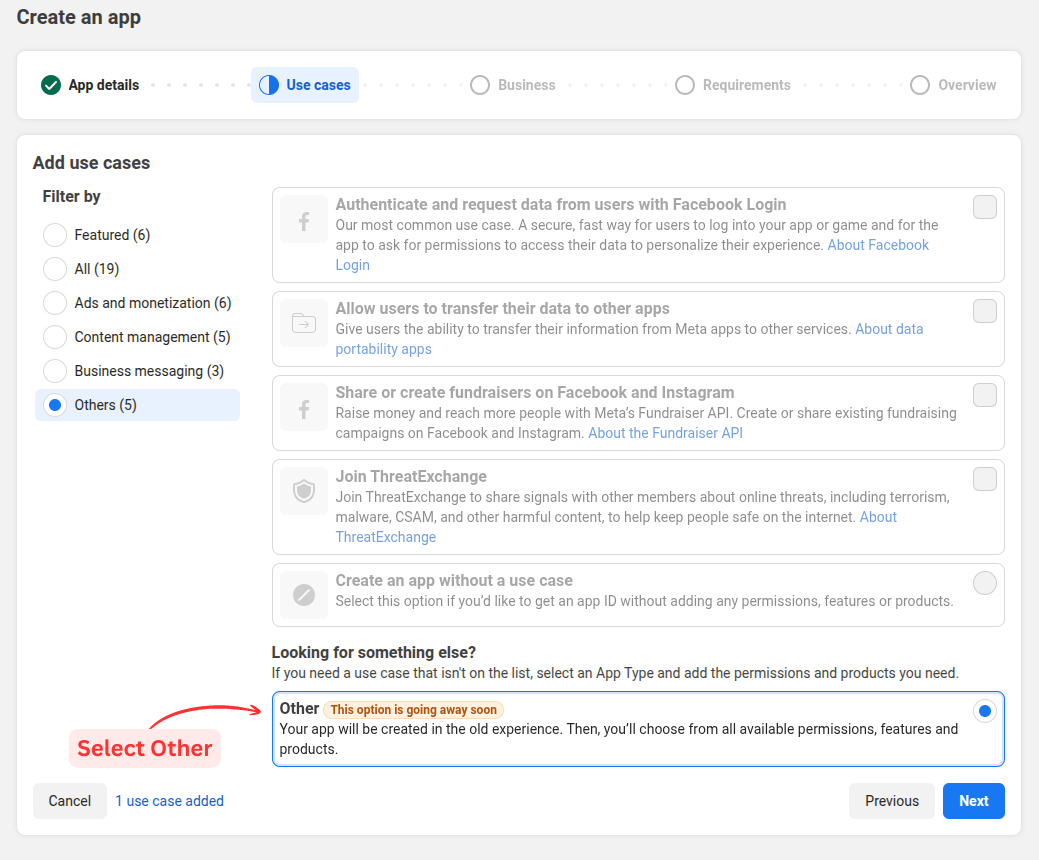
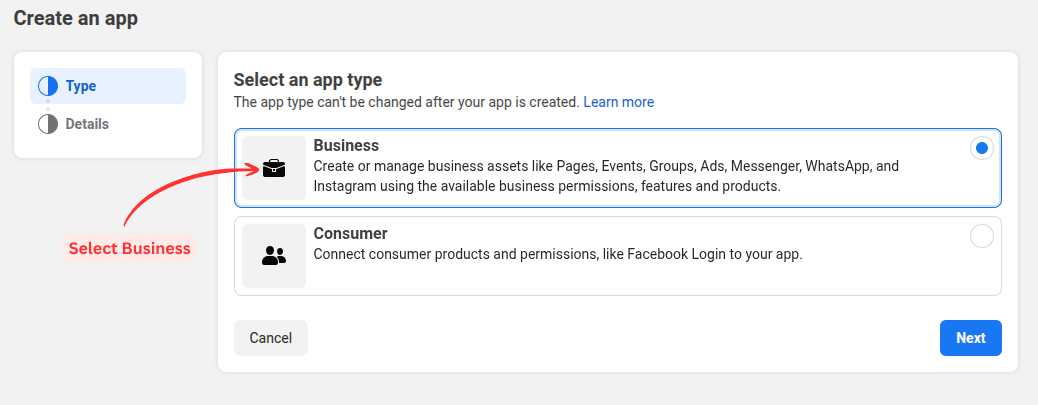
Go to developers.facebook.com. Click Create App and select Business type, then press the Next button.
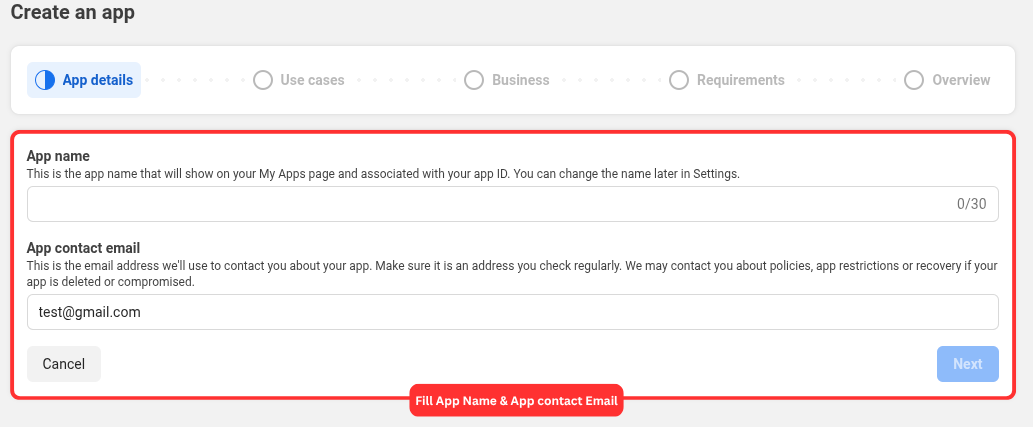
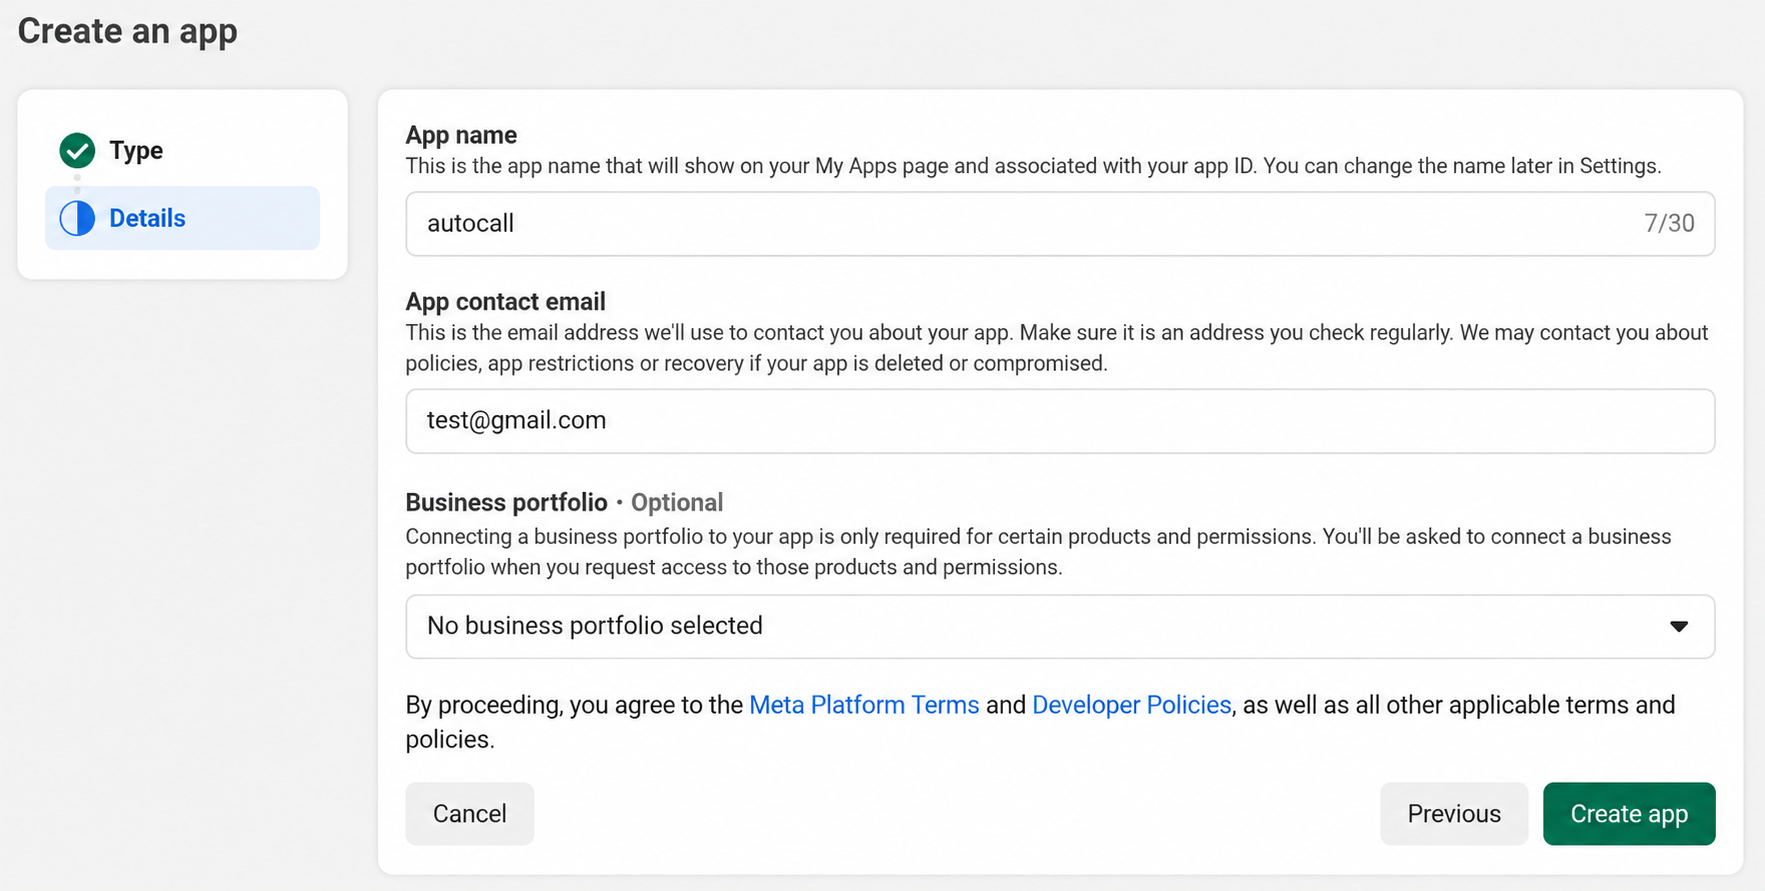
Complete the form by entering your basic details:
- Display Name: Provide a name for your business app.
- App Contact Email: Enter your business email
- Business Account: Choose a Business account if needed (optional).
Click the Create App button.
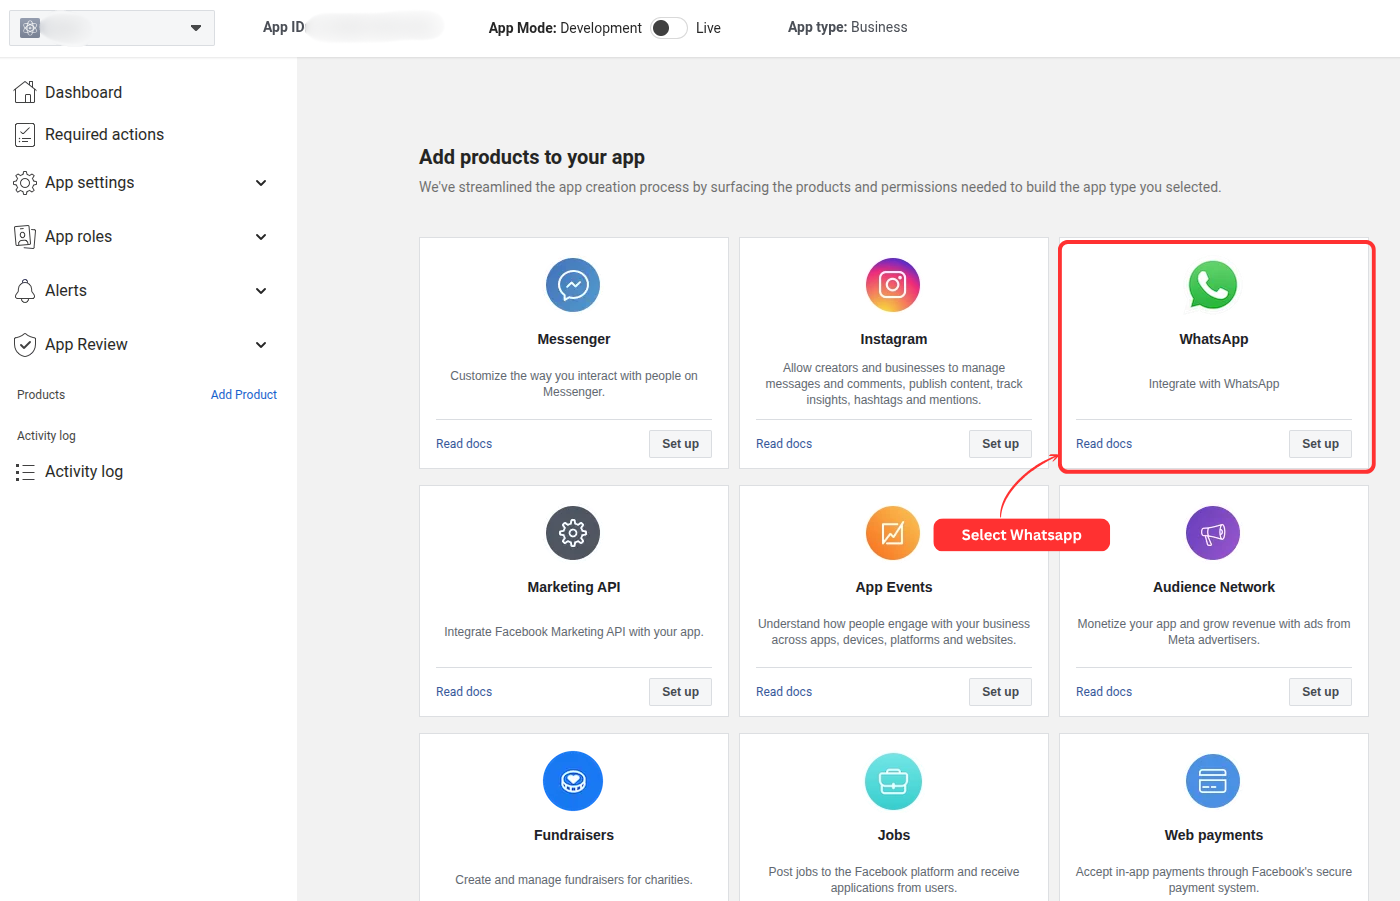
To enable WhatsApp integration, add the WhatsApp product to your app. Scroll down to the WhatsApp section and click Set Up.
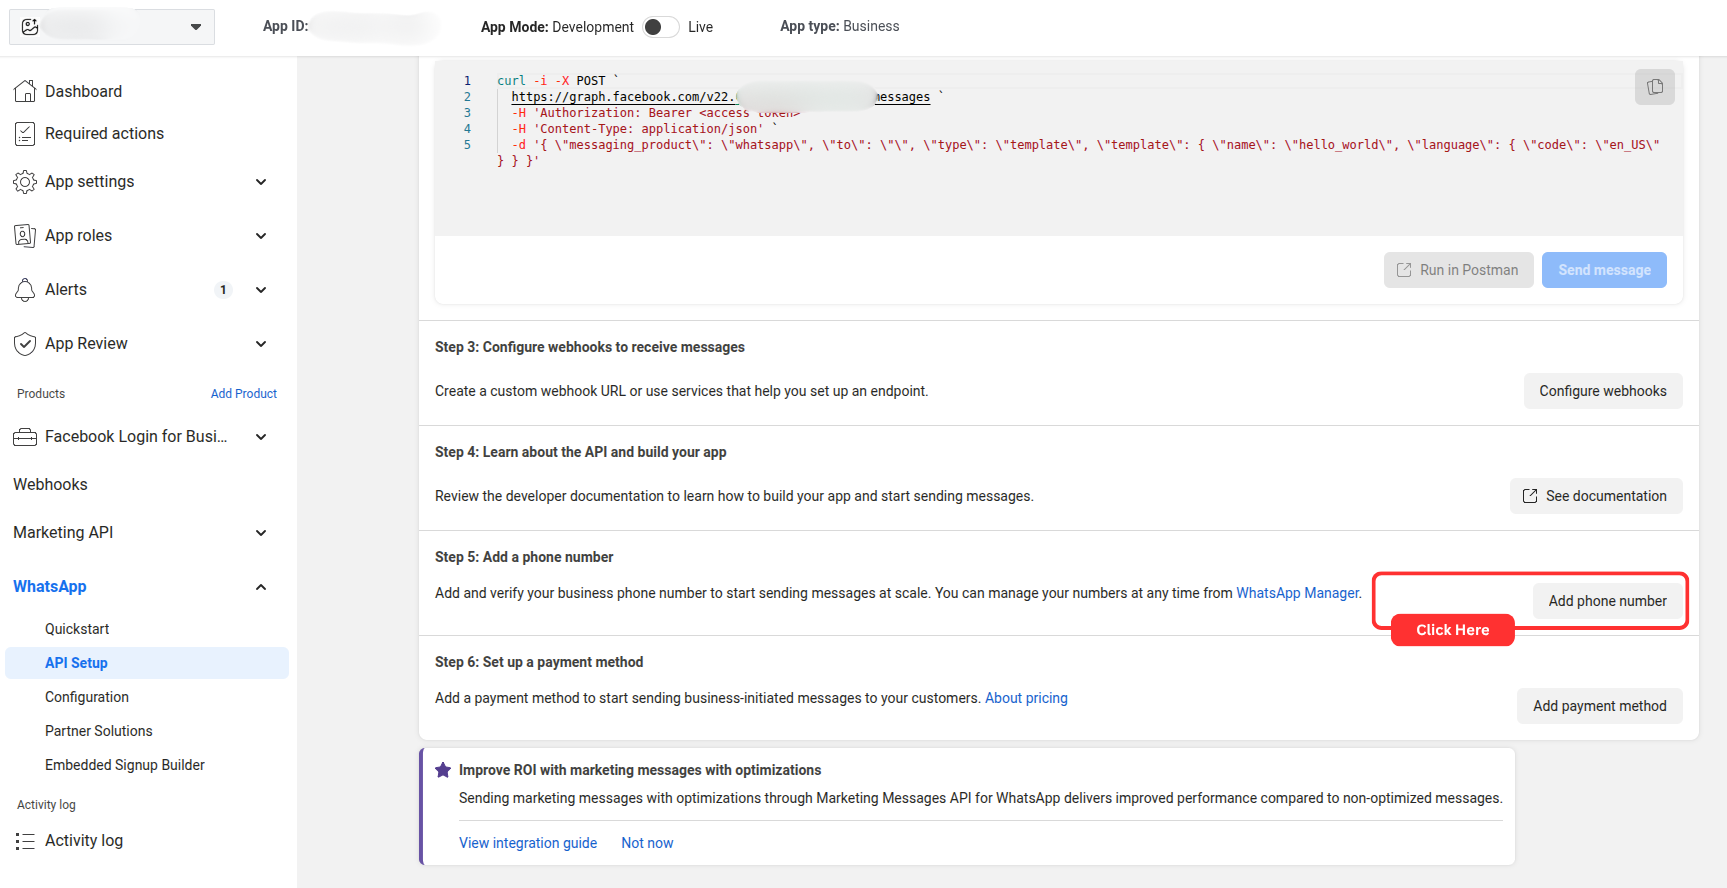
Step 2: Open WhatsApp API Setup
After clicking Set Up, you will land on the WhatsApp dashboard. Scroll down to the API Setup section in the left sidebar. Click Add Phone Number to begin the registration.
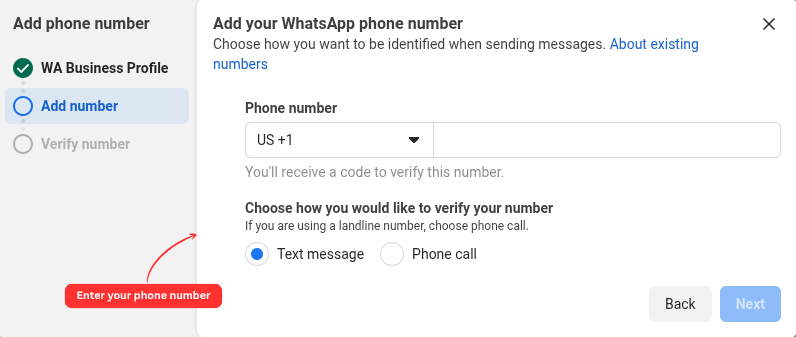
Enter your business profile details:
- Display Name: The name customers will see on WhatsApp.
- Category: Choose the category that best describes your business.
Click Next to proceed.

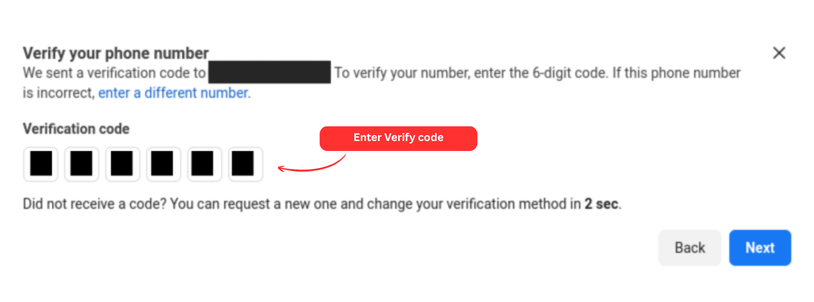
Enter your phone number and choose your verification method (Text Message or Phone Call).
Step 3: Generate Access Token & Assign Assets
Go to Meta Business Manager → System Users. Click Add and create a system user with Admin role.

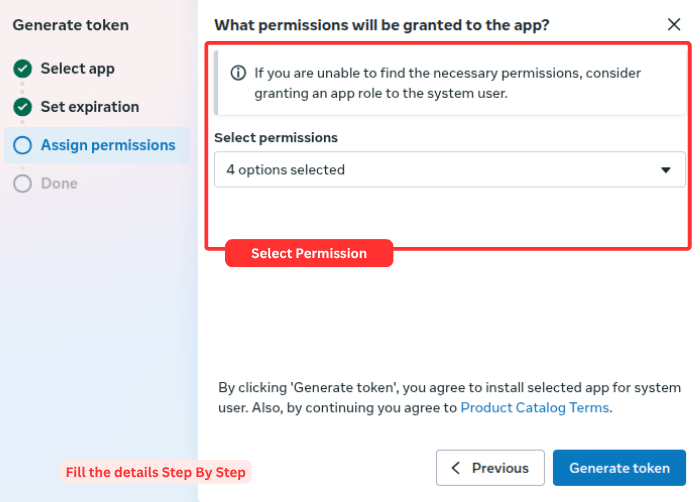
Select the system user and click Generate Token.


Choose your app and grant the following permissions:
business_managementwhatsapp_business_managementwhatsapp_business_messagingcatalog_management
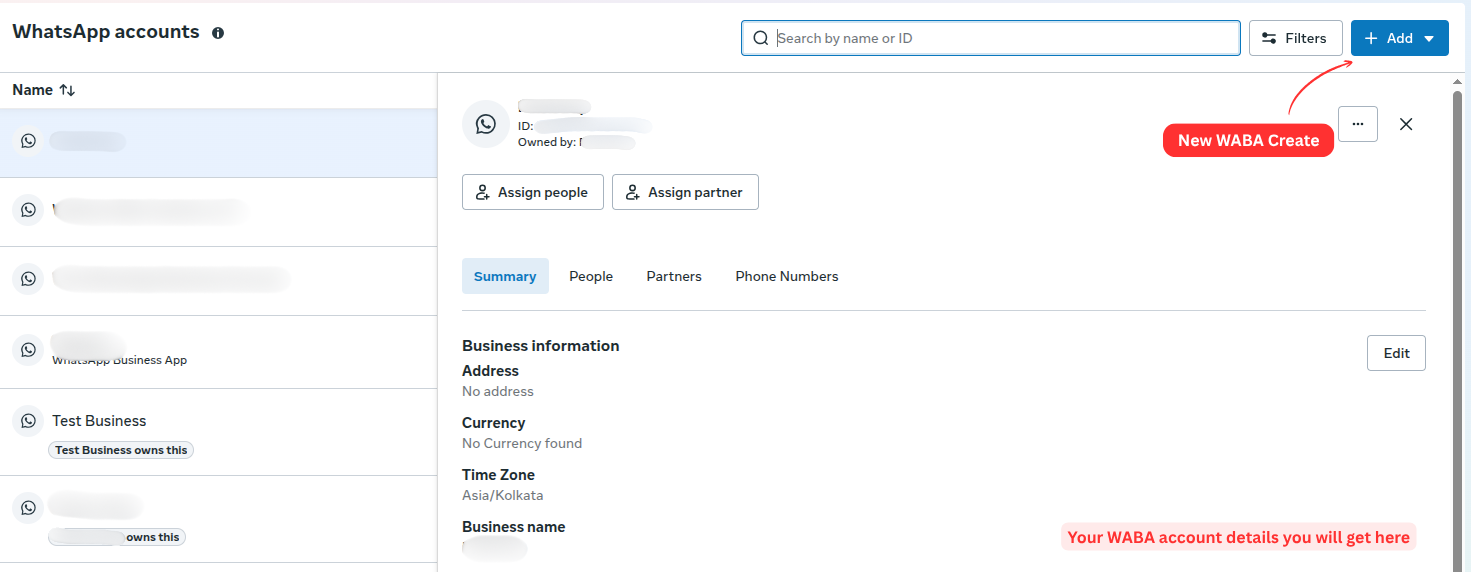
Step 4: Get WhatsApp Business Account ID
Go to Business Manager → Business Settings. In the left sidebar, open Accounts → WhatsApp Accounts. Select your account and copy the WhatsApp Business Account ID.
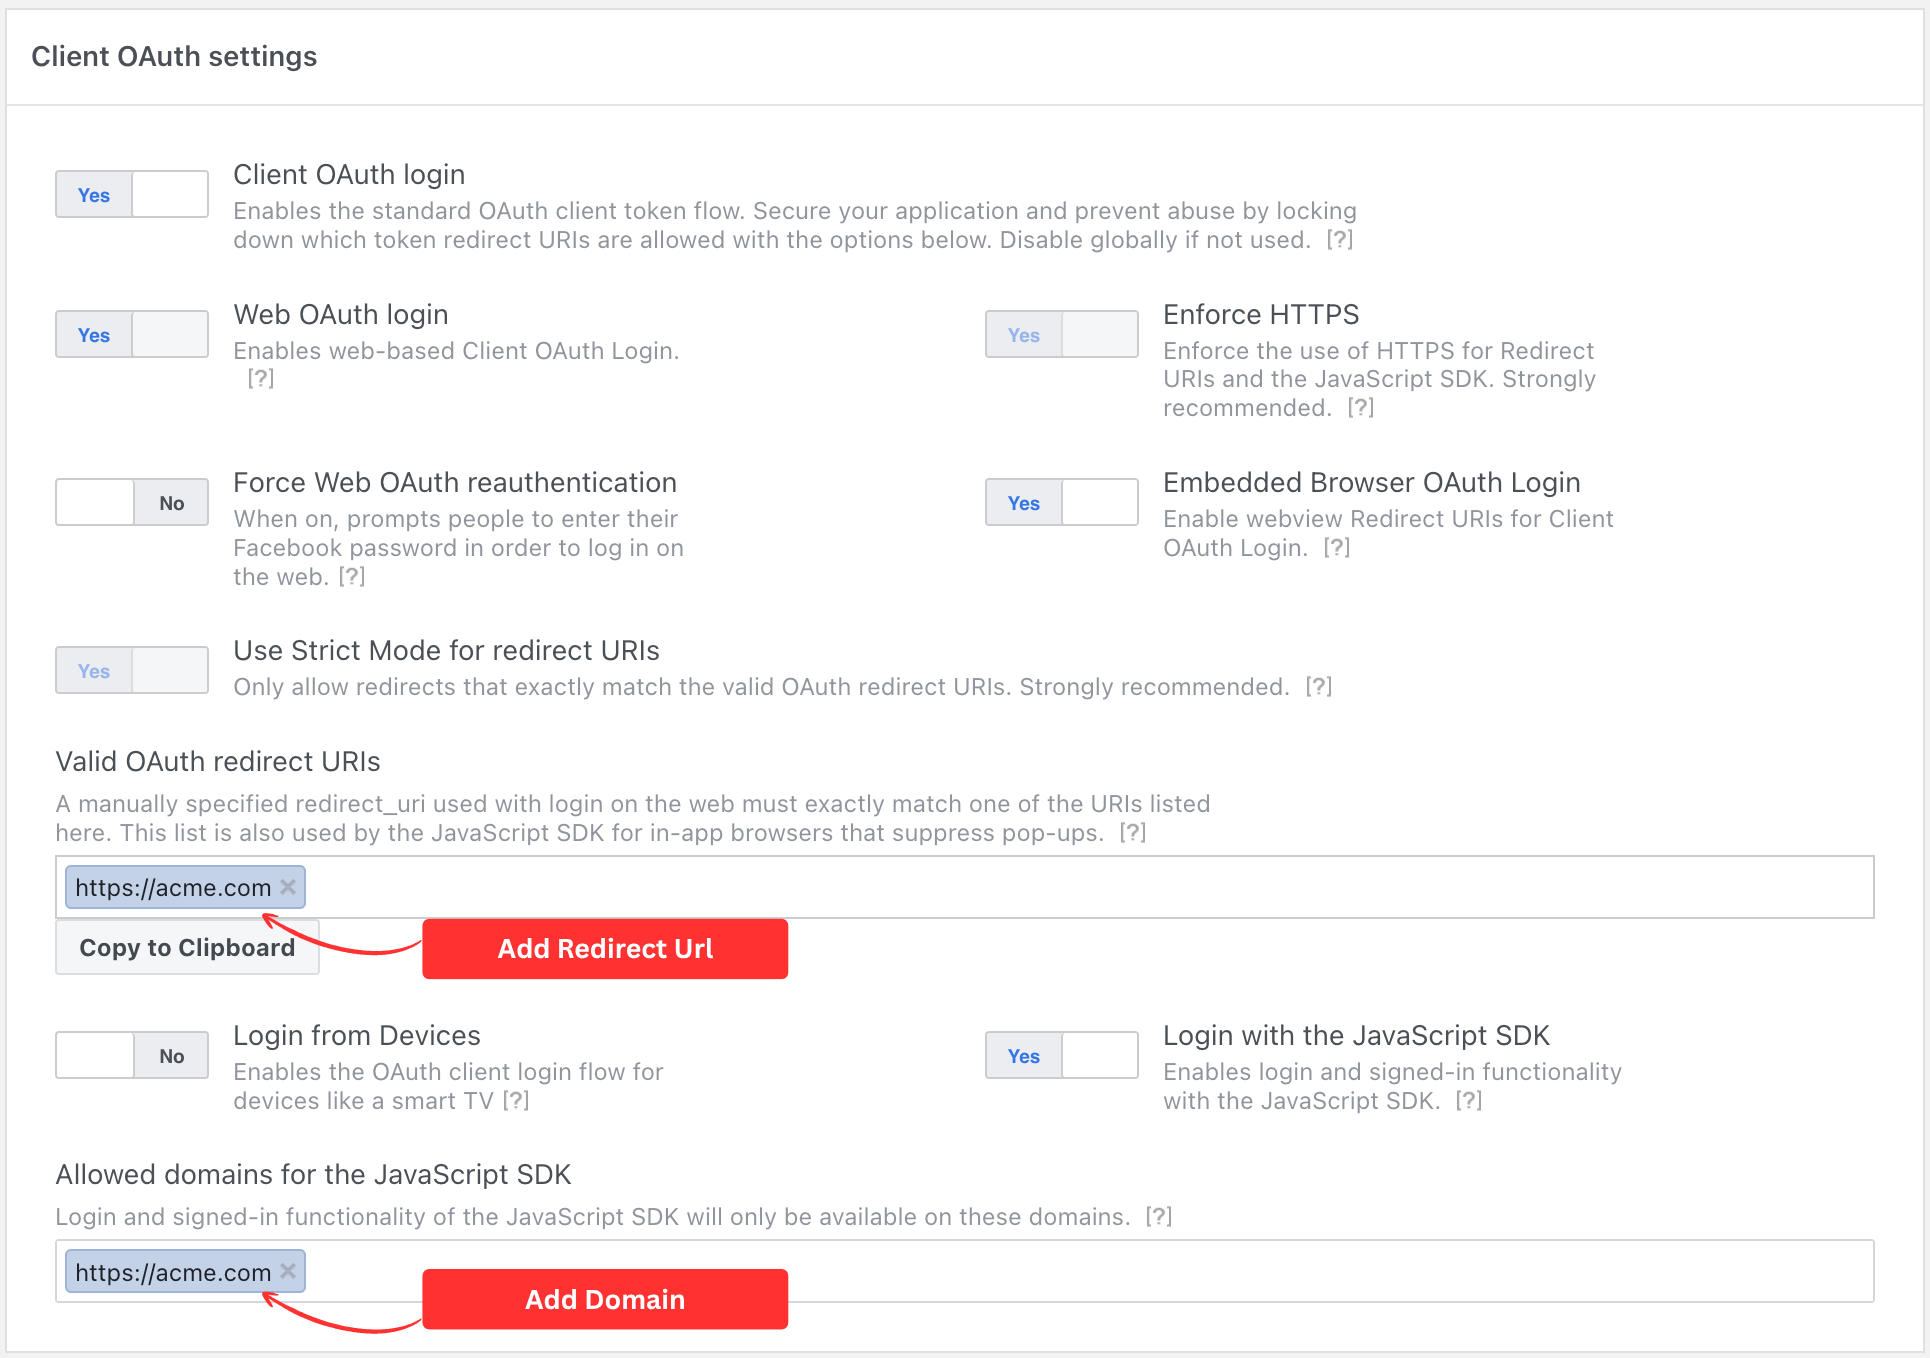
Step 5: Add Allowed Domains
Load your app in the Meta App Dashboard and navigate to Facebook Login for Business → Settings → Client OAuth settings. Configure your authorized domains and redirect URLs.
Step 6: Configure Webhook
To enable real-time messaging, you must configure the webhook settings in both your environment file and the Meta Developer Portal.
System Environment Setup
Add the following variables to your .env file:
WHATSAPP_VERIFY_TOKEN : A secure random string for
validation.
APP_URL : Your base application URL.
Meta App Configuration
Go to WhatsApp → Configuration in the sidebar to register your webhook callback.
Webhook URL: https://yourdomain.com/webhook/whatsapp
Verify Token: Use the sameWHATSAPP_VERIFY_TOKENfrom your.envfile.
Click Verify and Save to complete the real-time data connection.
- Security First: Always store your Permanent Token in a secure environment. Never share it publicly.
- Alternative Option: Consider our Embedded Signup workflow if you prefer an automated, guided setup experience.
- Support: Our technical team is available if you encounter any challenges during the manual setup journey.
What's Next?
Let's get started — your journey with AutoCall begins here!