 Connect With Admin :
NOTE :
Before launching the app, ensure you have correctly set up the ADMIN LARAVEL and
have added all
necessary data through the admin panel.
 Firebase Collection:
As you have know there are multiple collection has been used in firebase. Let's see what is the use of the collection and how it added
There are 5 collections created in the firebase
- chats - [Auto generate]
- driverTrack - [Auto generate]
- driver_ride_requests - [Auto generate]
- ride_requests - [Auto generate]
- rides - [Auto generate]
- users - [Auto generate]
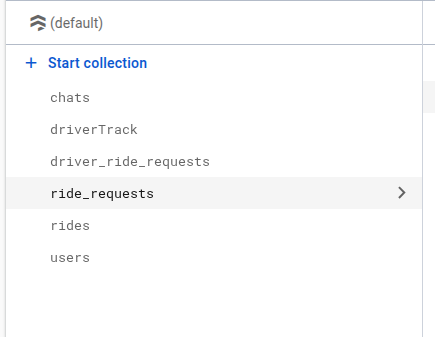
NOTE :
In above collection list [Auto generate] means this collections are
generate in firebase whenever any first user enter any data
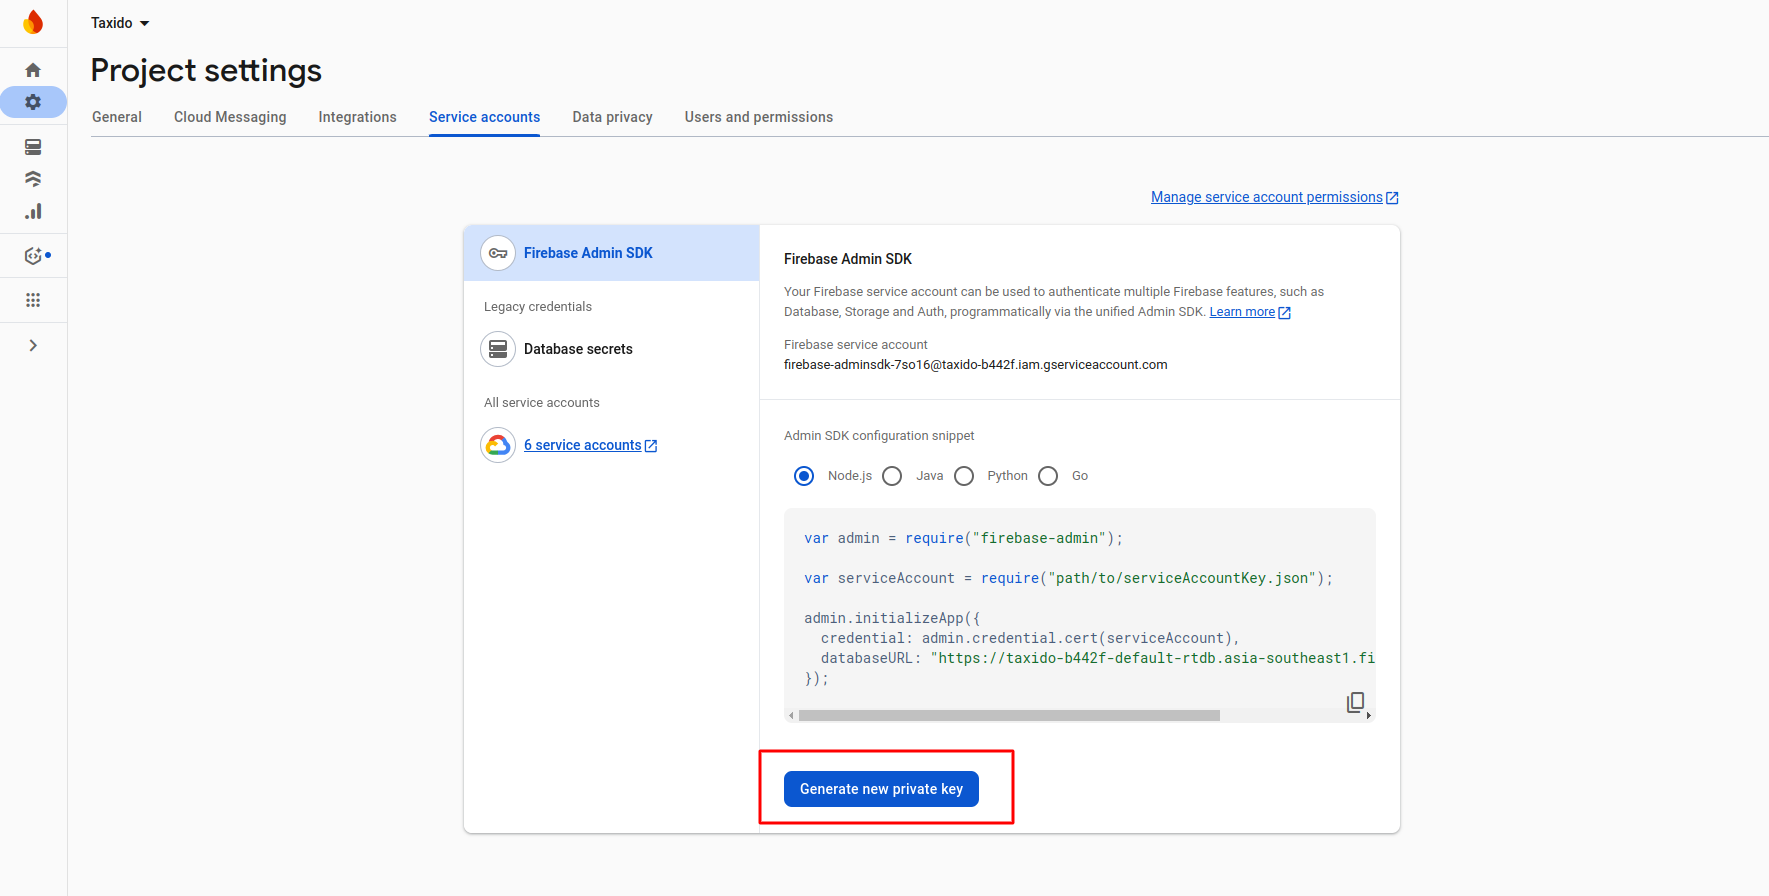
- Now go to Service accounts
To get the
firebase.jsonfile, just follow the steps below. - Go to Firebase Console
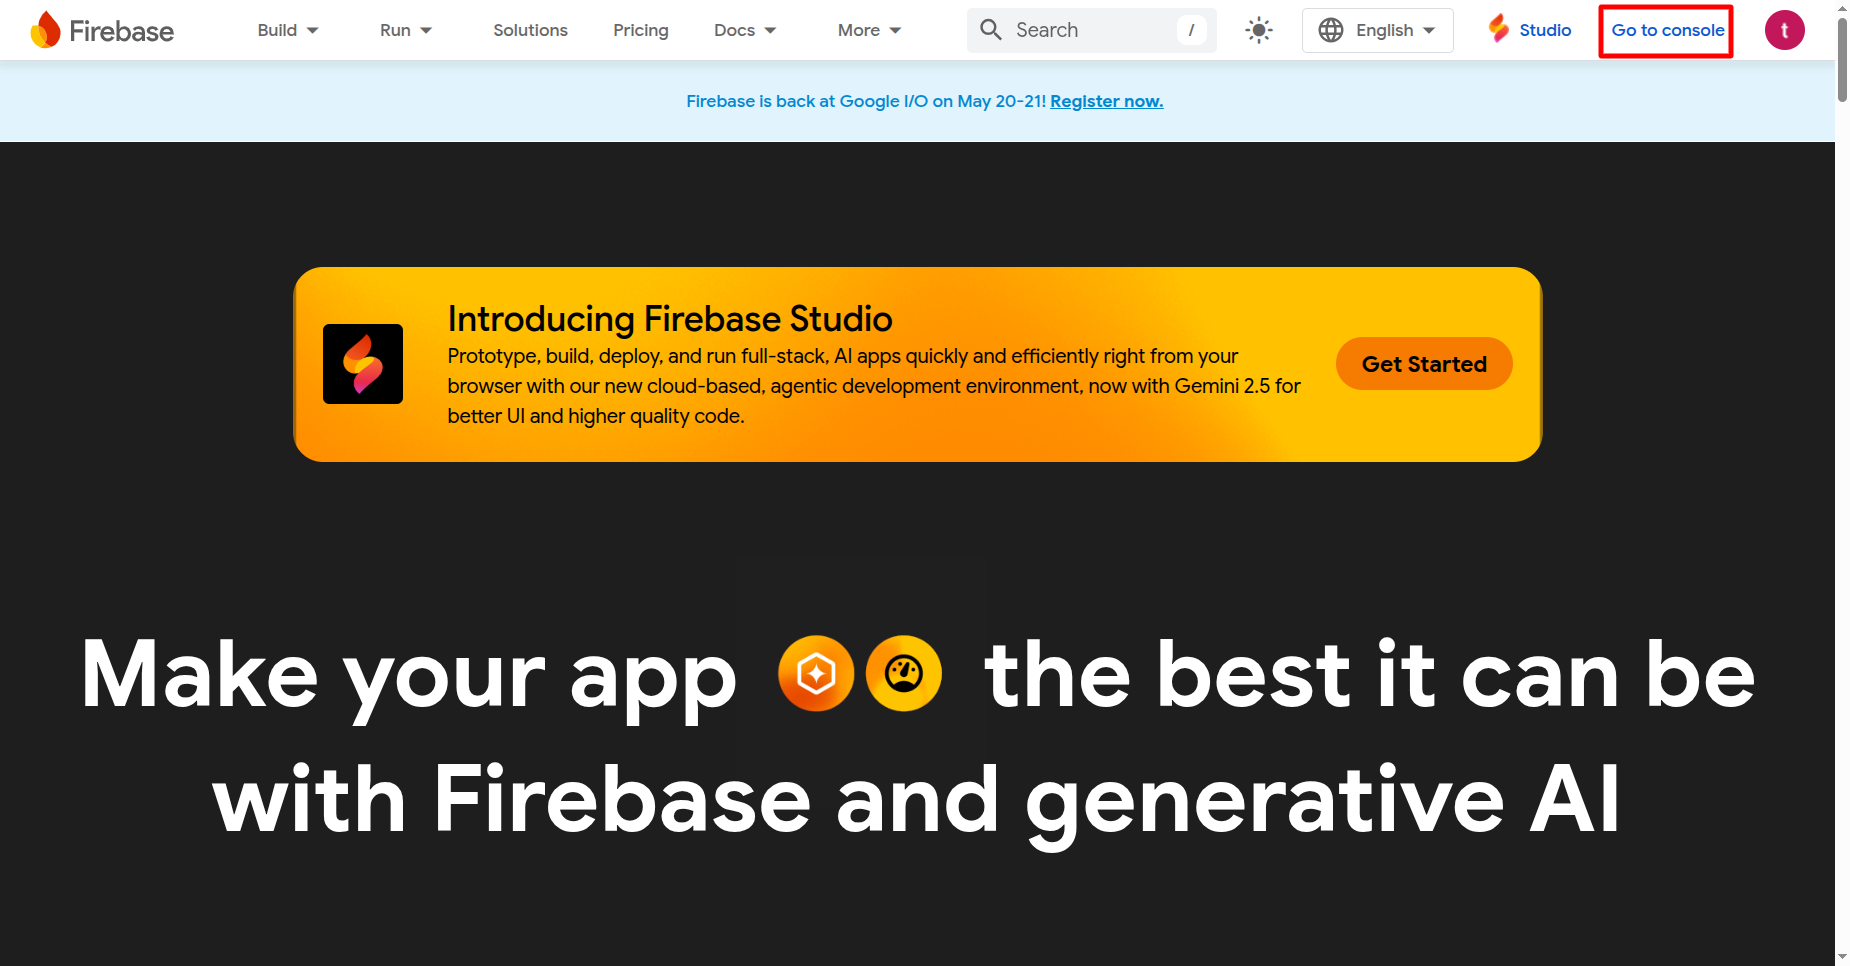
- Now go to your Firebase project, On left hand side panel click on setting
icon. On click Setting button pop open. In that click on Project
Settings
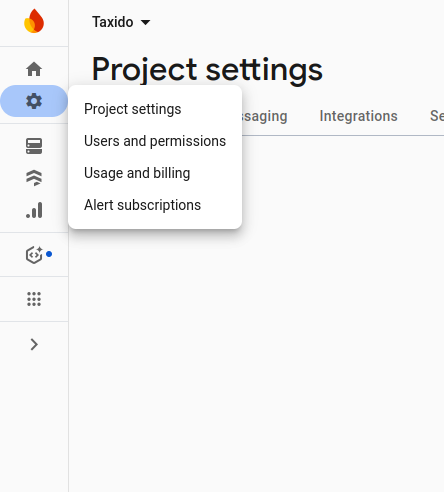
- Now go to Service accounts
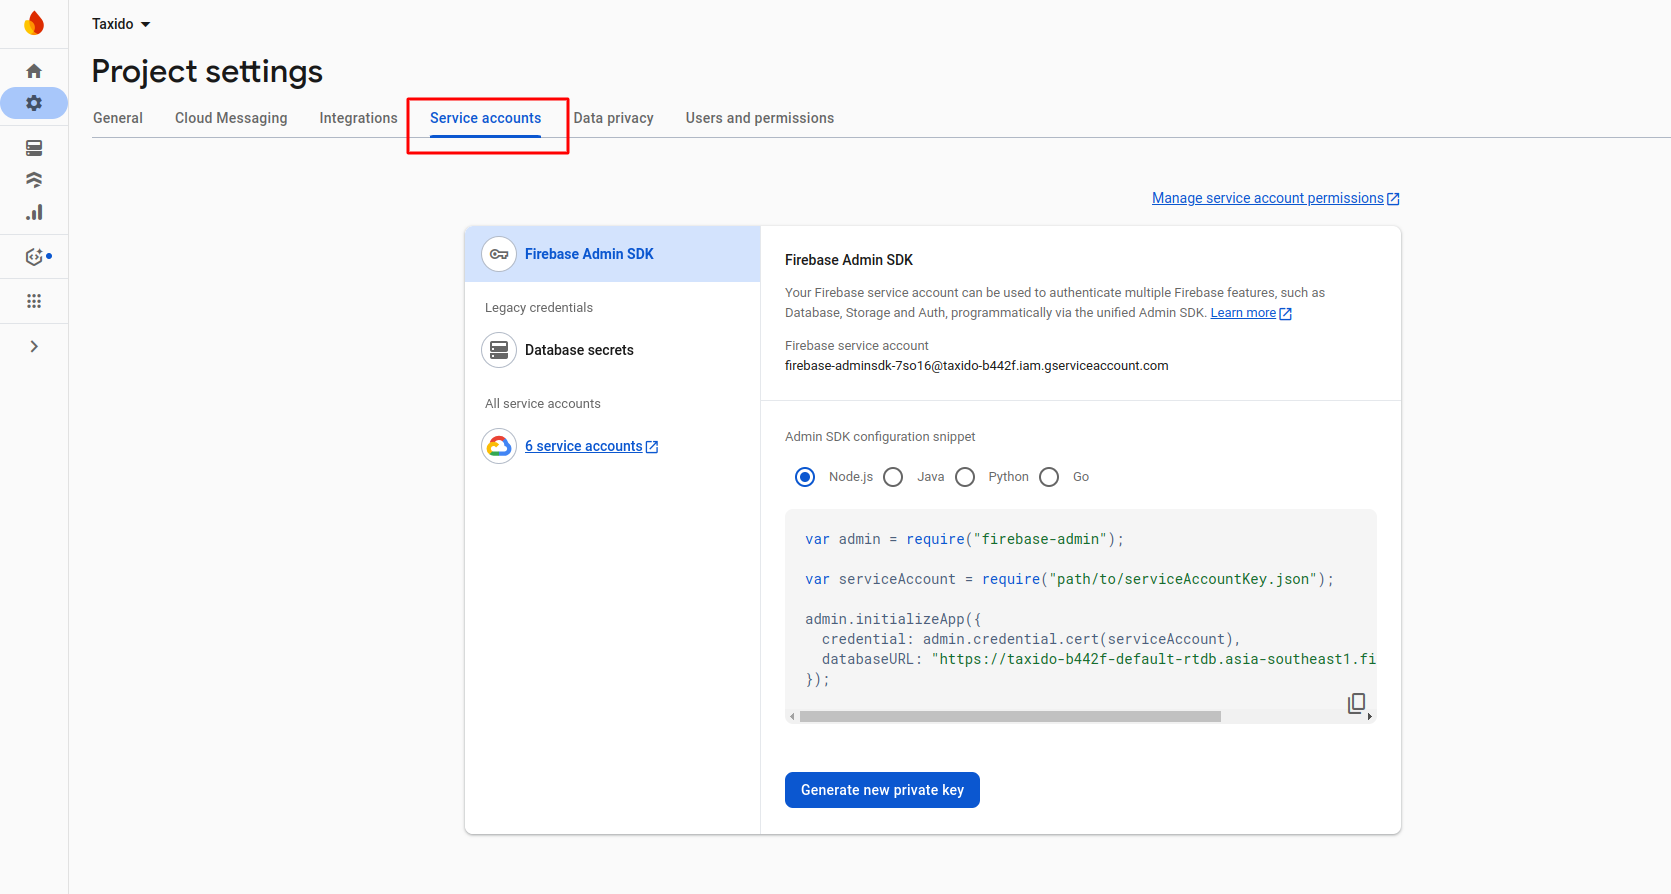
-
Now click on button Generate new private key
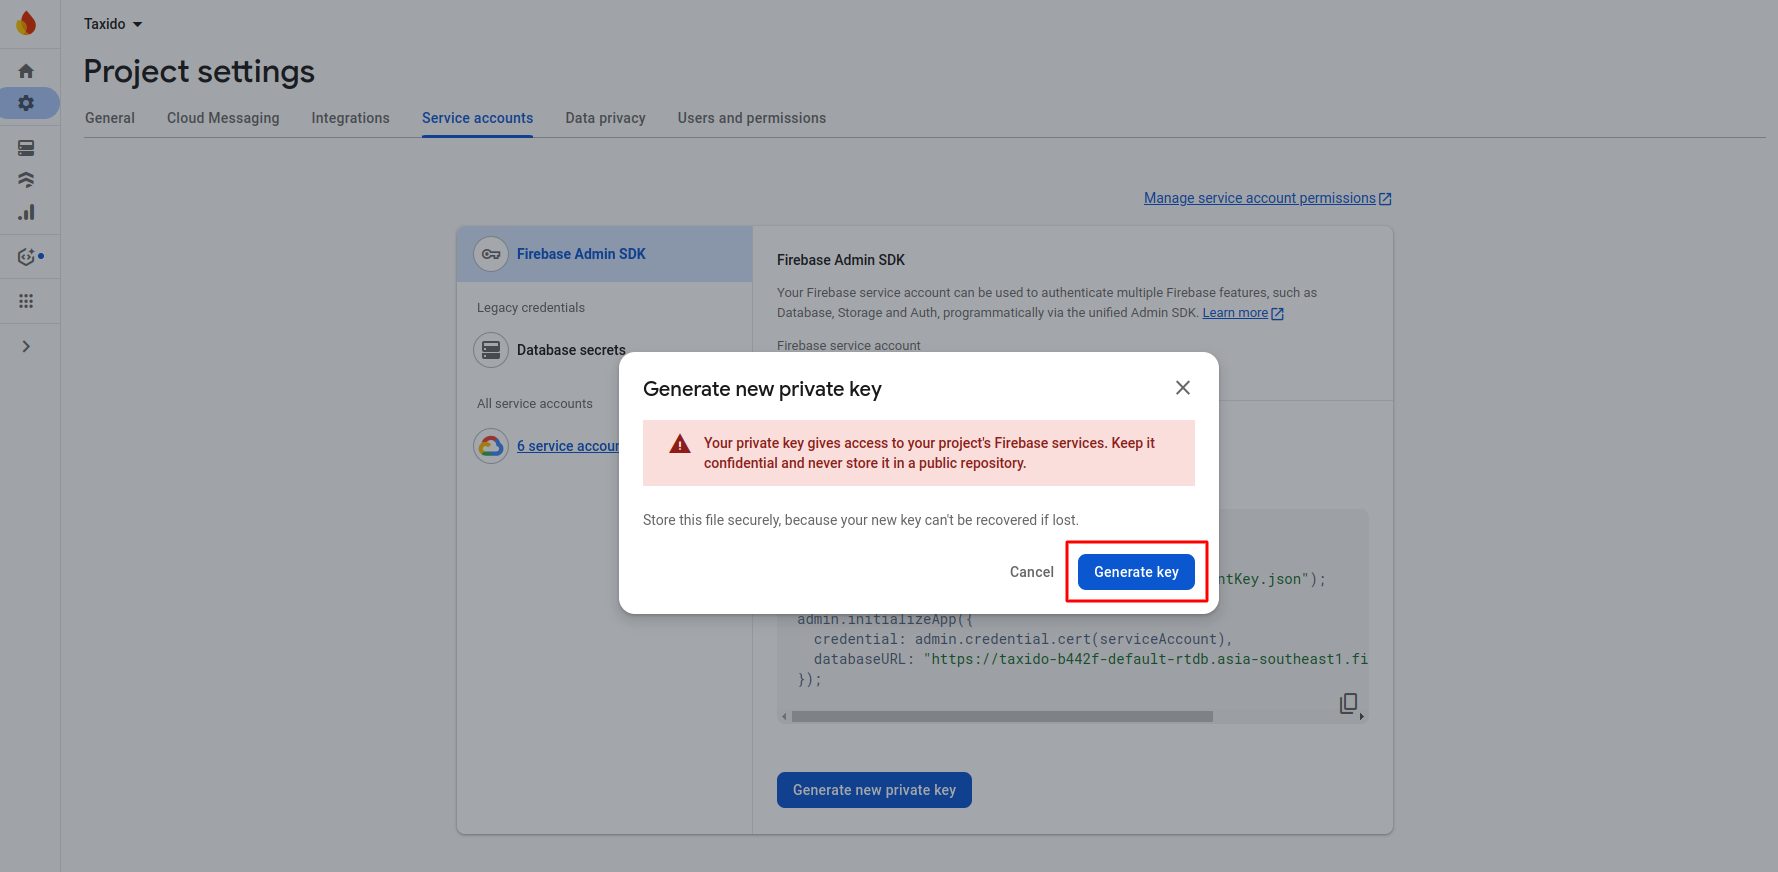
-
After click on button on pop-up appear int that click on Generate
key
-
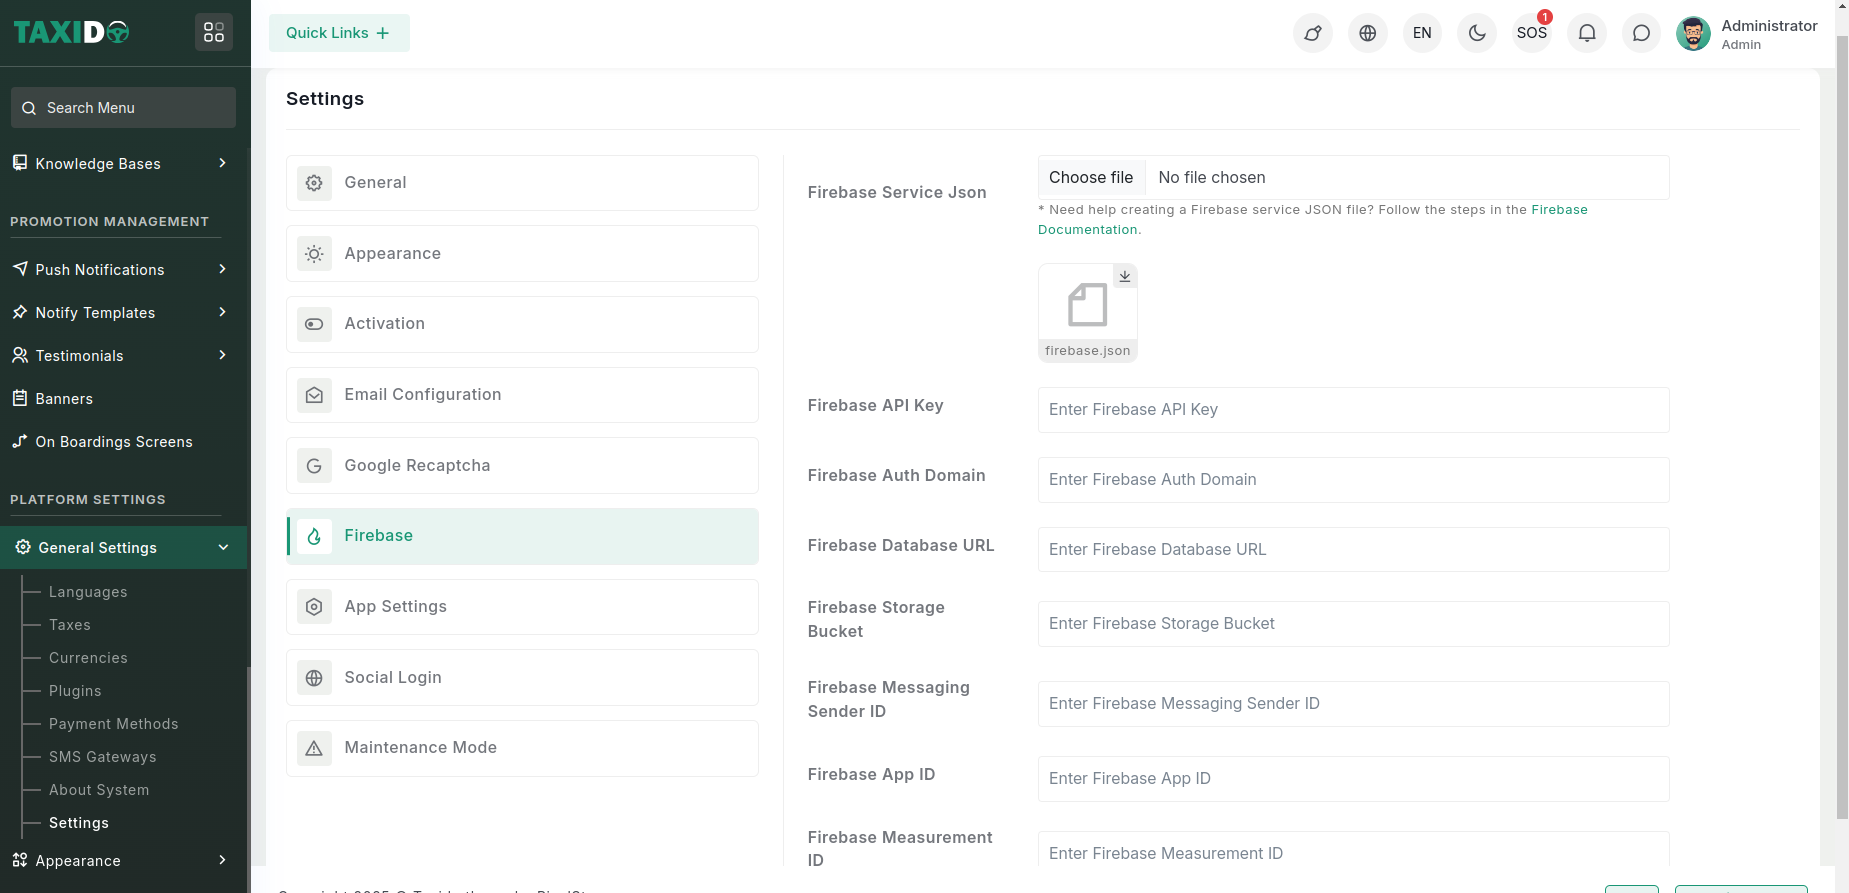
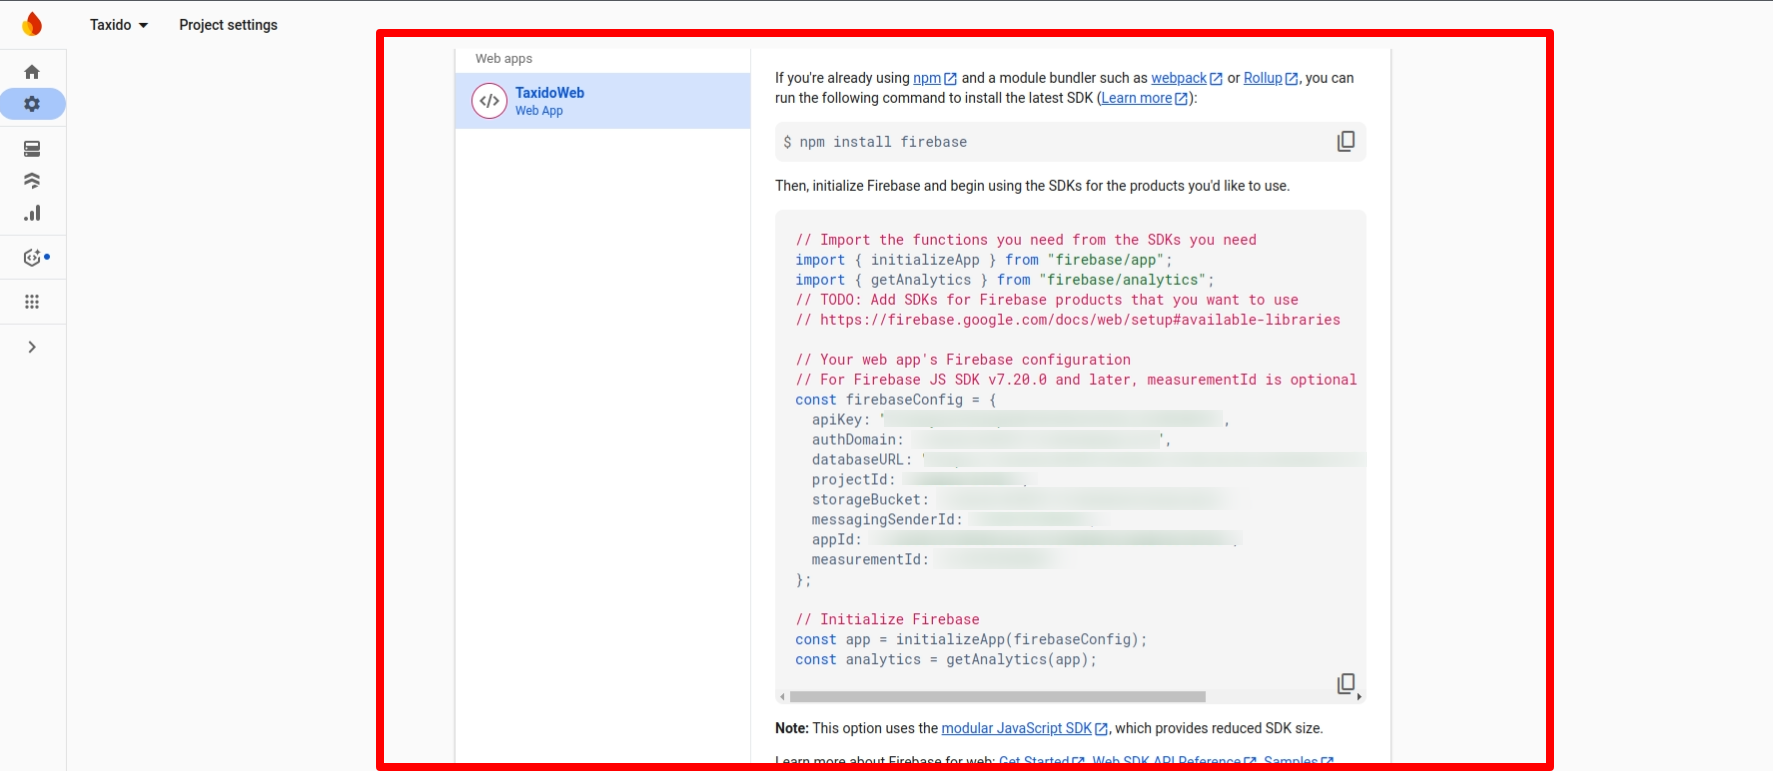
Firebase API Key: Used to identify your Firebase
project when using
client-side SDKs.
Find it in: Firebase Console → Project Settings → General → Web API Key -
Firebase Auth Domain: Domain used for Firebase
Authentication
(usually ends with
.firebaseapp.com).
Find it in: Firebase config JSON →authDomain -
Firebase Database URL: URL to access your Firebase
Realtime
Database.
Find it in: Firebase Console → Realtime Database → Database URL -
Firebase Storage Bucket: Used to store user files
like
images or
documents.
Find it in: Firebase config JSON →storageBucket -
Firebase Messaging Sender ID: Unique ID used for
Firebase Cloud
Messaging (push notifications).
Find it in: Firebase config JSON →messagingSenderId -
Firebase App ID: Unique identifier for your
application registered with Firebase.
Find it in: Firebase config JSON →appId -
Firebase Measurement ID: Used for integrating with
Google Analytics
(optional).
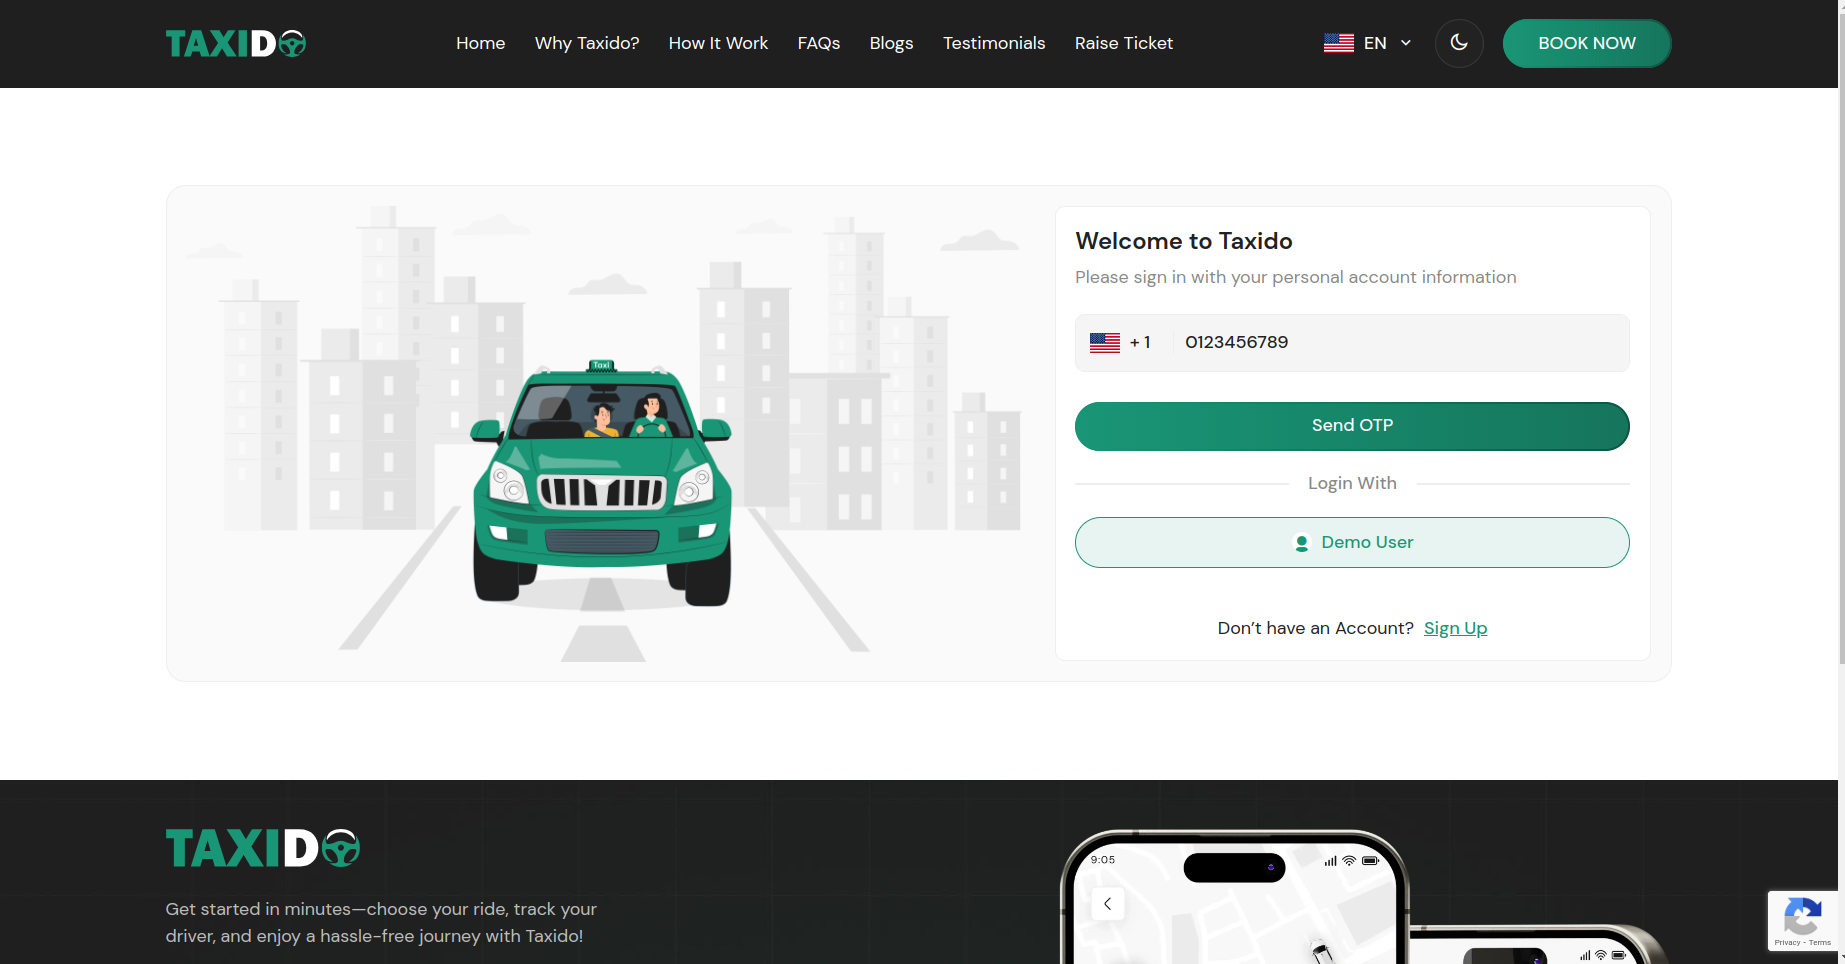
Find it in: Firebase config JSON →measurementId - User visits the login page and enters their mobile number.
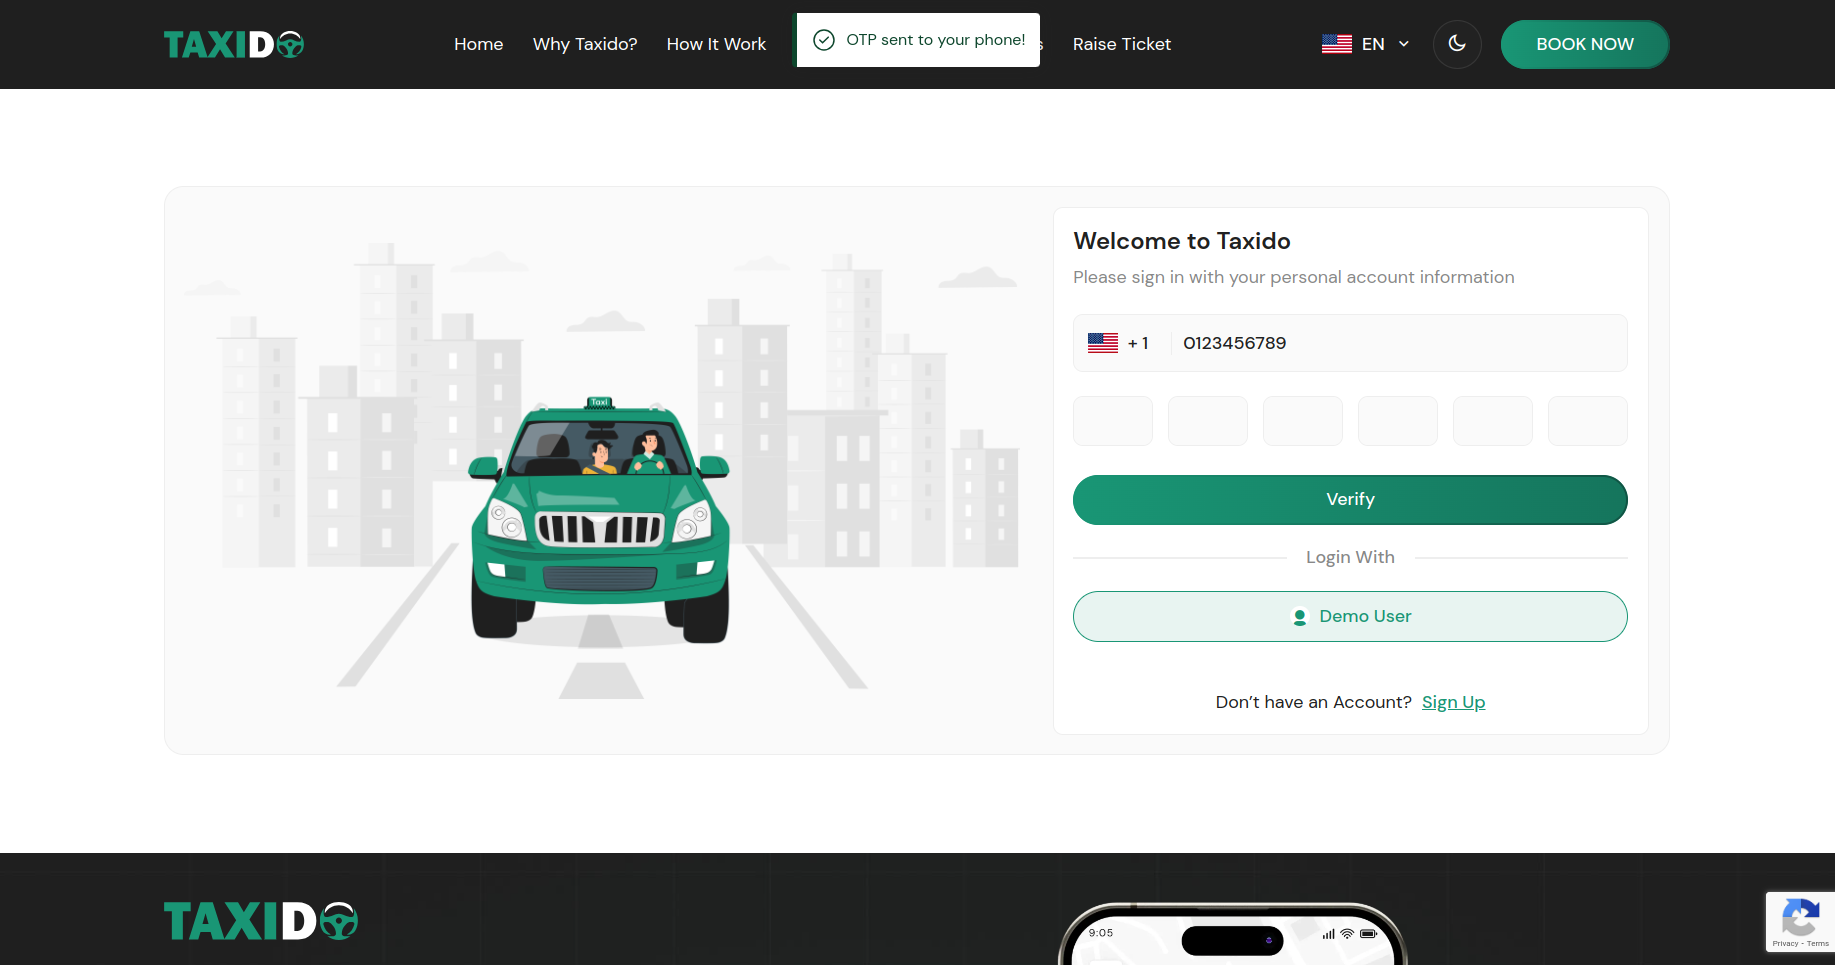
- On clicking "Send OTP", Firebase sends a verification code via SMS.
- The user enters the OTP in the input fields and clicks "Verify".
-
Upon successful verification:
- If the number already exists in Firebase, the user is logged in directly.
- If the number is not registered: the user is redirected to a manual registration form to fill in details like name, email, etc.
- The Firebase UID and access token are stored in your backend for future logins.
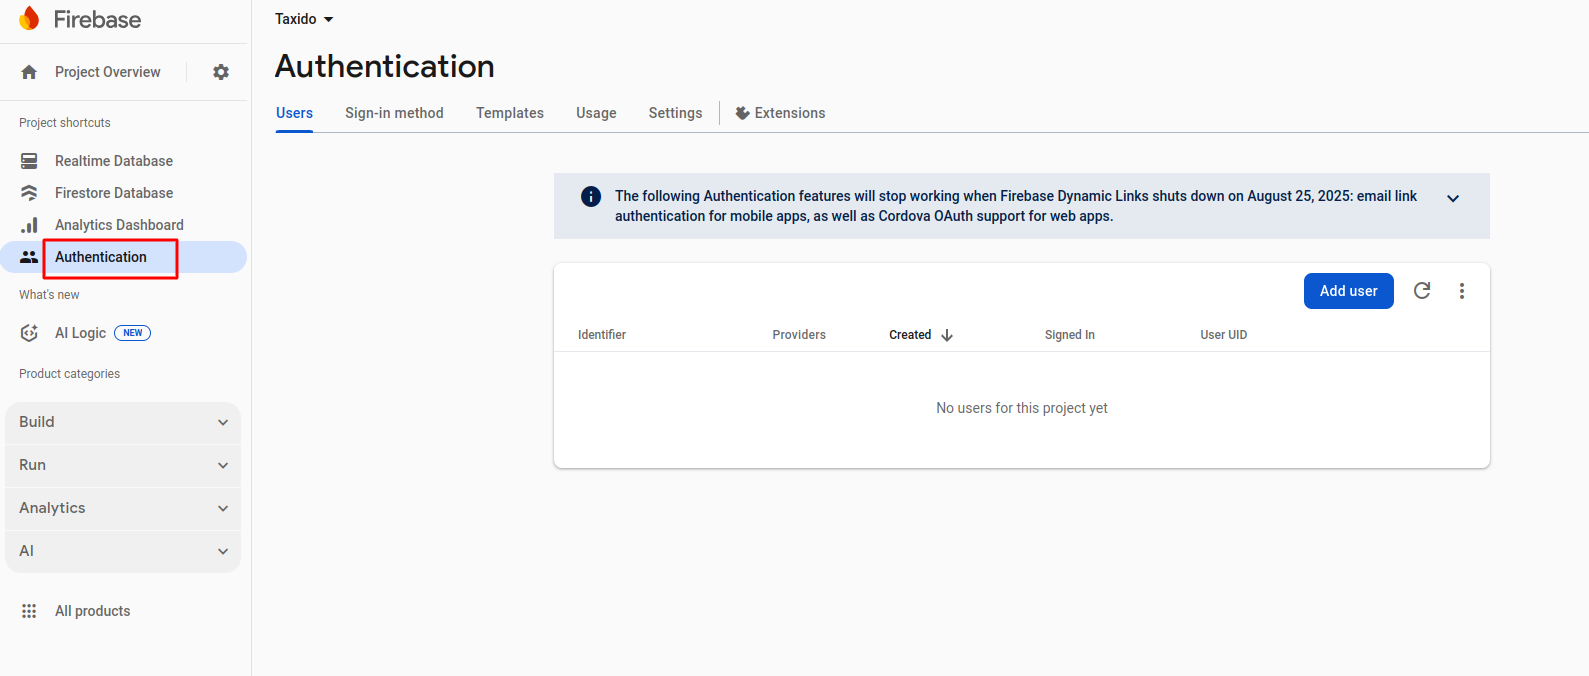
-
Go to the Authentication tab in your
Firebase project.
-
Click on the Sign-in Method section from
the left sidebar.
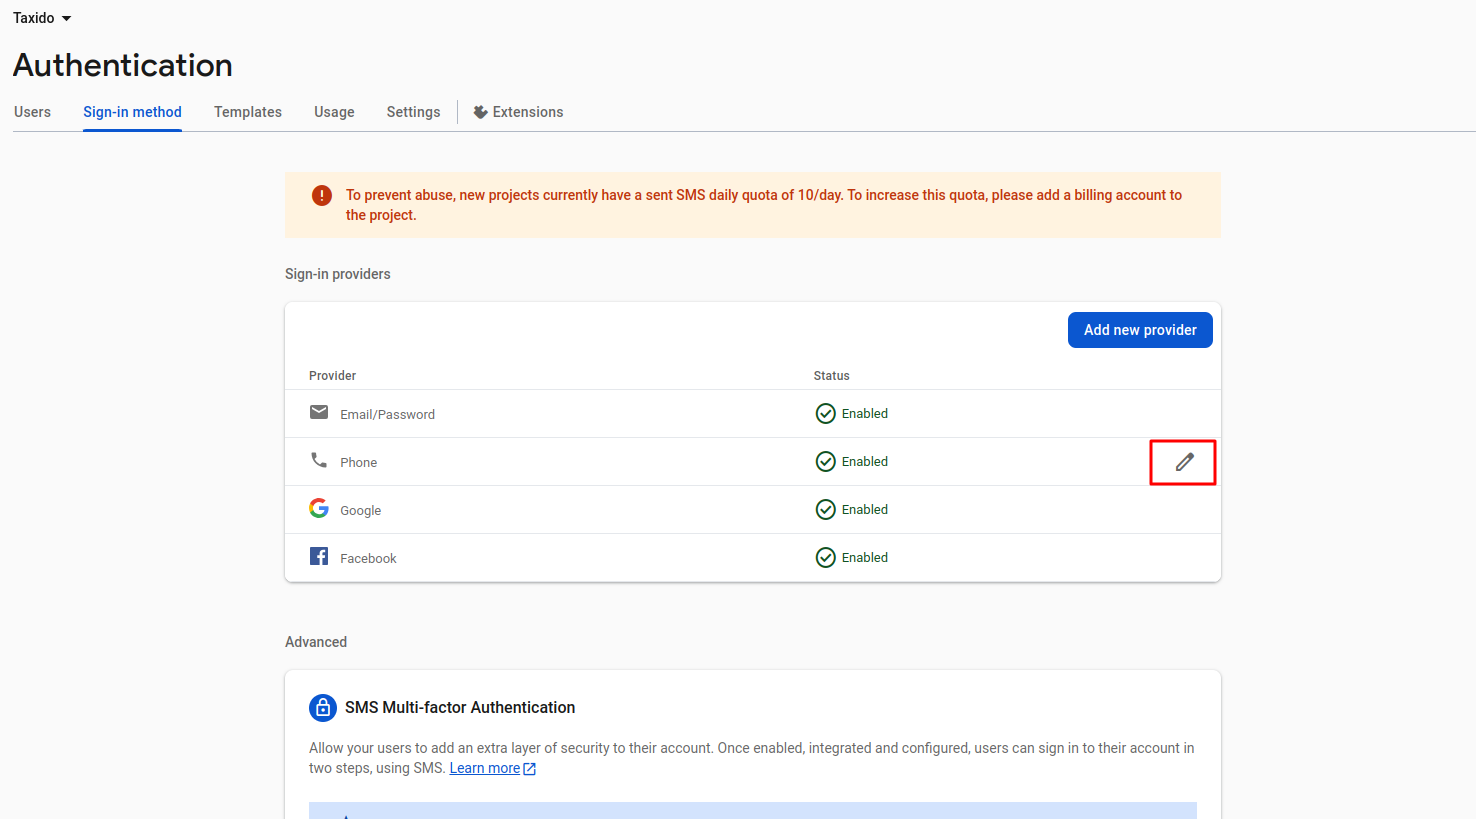
- Scroll down to the Phone provider and click the Edit icon (pencil button).
-
In the popup modal, register your test number by entering:
- Phone Number (e.g., +91XXXXXXXXXX)
- Verification Code (OTP) – any default code you'd like to use for local testing
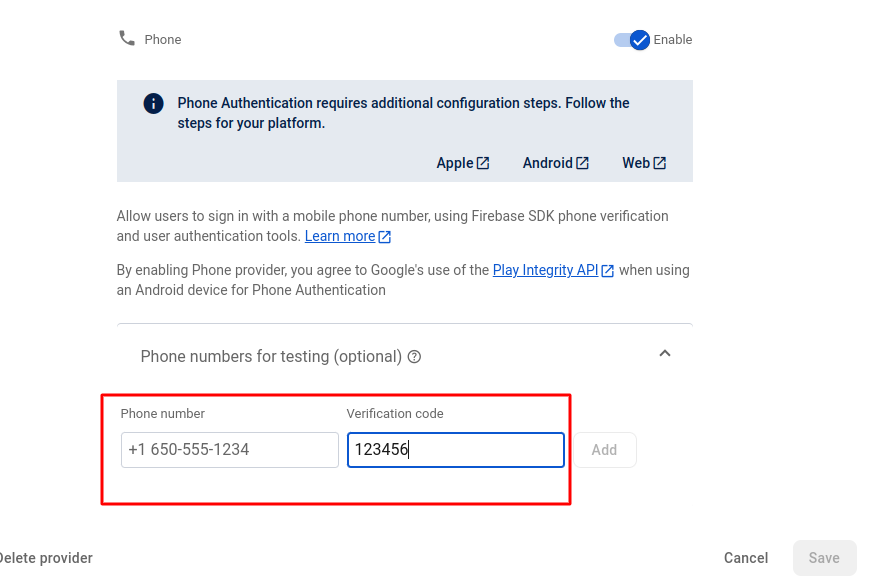
- Click Save. This number is now allowed to receive a default OTP during local development without needing real SMS delivery.
-
Go to the Authentication tab in your
Firebase project.
-
Click on the Sign-in Method section from
the left sidebar.
- Scroll down to the Phone provider and click the Edit icon (pencil button).
-
In the popup modal, register your test number by entering:
- Phone Number (e.g., +91XXXXXXXXXX)
- Verification Code (OTP) – any default code you'd like to use for local testing
- Click Save. This number is now allowed to receive a default OTP during local development without needing real SMS delivery.
- Go to the Authentication tab in your Firebase project.
-
Go to the Settings Tab
In the Authentication dashboard, click on the Settings tab at the top (next to "Users", "Sign-in method", etc.).
-
Locate the Authorized Domains Section
Scroll down to the Authorized domains section. This section lists domains that are allowed for OAuth redirects, which are required for phone authentication.
-
Add Your Domain
Click the Add domain button (as shown in the screenshot).
In the pop-up, enter your production domain (e.g., myapp.com)
Important: Do not include http:// or https://, and do not add a trailing slash. For example, use myapp.com, not https://myapp.com/.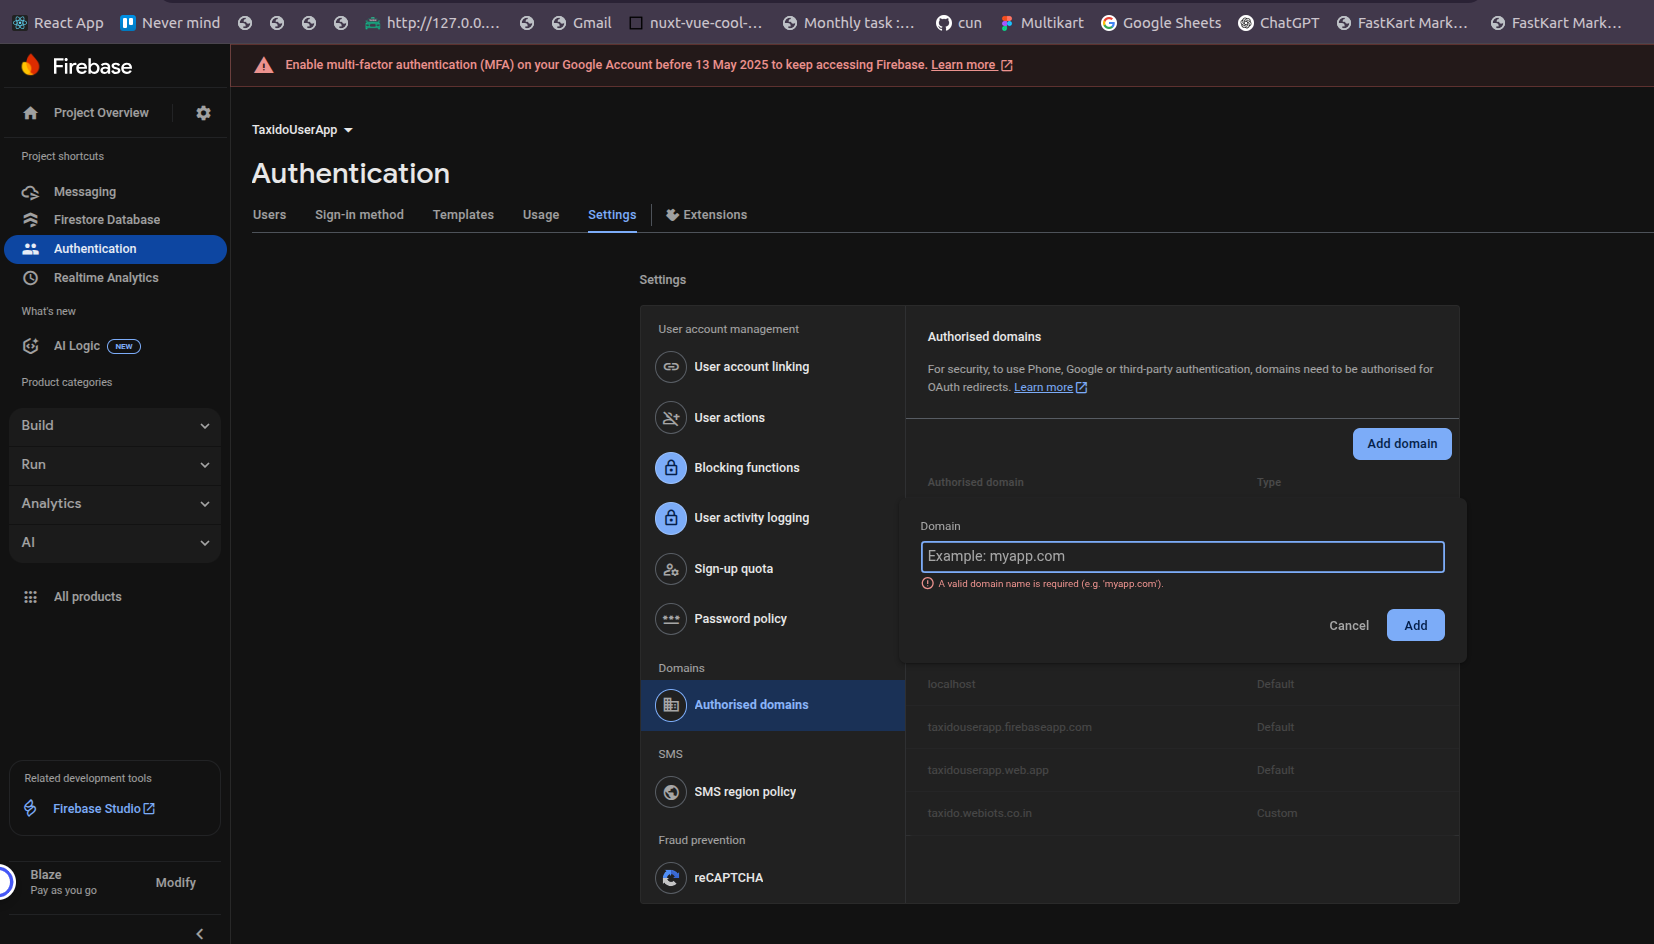
- Click Save. This number is now allowed to receive a default OTP during local development without needing real SMS delivery.
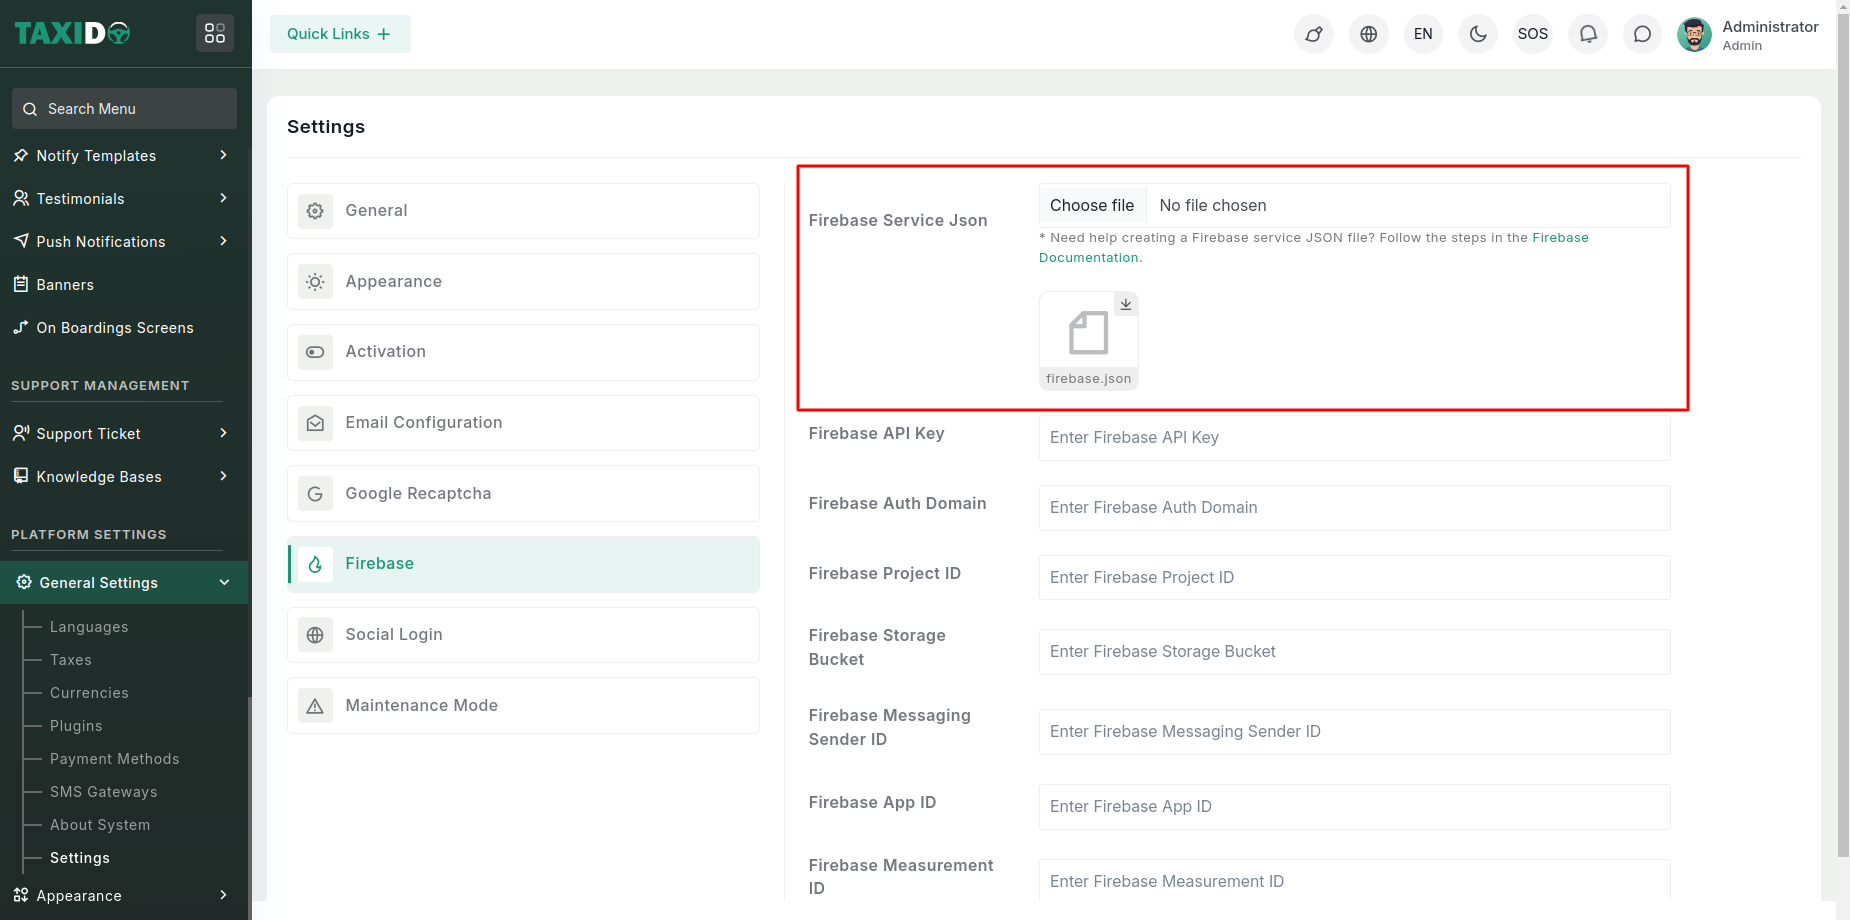
Once uploaded, the file will be saved to: public/admin/assets/firebase.json. The system will use this
file for Firebase Admin SDK integration.
Connect Admin with Firebase
Firebase Console → Project Settings → General → Web API Key
firebase.json file,
which is saved at
public/admin/assets/firebase.json.
Any additional Firebase-related keys or configuration added from the
admin panel are stored in the .env
file.
Firebase SMS Authentication
Firebase SMS Authentication: Allows users to log in using their mobile number via Firebase's OTP (One-Time Password) authentication system.
Login Flow:
Running Firebase Authentication Locally:
If you want to test Firebase SMS login locally, you must
manually register your test phone number in your
Firebase project. Follow the steps below:
For Localhost assign test number and OTP
Running Firebase Authentication Locally:
If you want to test Firebase SMS login locally, you must
manually register your test phone number in your
Firebase project. Follow the steps below:
For local testing, ensure the test phone number is manually registered in Firebase. On production, this registration happens automatically during login.
Running Firebase Authentication in Live Production
Server:
These steps are intended for setting up Firebase Authentication using
phone login on a live server in a production environment. Ensure you
have administrative access to your Firebase project and the domain you
intend to authorize. Misconfiguration may lead to authentication
failures or security issues, so proceed with caution and double-check
each step.