

 Add Custom Form Field
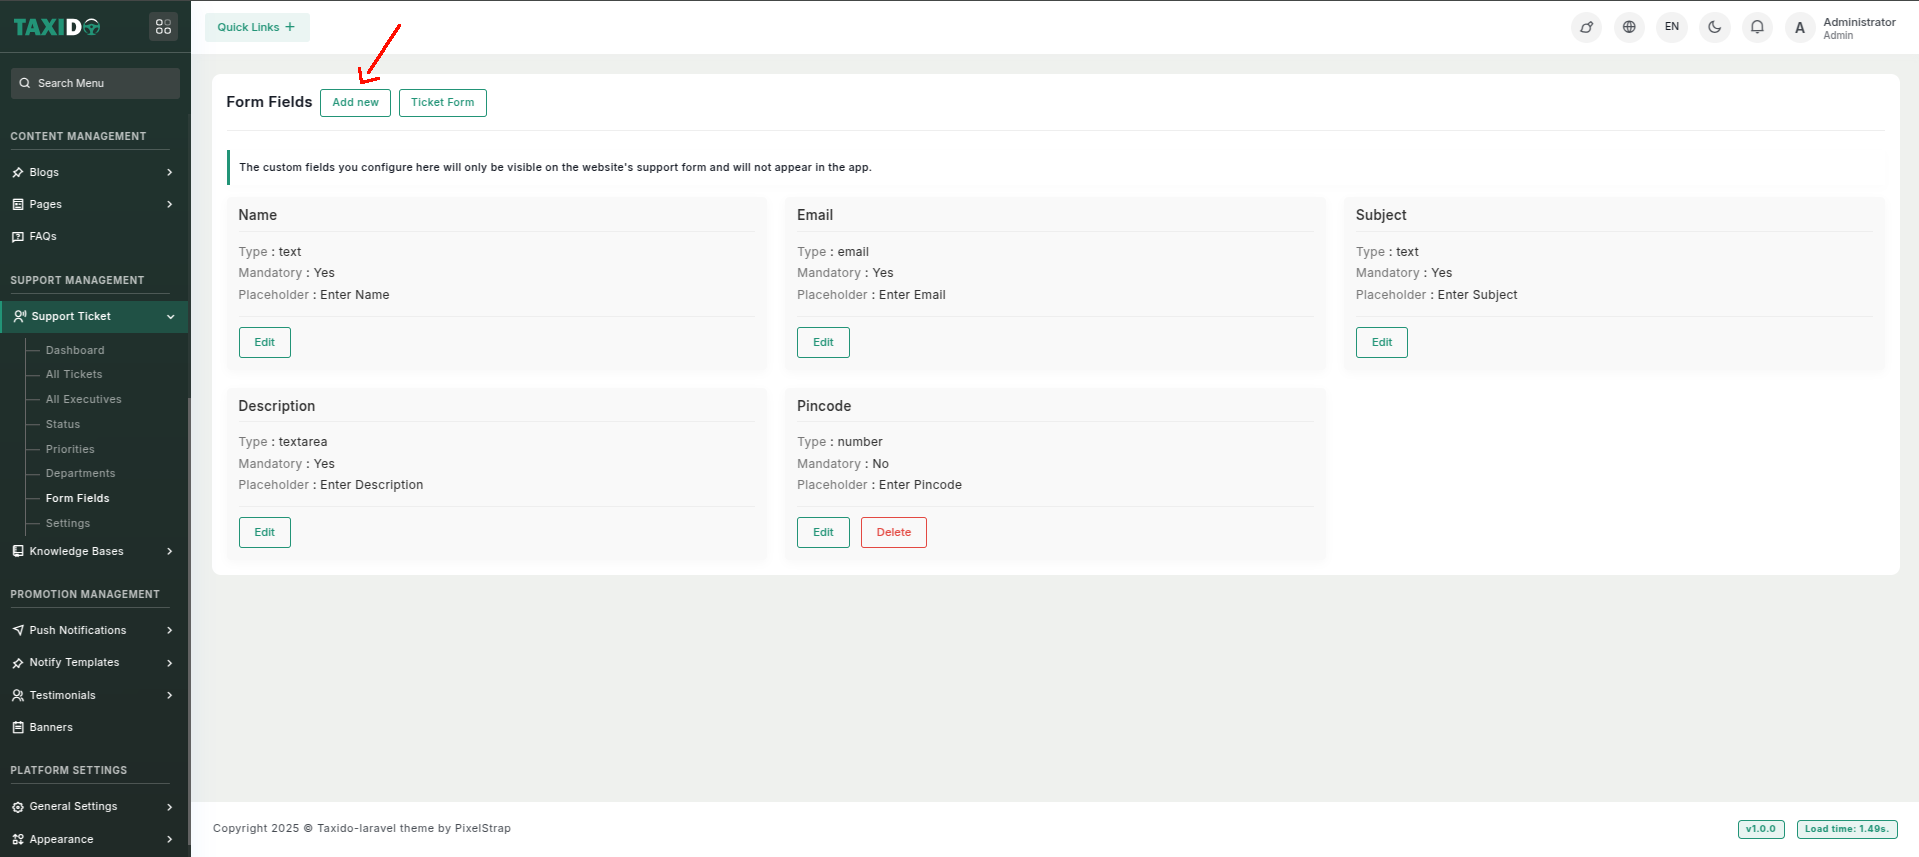
Note: The custom fields you configure here will only be visible on the
website's support form and will not appear in the app.
How to add the custom form field ?
- Navigate to the "Support Management" section.
- Click on the "Form Fields".
- Click on "Add New" for creating a custom form field
- Fill out the details, which may include:
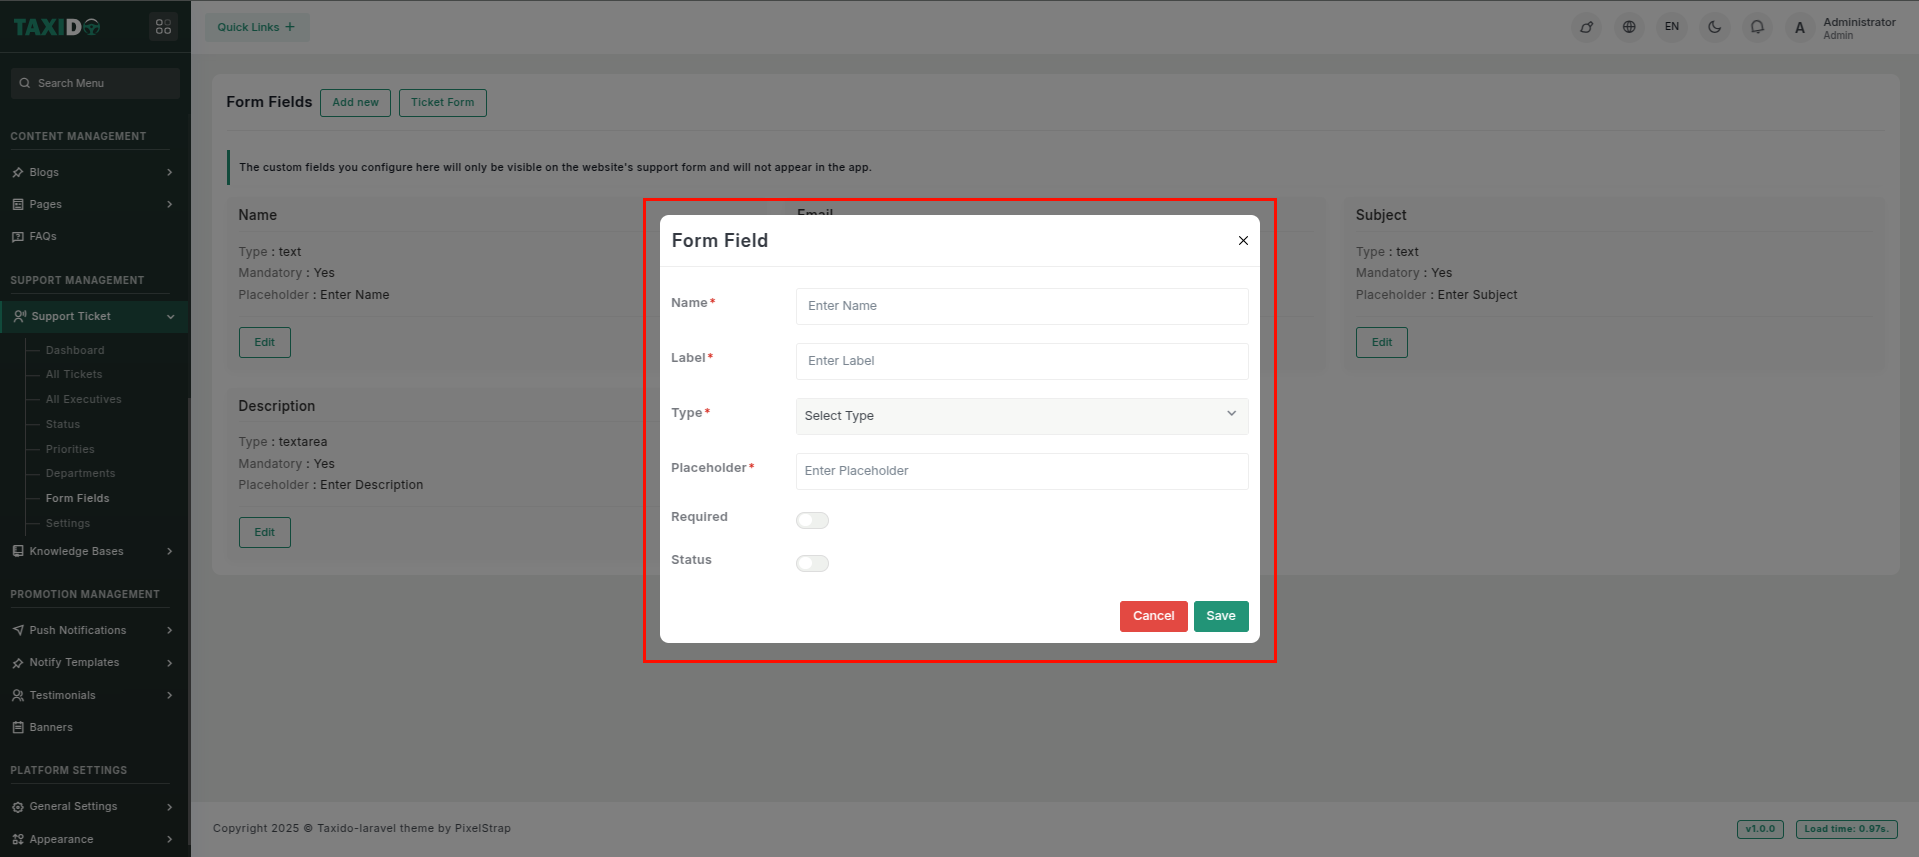
- Name: Enter the name of the custom field.
- Label: Enter the label will be used for showing the custom field.
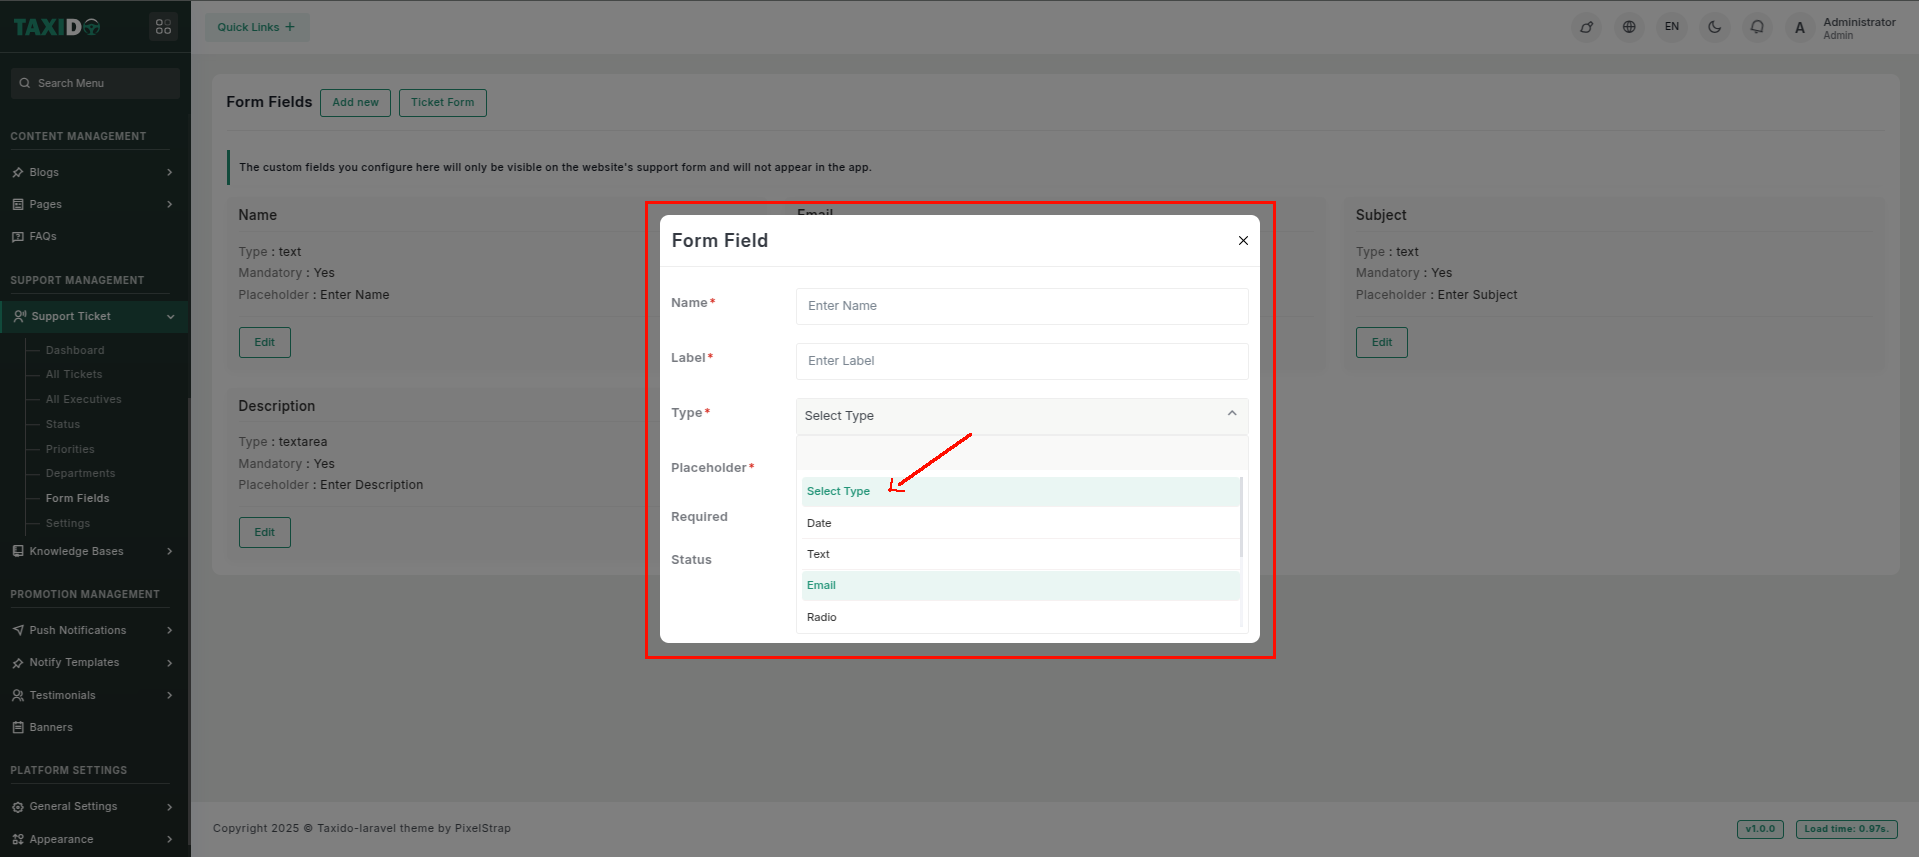
- Type: Select the type, contains date, text, email, radio, number, select, textarea, checkbox.
- Placeholder: Enter the placeholder of the custom field.
- Required: Set the status to either "Active" or "Inactive." If the status is "Active," this custom field is required while submitting the ticket form. If "Inactive," it will not be required for use.
- Status: Set the status to either "Active" or "Inactive." If the status is "Active," this department is available storing ticket department wise. If "Inactive," it will not be available for use.
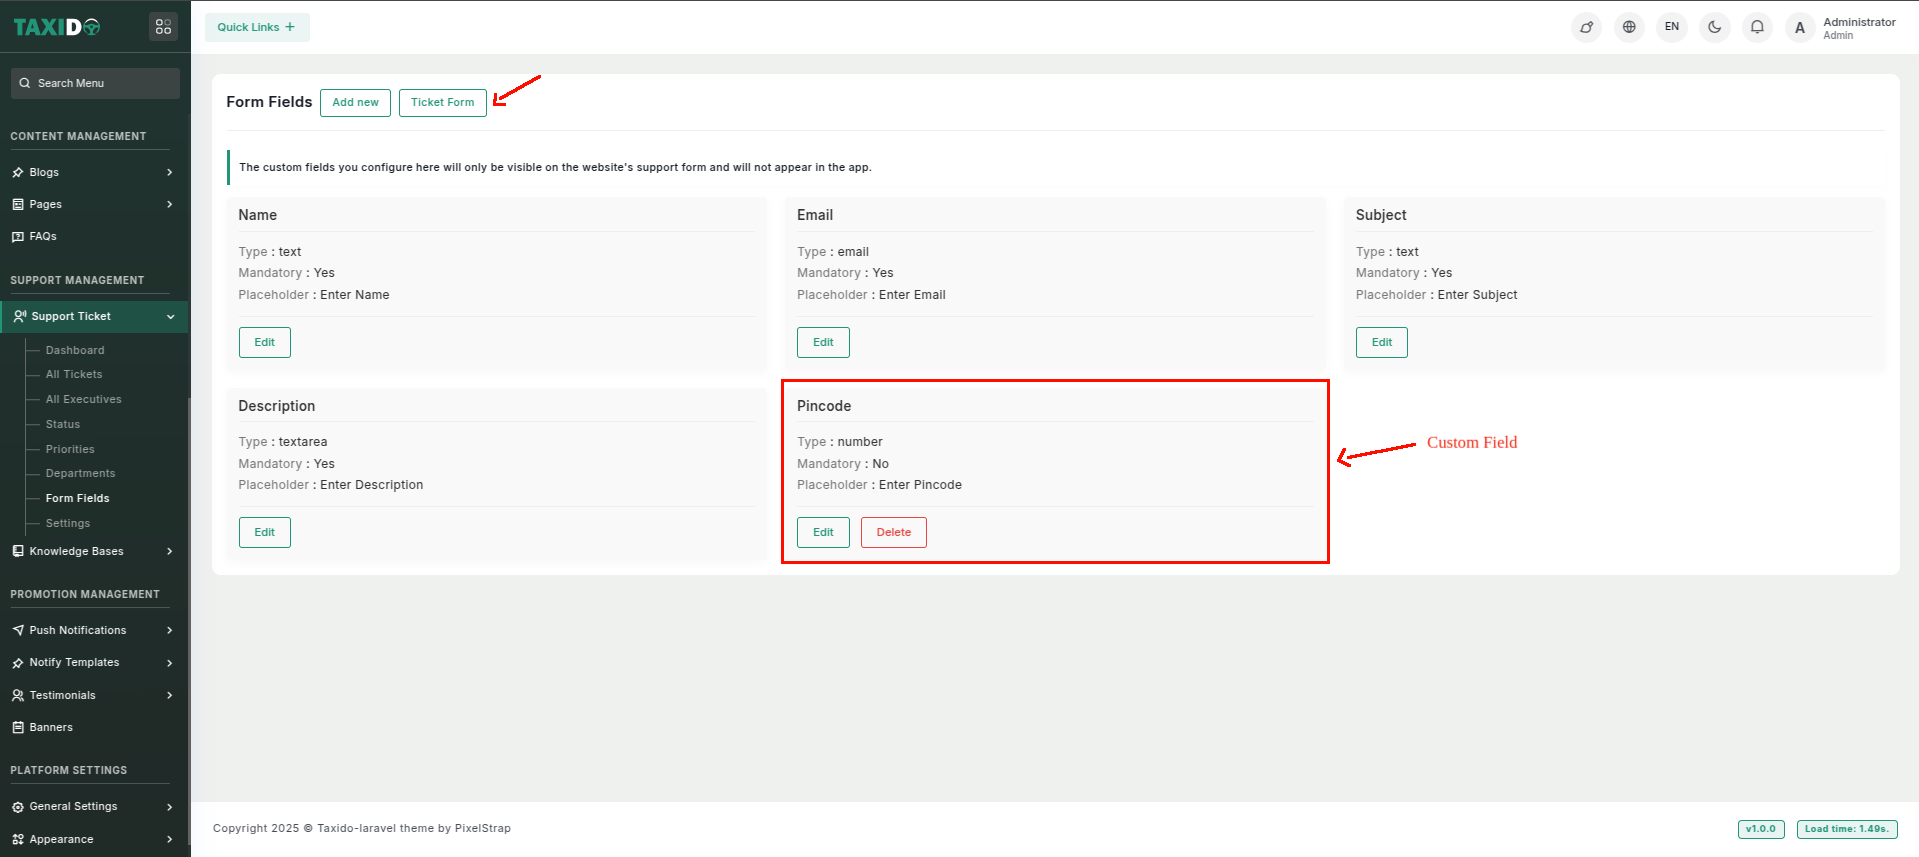
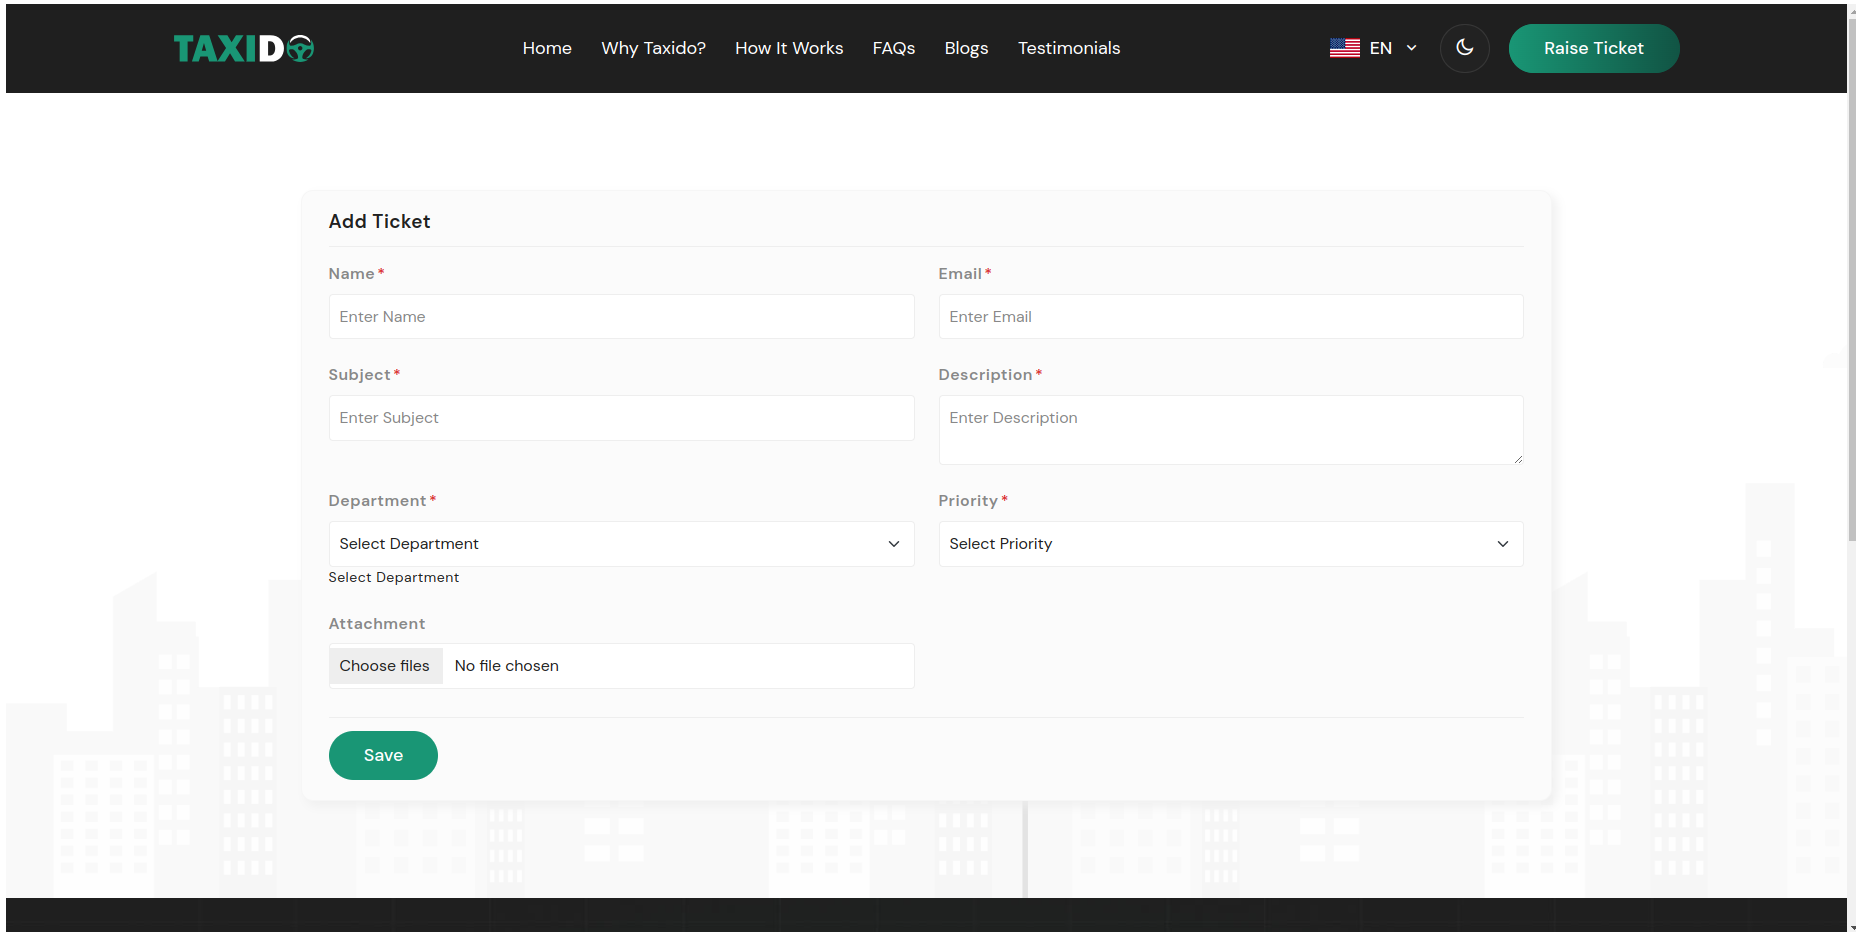
Want to see the custom field in the form ?
- Go to the Form Field.
- Click on "Ticket Form".
How to edit the Custom Form Field ?
- Go to the Form Field.
- Find the field you want to edit and click the Edit button from the Action Column.
- Make your changes and click on the "Save" button.